
With school fast approaching (yikes!) for most of us and a few already back, I am feeling the pressure to get more organized and orderly for the upcoming school year. Two years ago, I designed a bulletin board that would help us be more organized with the kids activities and homework, etc.
I did not take pictures of each individual step of the process because, I was not documenting every little thing I did back then :)! So I will explain it to you as clearly as possible.
My hubby and I bought some two large peices of sheet metal from Home Depot. We measured out how large we wanted the bulletin board to be and actually drew it out on the wall in pencil. We used a wall we had in our laundry room by the side door of our home. The inside of a garage wall would work well for this too.
We screwed the sheet metal to the wall after cutting it to the appropriate size. However, we did not want the seam to show where the two sheets of metal met. We made sure in our measurements that the seam would fall directly below the third peice of wood separating the section for the third and fourth section. Make sense?
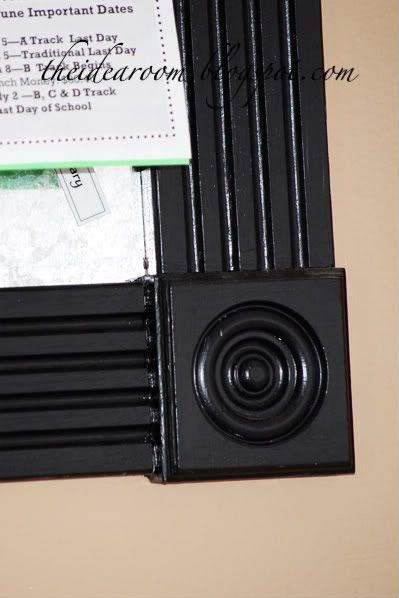
We then took some chair rail and cut four appropriate lengths each with a straight edge. Two for the top and bottom of equal lengths and 2 for the sides of equal lengths. We cut them shorter than the actual length of the bulletin board itself so that we could place some decorative corner peices on the four corners of the board. After nailing everything in place with finishing nails, we puttied the nail holes and used painters caulk to fill all the cracks and crevices where the wood met with the corner peices.
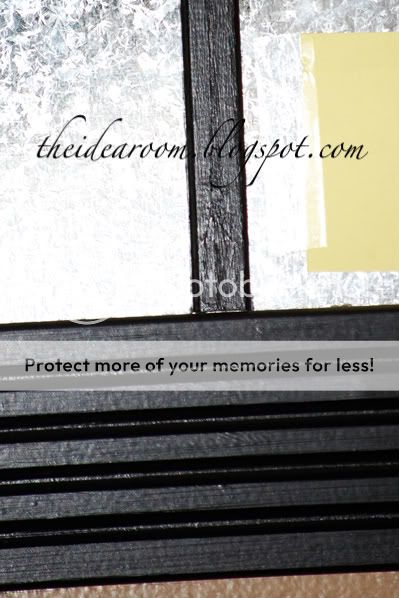
Now that the edges of the bulletin board were finished, we added some 1/2 inch wood strips (Home Depot) to separate the board into sections. We attached them using finishing nails after they were laid out so that each section was equal in size. (Remembering to place one of the strips directly over the seam of the sheet metal). We puttied the nail holes and used caulk to fill the cracks here also.
When it was all dried and the puttied holes sanded, we primed and painted the wood. Use painter’s tape to cover any areas that you don’t want painted.
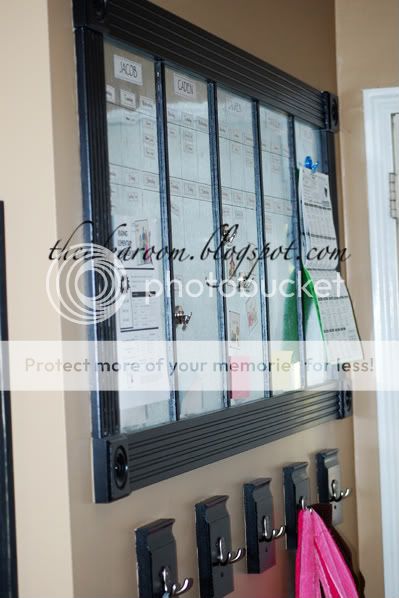
Then we added some coat hooks for the kids coats and backpacks to hang from. Each child’s is directly below their own section. We simply cut out equal sections of a pre-cut baseboard we found at Home Depot. Each square was sanded and painted, and then we screwed the hooks on. That’s all there is too it.
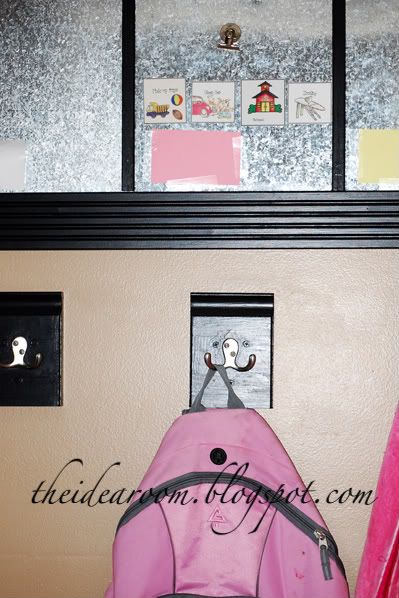
I have loved having this board. I put all the kids individual spelling lists, birthday invitations, flyers, class notes, homework, permission slips, etc. in the proper section. No more confusing who has what when.
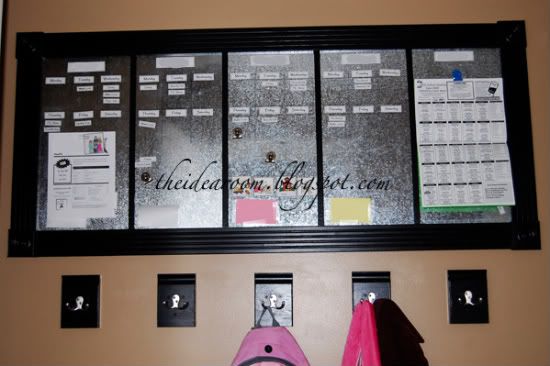
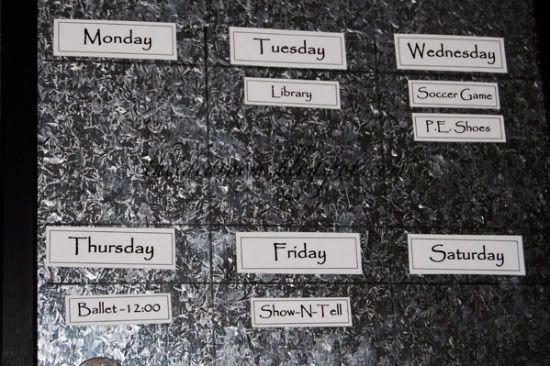
I have labeled each section with their names at the top and each have a section where I drew with marker, that comes off with Soft Scrub, for when they have things during the week. I could never remember who had library books due or keyboarding homework or had to have proper PE shoes on any given day. Now with one glance as we are heading out the door (or the night before when they get their back packs ready for the next day) exactly what they will be needing. I typed up the word strips and then laminated them with a magnetic backing so that they stick right to the board.
This has made our mornings and the process of getting out the door to school a much smoother process. The kids also know exactly where there stuff is and where to find it. Now that is a miracle in and of itself!
**The bulletin board looks really shiny and weird in these photos. I had to use a flash so my pictures where not blurry since there in not the greatest light in that room. The baby really has no pressing schedules yet, therefore that is where we hang the school lunch menu. Gonna have to figure out where to put that in a few years! 
JOIN OUR NEWSLETTER
Would you like more Recipes, DIY, Printables and Organization Ideas?
Subscribing to the newsletter will enable us to periodically send you creative content exclusively for Idea Room subscribers.
*View our Privacy Policy here.


Love this! Can't wait to try it or share with my sister!
What a lovely idea and I really like how you used the beading around the outside of the metal, really professional. I really love coming and visiting your blog and seeing all your creative ideas. Smiles Catherine
I love this idea…. I am always looking for new ways to organize the kids stuff and with my oldest starting school in about a year, this would be perfect!
LOVE this!
Love this! As a teacher preparing for "back to school", I hope to have at least 1 student with a mom this organized…. Although she may regret having her baby in Ms. Scatterbrain's class!!!
HOW COOL! I love it!
That's great … I wish I had a good place to hang something like that.
I am new to your blog and I have to tell you that I LOVE IT!!!. This is so much fun and such a great idea. I do have one question what did you put the coat hooks on exactly??
Ginger…That is a good question. I think it was just a peice of baseboard that was already precut in the baseboard and chair rail section at Home Depot. They have a lot of various sizes and designs.
I just made the hooks on the same type of baseboard pieces. How did you hang yours? I am still trying to figure out the best way to hang them.
Thanks
This is brilliant!!
That is a pretty cool project!
Hmmm…I'm thinking of a smaller version for the kitchen with a permanent rotating chore chart…
Oh my gosh that is the coolest ideal I have ever seen.
That is such an amazing idea! Thanks for sharing!! :)
This is a really great idea. I love customizing things to make them work for you. Thanks for sharing this!
I love, love, love this. I love it so much, that I had to make one for myself. I did and I linked to you at http://controllingmychaos.blogspot.com/2009/08/another-problem-solved.html . You solved a problem for me and I've been waiting for something like this. Thank you!
Thank you for the great idea … I adapted it a bit, but you sent me on the right path!!! LOVE IT!!!
I commend you for being so organized and for sharing all of this with us. My children are all grown now and our daughter has 3 children and boy, she should have implemented something like this long time ago.
Also fairly new to your blog- I am in the middle of building lockers for my laundry room and this will be perfect to put on the opposite wall– thanks so much for sharing your organizational ideas!!!!!
Wow – that is the king of organizational boards.
We have a few magnet boards around our house, they are great for organizing. Did you know that you can write on them with dry erase marker? I have some examples on my blog if you are interested http://outofchaos-wellsfamily.blogspot.com/2009/02/i-heart-magnet-boards.html
What a fantastic idea – thanks for sharing! I just found your site today (May 22, 2010) and LOVE it. Thanks for all your great posts.
lovely idea! btw it's spelled wainscoting :-)
this is wonderful!! we will SO be doing this. we have 5 kids and a very busy house.
I just found your blog also. I love this Idea. My kids would be a lot better organized if I am. What are the little pockets for and do you have any clip art or files you would be willing to share?
Thanks for all the hard work.
Love this idea so much that we made our own version. :) I blogged about it over on my blog last week. Thanks so much for sharing.
[email protected]
Yours looks great! And 5 kids too! Thanks for sharing with me!
This is the best command center for kids I’ve seen yet- and I have searched and seen many on blogs!
How do you paint your trim/wood. There aren’t any lines. Mine always show lines from the brush which I think take away from the finished product. Do you use a sprayer, particular types of brushes or is it all in the type of paint?
Thanks again for sharing!
Approvo del tutto verso le idee espresse ancora. Andate avanti in questo modo.
Do you have a spam problem on this site; I also am a blogger,
and I was curious about your situation; we have created some nice practices and we are looking to exchange strategies with others, please shoot me an email if interested.
The info you would find at the web sites should sure help you
in determining which wedding photographer to pick.
Hi there Dear, are you really visiting this website regularly, if so after that you will
absolutely get good know-how.
It’s awesome to pay a visit this site and reading the views of all friends on the topic of this article, while I am also eager of getting knowledge.
Hello it’s me, I am also visiting this site regularly,
this website is truly pleasant and the visitors are truly sharing good thoughts.
Hi it’s me, I am also visiting this site daily, this site is genuinely good and
the visitors are really sharing nice thoughts.