
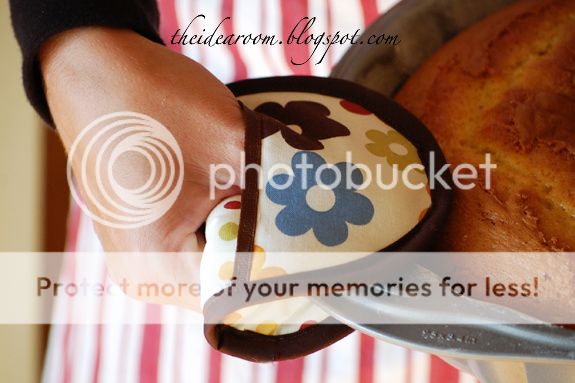
Doesn’t the onset of cooler fall weather make you want to bake something yummy? I have been doing a little baking which inspired me to finally make a cute oven hand mitt I had seen recently in a store. I came up with a tutorial so that you can make one too! I love how easy they are to use. Plus, they are a lot more functional than those big, thick akward oven mitts.
I have provided you with a free downloadable pattern, click here to print it (select the large size; it should fill a 8.5 x 11 in. paper). After you have it printed you will be able to use the patterns to cut out your material and get started.
You will cut 2 large ovals in your fabric choice A (use 100% cotton fabric). Then using the same pattern you will cut out 2 patterns of your Insul-Bright (found at most fabric stores), and 1 pattern of quilt batting (also use 100% cotton batting).
**Edit–After using my hot pads several times now, I have noticed that I am beginning to feel some heat through the hot pad. I think it would be better to add two layers of Insul-Bright instead of the one layer I had first suggested. The pattern you download will say cut 1 of the Insul-bright, but you should cut 2 to provide extra heat protection!
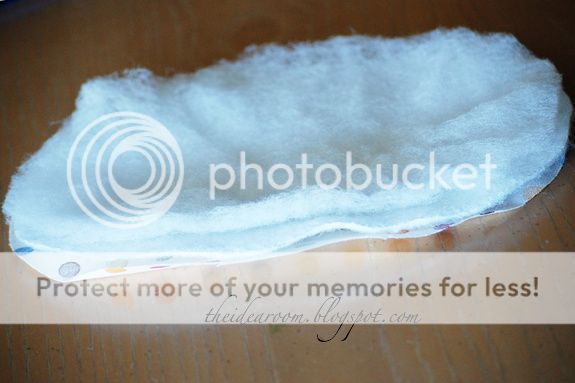
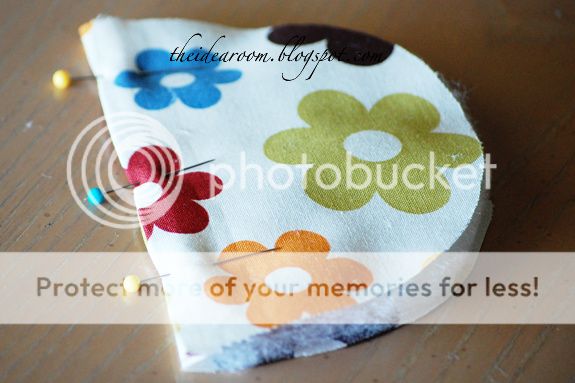
Place one of the fabric pieces right side down on the table. Then place 2 layers of the Insul-Bright on the fabric. Next lay down the batting layer and finally top with the other piece of fabric.
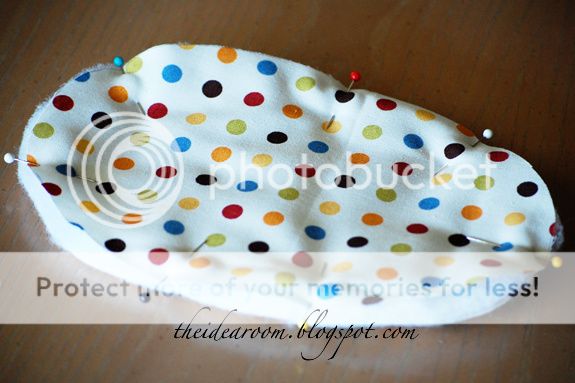
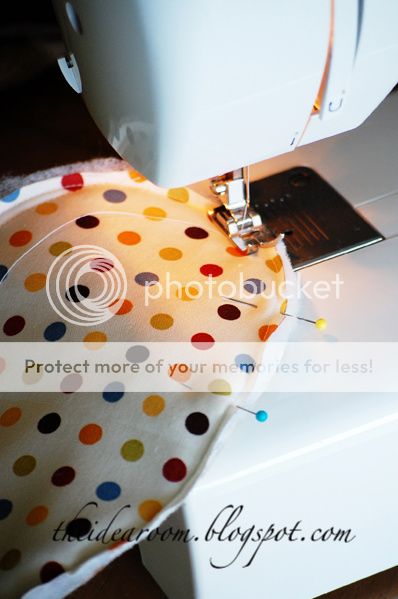
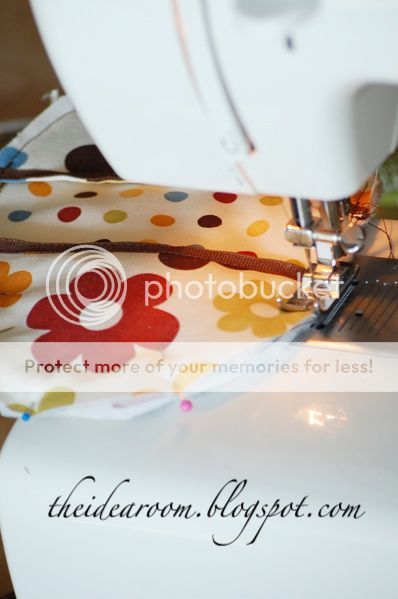
Pin together all the different layers. Sew around the entire thing using a 1/8 inch seam. Be sure to backstitch at the beginning and end of your sewing.
Next, you will need to cut out 4 half-circle pieces of your fabric B. Iron the flat edge down 1/4 inch. Cut out 2 half-circles of the quilt batting and place them on the fabric. The fabric should be facing right side down like the picture. Be sure to place the batting up under the folded edge so that it does not show through the material.

Now add the other piece of fabric with the right side facing up and pin together. You will repeat this process with the other 2 pieces of fabric and the other piece of batting. These will be the finger and thumb pockets for your oven mitt.
Now sew along the top flat edge of each pocket.
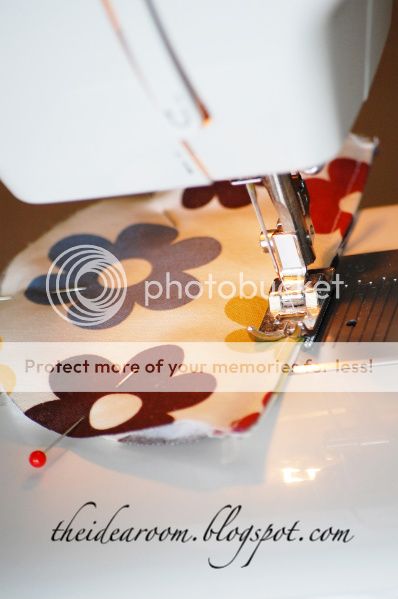
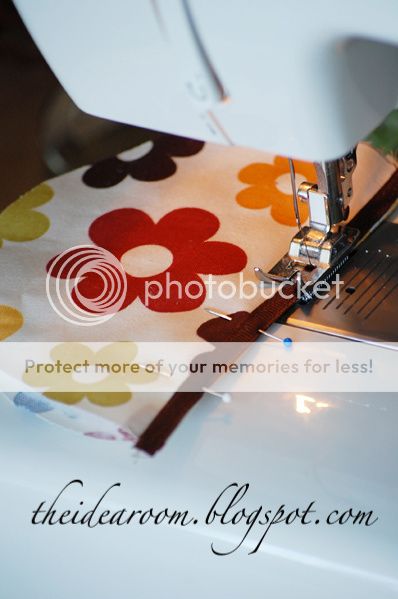
Take your coordinating ribbon (or ric-rac) and sew it onto the top flat edge of the pocket. I used a thread that matched my ribbon and sewed it right onto the edge on both sides of the ribbon. Do this for both pockets.
Now pin your pockets onto the top of the larger oval shape you have already sewn. **Make sure that the layer of Insul-Bright is under the batting so that it will be the first to contact the hot items. This will ensure proper insulation from burns. You can tell by looking for the silvery material as opposed to the batting.
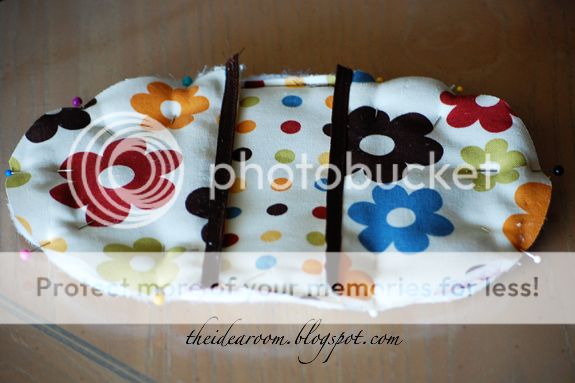
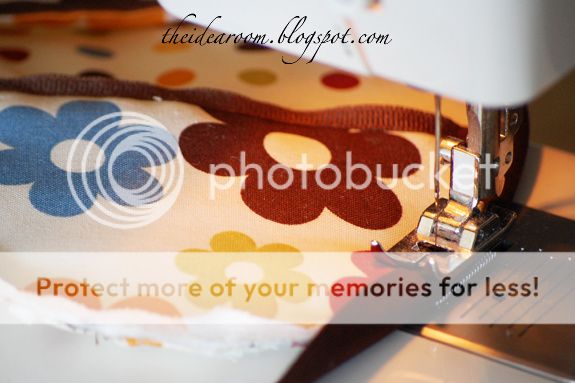
Now sew around the entire oven mitt.
Take your bias tape and also sew it around the entire mitt. I sewed close to the edge but was extra careful to not miss the tape on the other side.
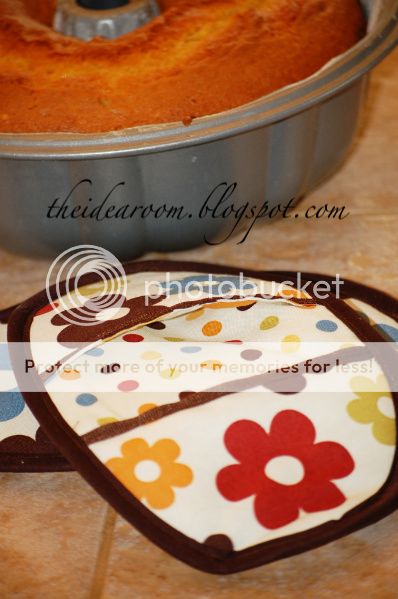
And there you have it! Easy huh? I have found these are much easier to work with when pulling things out of a hot oven. They would make a perfect gift for the baker in your life this holiday season.
**The fabric was purchased at Hobby Lobby. It is labeled as 2008 Brother Sister Design Studio B24-R-P07.


What a great idea! I've been looking for some ideas for Christmas presents and this is it! Who doesn't need oven mitts?!
So clever, Amy! I am filing you away (again!!) at thecraftersfilebox.blogspot.com.
Thanks for sharing!
What a fabulous idea! I've always wanted to make my own, so now I have some inspiration about how to do it! Thanks!
I love this! and the fabric is great!!!
I love this! I am new to sewing so I hope I can do this one.
Such a great idea! Thanks, I am going to try these this week!
Fantastic xmas gift!!! Love your blog, so inspiring.
This is adorable, and also looks perfect for dealing with hot pot handles on the stove!
Such an simple idea!!! Now why didn't I think of that!
I am so excited about this!! Thanks for sharing. Such a fun and cute idea :)
amy, you need to stop with all of the fun ideas. my list of homemade christmas gifts is growing each time you post something new. i can only get so much done on my retreat weekend. maybe this will have to wait until i get back. we are making your pumpkin bowls tonight for FHE. my kids love any reason to have me make clam chowder. what a great excuse.
Thank you for sharing this. I want to make these for my friend for her birthday!!!!
Wow! What a fabulous idea! I am planning on stealing this and making some stocking stuffers!
Thanks for sharing!
Hooray! I was just thinking how I needed to make an oven mitt and didn't have a pattern. You're pulling through for me… again!
THese are sooo cute! Thank you for sharing yet another wonderful idea!
Amy your tutorials are wonderful. I swear I want to make every single one of your projects. I made the key fobs and now I must make this!
Where did you get your fabric and do you know the designer?
Today was my first time on your blog and I LOVE it. I have not creativity in me, but I can follow directions and I love tutorials. Thanks for blogging. I can't wait to make these oven mitts.
What a great tutorial! Thank you so much for sharing, I can't wait to make a pair of these for Christmas gifts!
Cheers,
Julie
This is wonderful! A quick and easy Christmas gift! I just can't wait to pick out the fabrics – that's half the fun!
this is genius!!!!!Love the item and how you took all those clear pics is great!!
xoxo
Priscila
littlemissheirlooms.blogspot.com
I love the fabrics you used on these! A few years back, I bought my mom a set of some similar hand mitts, and I thought I'd let you know that they had magnets sewn into them – so you can stick them on the side of the stove or microwave!
How cool is that!! I'm definitely going to have to try that…we have a few of those huge mits, and I avoid using them because it's impossible to pick anything up. Thanks for this! =)
Have I told you lately that I love you…lol! And of course that YOU ROCK!
This is wonderful and so, so giftable! Thanks tons, I'll be linking.
I love this. Thanks for sharing this pattern.
So cute! These will be perfect to go with aprons I'm making for christmas gifts– thanks for the great tutorial!!!!
This is adorable!! Cant wait to go through all of my fabric and make some for Christmas!! Thanks for the easy tutorial and pattern!!!
Thank you so much for sharing! I can't wait to try it!
It's on my list! I even have the insulbrite stuff already!
Thank You! Thank You! thank You! I am in desperate need of new oven protection and was loathe to buy those ugly things in the stores and too lazy to design my own. insul-bright here I come!
This is super cool! I love it very much!
I love this style of oven mits… But mine are just plain black!
What a great tutorial!
Off to find some yummy red fabric and insul-bright!
[Linking you in my Friday Favorites]
LOVE Ur Site and it's beautiful Photo's…going to try my hand at the oven mitts for the holidays! GREAT tutorial! Plumcrafty.blogspot.com
Hello, I made myself some mittens a few years ago, and ideed I used two layers of insul-bright and the silver fabric used to cover ironplanks, works perfectly and after a few years of use, still no heat comming through.
Congratulation on a great tutorial!
I first saw these small mitts at a church sale. They were called ‘micro mitts’ and said they were for for taking hot dishes out of a microwave oven.
I purchased a couple of pairs – then made several pairs myself – using an old ironing board cover for the ‘insulation’ batting. I used colourful scrap material, and gave a few sets away as gifts. Everyone found them very useful. They were put to good use for years before becoming threadbare from continued washings. Guess it’s time to make some more with your instructions.
I featured you on my blog! http://honeybeebzz.blogspot.com/2009/11/thanks-idea-room-for-great-oven-mitt.html
I even made some and posted a picture! If you would like, you can grab the feature button and add it to your sidebar.
Also, Instead of cutting 4 of the smaller pockets out of coordinating fabric, I cut two on the fold. It was easier for me to sew since I am still learning! :)
Great idea! Thank you. One thought: I have made pot holders with pieces of old towel inside, that is something your readers might want to consider instead of the bought stuff. The heat doesn't come thru over time. Melissa good idea to cut on the fold too!
Kathy
I totally love these!! I am going to have to make these for sure!!!
Thank you so much for the tutorial!
Angie
Great tutorial! I linked you up for my Facebook Fans!
thanks. this is a great gift idea for a baker friend or sister. can't wait
The tools in ur kitchen are really fantastic. They are perfectly matching with ur kitchen. I m surely following ur blog
I was given a set of these years ago as a gift and have had them on my "to do" crafts list to make more ever since, but never seem to find the time. Wanted to share a hint about mine though – they have a small, flat magnet stitched into a little pocket of the "open" area between the finger flaps. This allows them to stick right to the side of the refrigerator next to our stove – easy access and we always know where they are! Thanks for the tutorial – I think I need to move these to the top of my to do list.
-Jamie
We’ve always kept our micro-mitts on top of our microwave oven where they are easily found.
After washing, they dry out well on top of the microwave also.
I am going to have to make some of these for myself. I am in the kitchen all day every day so I could use all that pretty fabric I only have a tiny bit of and still be able to look at it all the time.
So CUTE! I am going to try using some of my old potholders for the batting….just cut them up to fit the pattern………or maybe even buy some ugly ones at the dollar store for the batting. Thanks for the tut!
I just has a go at making something very similar for my Mum! http://kittygardensmakes.blogspot.com/2010/01/owl-and-pan-holder.html
Not quite as pretty fabric as your though!
Kx
Thank you for the tutorial! I made some of these and they turned out super cute! Two layers of Insulbrite made sewing these a demon though! I had to use the seam ripper way more than I would like. I kept thinking I was sewing through the bias tape and completely missing it on the back side. I think the trouble was worth it though! ;)
Hi! I'm Laura from Italy! thnkas for sharing your project on web!
SO cute!!can't wait to try to make my own!! I always need more oven mitts!!!!
for the ribbon do you fold it over and sew it or do you sew two seperate peices one on each side?
ok just kidding, I get, it you just sew it on the top… sorry :P
I just tried making these. Took your recommendation on using two layers of insul-bright and one of batting. Makes them super thick! I ripped the stitch and removed the layer of batting to make them a little more manageable. I'm struggling with the bias tape(I've never sewn one on before).Was hoping for a quick and easy project on this rainy afternoon unfortunately it has not turned out that way. They are super cute, and I know my sisters would love them.
just made this!! i have had the tutorial for months (got it off dixie mango) but this was my rainy day project for today. (i live in england…we got LOTS of rainy days….hehe) anyways, it was easy and fun! thanks!
I can't count the number of Amys I've now come across just in blogging. It's like the blogging name! Anyways, to the point, I'm going to be making a pair of these for an apron swap I'm doing. I dont like the big bulkyness of hand oven mitts. these are more practical and look nicer, I think. So thanks for sharing the tutorial!
Amy,
I love this IDEA. They are really adorable. I would love to show these off on my blog–let me know what you think.
It was great getting to KNOW you and I look forward to getting to know you better.
Cheri
http://www.itssoverycheri.com
http://www.thediyclub.com
Love these! I'm all set to make them with some fabric I picked up during my Thanksgiving honeymoon to Hawaii :)
About how much binding/ribbon do you think you used per mitt?
I just made one useing primarily your tutorial.
http://www.flickr.com/photos/58702936@N03/5428808289/
My mom makes hot pads and she uses old cotton mattress pads for the insulation. They have to be the 100% cotton ones…the polyester ones won’t work.
These are awesome Amy! I love that they have a pocket on either end. Those kind with just one big pocket are too cumbersome for me. Thanks! They’re just what I need…and I’ll be making some for mom too!
That is so, so cute! and I love the polka-dotty fabric!
Amy, I’m not sure if I printed the pattern off correctly. Would you please send me the dimensions for the pattern?
Thankis for all of your cute, cute ideas,
i made these tonight! omg they are really easy to make. going to make more of them for christmas gifts. thanks for the pattern!
This bias tape is the Devil!!!! How to go around corners :( ??
Pot holder idea
I made these tonight. So cute! I made one the same size as the tutorial and one 3/4 of an inch bigger. Awesome tutorial. Bias tape takes some practice. Make sure you buy the double fold!
Great tutorial! You’ve been featured on the Quality Sewing Tutorials blog.
We hand select only the best free tutorials and patterns for home sewers.
Grab a brag button!
Hi, I love this idea and am hoping to make one soon. However, when I went to print the pattern off it looked a bit small even after I clicked on the ‘large’. Do both the oval and hand mitt fit on the same page? Otherwise could you email me the pattern? I would really appreciate it! Thank you :)
Hi
Love to try to make these mitts but I can’t get the pattern to print out the size I could use no matter how I changed my printer setting. Please email me the measurements
Thanks for all your great ideas
Lois
Thanks so much for such a great tutorial. I just finished mine (and blogged about it here – http://beinginspired-blog.blogspot.ie/2012/10/oven-hand-mitt.html). Love it! :)
I can not get your pot holder pattern to down load
I have been looking for this very thing for over 1 year. I had given up was just about to start the trial and error of making my own pattern. You have saved me a ton of time. Thank you every much. These will be great hostess gifts during the holiday season and great teacher gifts.
I just made an apron for my BFF and had a little fabric leftover but didn’t know what to do with it. Now I know! I cannot wait to make matching oven mitts, she’s going to die! They will be too cute with the apron!
Very nice! It looks so easy, thank you for sharing! :)
Oh my gosh I looooove theses !!! Thanks for the pattern it’s awesome !!
Yay! Hope you are able to make some. I need to make another set. My son burned this set just a couple of weeks ago making “flaming nachos” only they were not supposed to be flaming…oopsie!
Couldn’t you use quilted fabric?
Since you suggest using a double layer of insulbrite would you skip the batting on the large piece so the mitt isn’t so thick?
I’can’t seem to print the pattern for the Oven Mitt Tutorial. Help Please!
These oven hand mitts look so much more comfortable to use than those large oven mitts that we always use! Thank you for sharing this tutorial with us!
I featured your post on my blog, you can see it here: http://www.sewingshop.net/blog/cute-oven-hand-mitts/.
I tried making these last year, but my machine could not handle the thickness of all those layers any suggestions on that?
Not sure if your machine can adjust to different thickness. You may have to check your manual.
Neat! Thank you for taking the time to write, update and share this pattern!
Audrey, Thank you!
I have been surfing these kind of for a while but no one really puts a template out with it. I really want to make some pot holders and gloves, plus make some as gifts. I love making things for others. Feels nicer to give something personal that I have worked on. I know that no one else will give the same thing as most of my friends are not crafty.
What size bias??
Irma, I used 1/2 inch bias tape.