
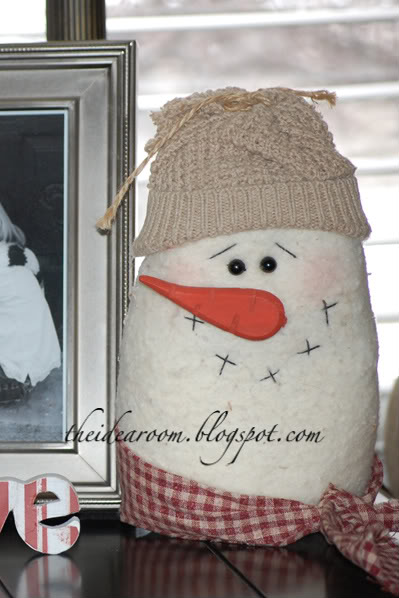
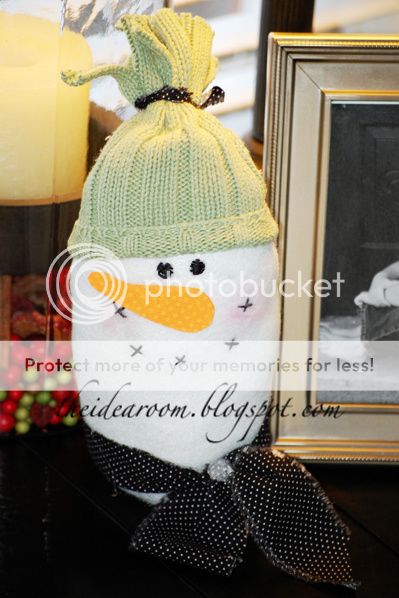
I made these cheery snowmen for Christmas gifts a few years ago and thought it would be fun to show you how to make some for yourself. These are a fun snow man craft and can be made in just a few minutes. I have also provided a free downloadable pattern here. You should be able to print it onto an 8.5 x 11 inch paper.
Simply take some white fleece or felt and cut out 2 of pieces using the pattern provided.

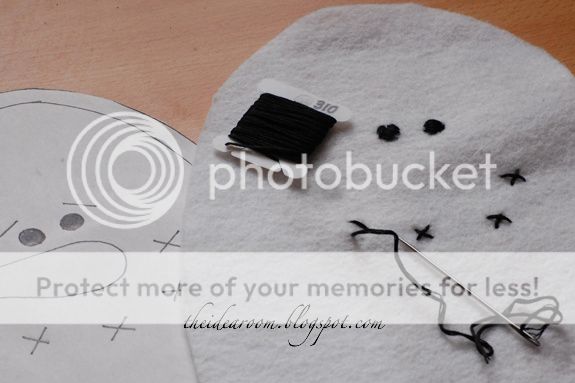
Trace the face (eyes and X’s for the mouth) onto the front of your felt very lightly with a pencil. Then using all 6 strands of black embroidery floss, hand-stitch the eyes and X’s.
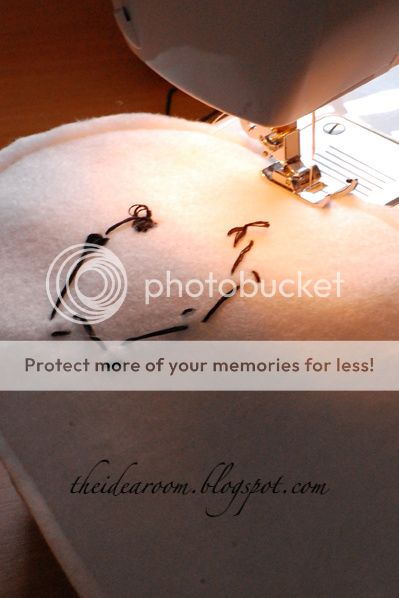
When you are finished, take your two pieces of fabric and pin them so that the right sides are together. Start at the bottom and sew around the entire snowman except for a small opening along the bottom.
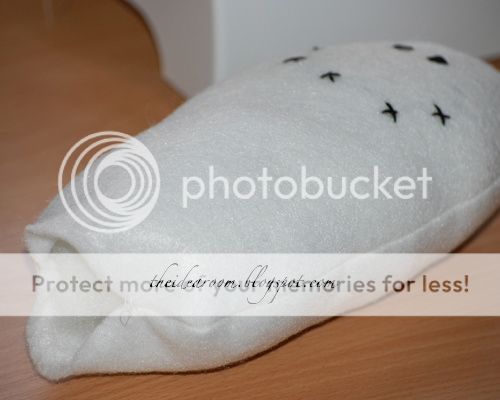
Turn the snowman inside out and fill him with stuffing. Do not fill him all the way full. Leave about 1.5 – 2 inches of room in the bottom.
Now take some beans, rice or split peas (not popular for eating at our house), and fill the bottom of your snowman. This will keep the snowman weighted down so he will stand upright.
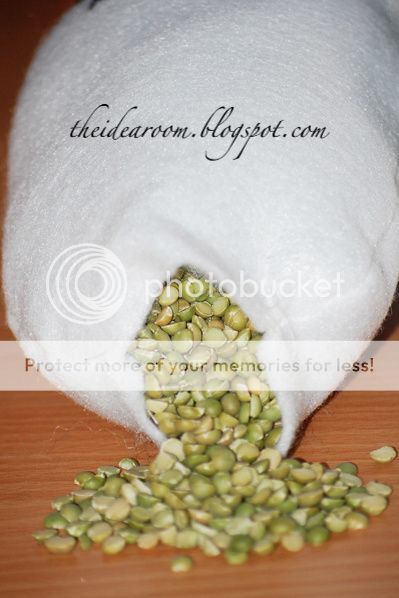
Take a needle and thread and sew the bottom of the snowman together. I pulled all the ends into the center and sewed them together to seal up the hole. Tie off the ends of your thread. Your snowman should stand up on his own.

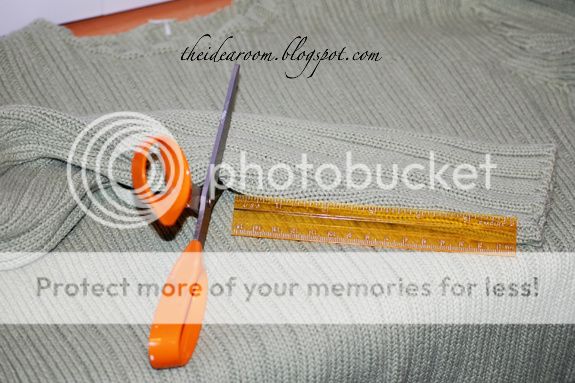
To make the hat, I took an old sweater that was in my pile for Goodwill and cut about 8 inches of the sleeve off.
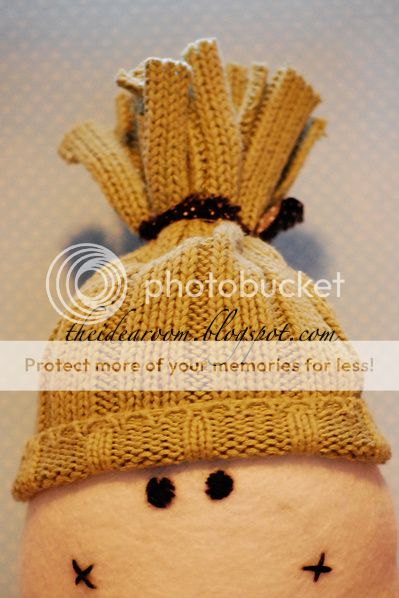
I put the sweater on the snowman’s head and turned up the finished edge to make the brim of the hat. You might need to whipstitch around the base of the hat to keep it secured with needle and thread.
Then I took some material (the same material I will use later for the scarf or twine) and tied the top of the sweater off to make the top of the hat. You will have about 2-3 inches of sweater sticking up at the top. Then I simply took my scissors and cut the sleeve into strips down to the tied off portion. This allows the hat to have a fringed look on top.
Then I just cut a long strip (about 20 inches x 1 inch wide) of material to make the snowman a scarf. Simply tie your material around the bottom of your snowman to complete the scarf. Take a red crayon and add some color to your snowman’s cheeks.
For the nose, I have cut wood with my jigsaw and then painted it orange. You can also cut out a peice of cardboard and then glue some orange scrapbook paper to it to create the carrot nose. Glue the nose onto the snowman with E6000 glue. And that’s it!
You can make a family of snow people by changing the width and height of the pattern so they are different shapes and sizes. This project could also be done without a sewing machine for you non-sewers by simply handstitching everything.
If you like this project, you might be interested in these other snowman spoon crafts, Powdered Donut Snowman treat, melted Oreo Snowman, or these Snow Man Decorative Balls.
JOIN OUR NEWSLETTER
Would you like more Recipes, DIY, Printables and Organization Ideas?
Subscribing to the newsletter will enable us to periodically send you creative content exclusively for Idea Room subscribers.
*View our Privacy Policy here.


i love this idea so much!! he is adorable!! thank you for sharing this!
These are super cute! What did you use to make the rosey cheeks? Thanks so much.
Very Cute, Quick question though, wouldn't it be easier to leave the opening in the top, dump in the beans, or peas then stuff. I just cant imagine trying to close up the bottom with the veggies in there. Just a thought. I tend to find the laziest way possible to do things. LOL These are just what are needed for post-Christmas decorating.
way cute i am going to make this. thanks for sharing
I love snowmen. This is adorable and do-able! Thanks
Too cute! My kids will like these even though it's after Christmas.
Carolyn
that is darling!! i think i need one.
thanks for sharing, he'll need to be added to my collection!
Adorable!!! thanks for sharing how you made it!
Suzanne
Quit making us all look bad:) Can I pick your brain sometime? Hey…come take the shoe personality test…I'm dying to know what you are, although I think I already know. And you may or may not get some extra entries into out next giveaway (shoe giveaway):)
Ohhhhh, this is so cute! and I think I can make this pretty easily too..which is saying a lot for non-crafty me! Thanks for another great idea! Come say hi :D
Adorable!
Come share at my Thursday's Treasures party!!
http://treasuresfortots.blogspot.com/2010/01/thursdays-treasures-week-6.html
I love the look of your friendly little snowman! As split peas also rarely (read: never) find a home in our pantry, using them for a project like this would be just fine.
I love checking out your blog… you have such fun and creative ideas! Thanks so much!
This is so cute! I love your style!
He is so cute! Thanks tons for the pattern, I'll be linking.
You can also take your powder blush from your makeup and us a q-tip and lightly apply to the checks of the snowman. This is a great way to use up old makeup that you might have just thrown away. For the nose you can also use orange paint or perm orange marker tilt to the side and paint or apply this work great also or you can use orange clay form and use mfg. direction you can then cut a small slit in the place where you want the nose put some glue on the nose and then push the carrot you have made in the little hole. Works great.
Another adorable snowman from you that was saved in my inspiration! I will be sharing this one too! Pink Little Notebook
Thanks – I LOVE your site!!!
He is adorable … thank you for sharing.
Thanks a bunch! I made two today and I love them!
So glad to hear that!! Thanks for coming back and letting me know! I always love to know when someone makes something I have shared!!
I love this pattern. The snowman are so cute. I too it a step ahead. I made a scarecrow and I’m working on a turkey face. Next I’m going to work a Christmas with the same pattern. Loving this pattern
Oh yea!! So glad to hear that. I would love to see them if you have any pictures :). Thanks for coming back and letting me know.
Thanks for the download. I can’t wait to make these with my 4-H kids
Thank you for the great idea! Made one..of course mine isn’t as cute as yours.
You are welcome and I bet it is darling!