
*This is a sponsored post on behalf of Lowe’s.
Another month, another Lowes Creator Challenge. This time we were given a few different challenges, I chose to make a table centerpiece. I know I have made some in the past…like the following:
Thanksgiving Table Centerpiece

This time around, instead of building a box, I wanted to see if I could core out a wooden pine beam and make a centerpiece out of it. This way those of you who are not inclined to build your own box can make one this other unconventional way! Plus it was fun to challenge myself to try something out of the box (pun intended)!

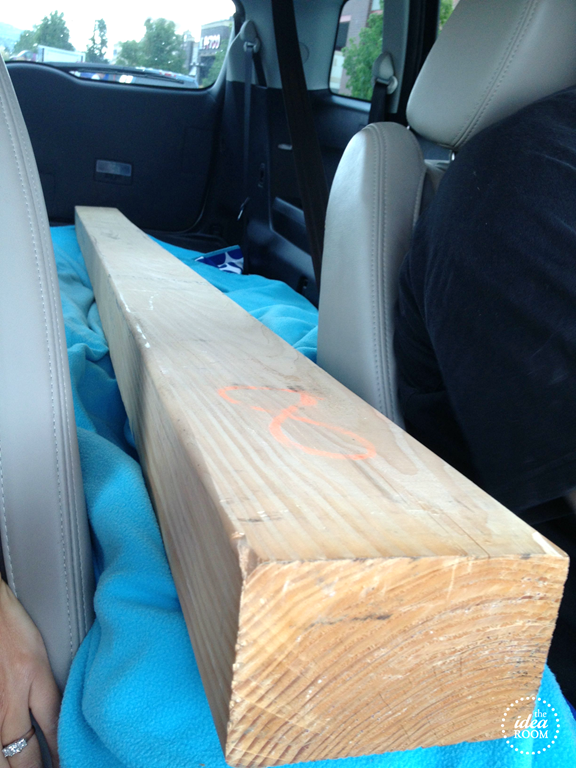
We picked up a 4 x 6 pine wood beam from Lowe’s.
We decided to fill it with succulents so that they would be easy to maintain, especially because I don’t have the greenest thumb.
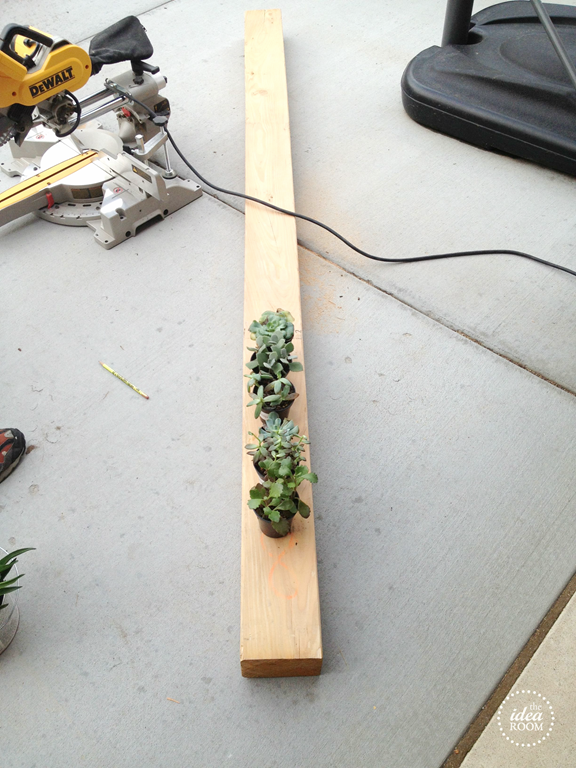
We determined how long we wanted it and settled on 28.5 inches in length. We cut it with a circular saw.

Determine how deep on the sides how big you want the center cut out hole or trough to be and draw a line with a pencil for a guide. Then take a 1.5 inch drill bit and drill down into the wood. Be sure to NOT drill all the way through the wood so that the dirt and water stay in the box. (You can drill a small drain hole, for the excess water, if you want…we did not).
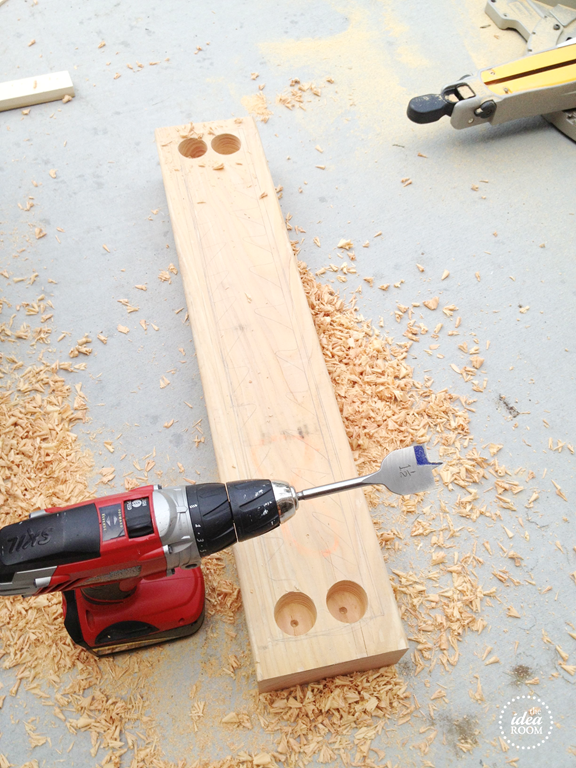
Drill 4 holes, one in each corner. Then take your circular saw and cut lines from the drill holes along the beam. You are just breaking up the wood so that you can easily chisel it out.
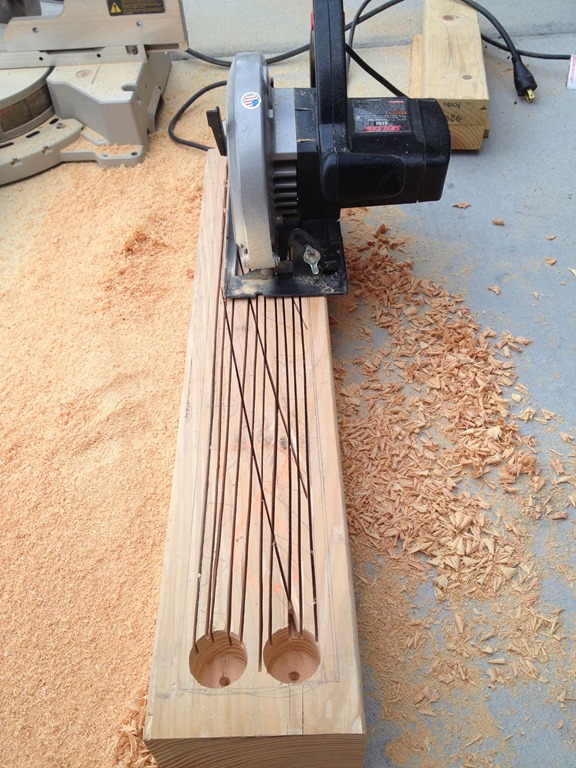
Take a hammer and chisel and break out the wood carefully. Please remember to wear protective eye covering and gloves as an extra precaution.
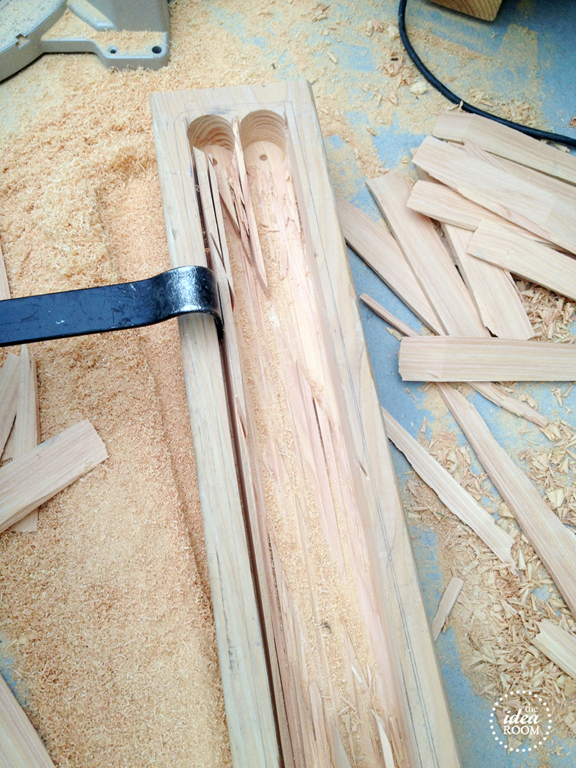
Clean out the center of the box as cleanly as possible.
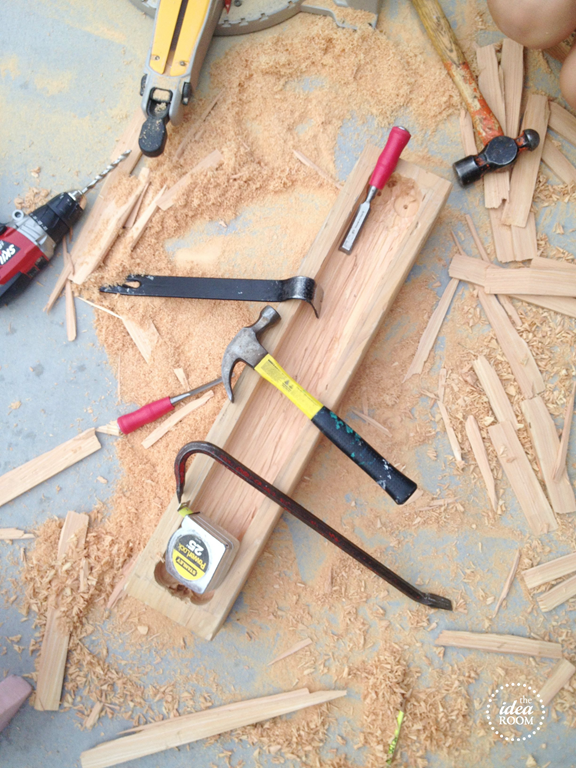
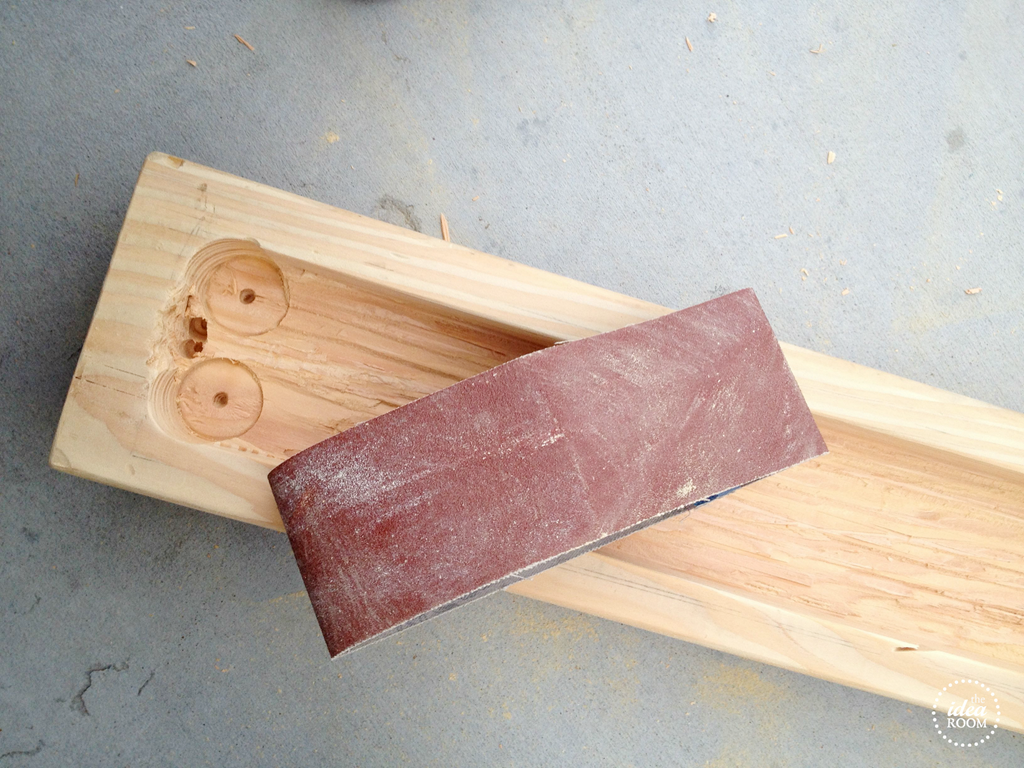
When it is all cleaned out you can sand the inside but it won’t be noticeable so it is up to you. We sanded along the top edges and a little on the bottom to remove any splinters or really sharp edges.
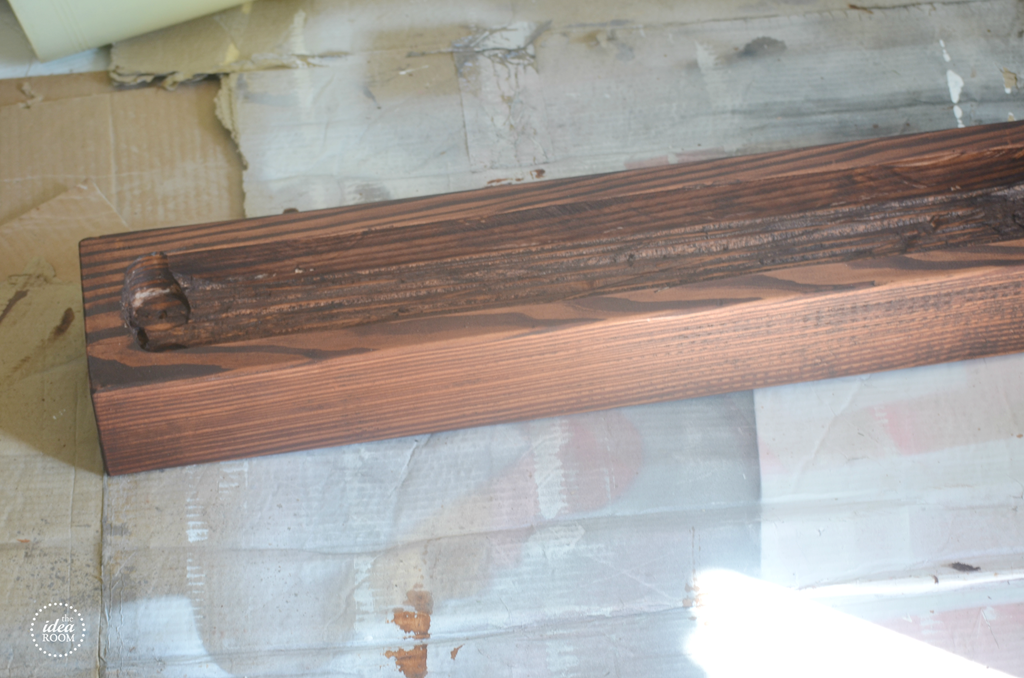
Then stain or paint your wood box. We stained ours with MinWax’s Red Mahogany.
Fill your planter with a good potting soil and then fill it in with your succulents or plants of your choice. You could also fill it in with candles or some Christmas ornaments!

And that is it. This was one of the easiest projects to complete and really took all of about an hour (if you don’t count the down time waiting for the stain to dry. I have used it out on our back deck patio all summer. Now that it is colder we moved it inside and it is now sitting in our laundry room window sill!

And…this DIY Wood Box project of mine was picked by Lowe’s to be featured in the online November 2013 edition of Lowes Creative Ideas using the iPhone or iPad app! You might also want to sign up for Lowe’s Creative Ideas Magazine. It’s FREE and offers a bunch of DIY inspiration. Go ahead and connect with Lowes Creative Ideas to find a lot more fun and creative ideas.

If you are interested in how I made these DIY Table Linens, you can find this post here:
{Thanksgiving Table Centerpiece}


*Disclosure: This is a sponsored post. Lowe’s provided me with a gift card to showcase a project this month as part of their Lowe’s Creative Ideas Bloggers team. However all opinions and statements are mine.
JOIN OUR NEWSLETTER
Would you like more Recipes, DIY, Printables and Organization Ideas?
Subscribing to the newsletter will enable us to periodically send you creative content exclusively for Idea Room subscribers.
*View our Privacy Policy here.


What an awesome centerpiece idea Amy! I love it!
xxoxox
Thanks so much Jen! I always appreciate hearing from you!
Love this! You make it look so easy! Pinning!
ha! Well…it was pretty easy! Just a little bit of power tools! xo Thanks so much Jamielyn!
This looks awesome! one question, and it’s kind of dumb, but how did the circular saw not just cut all the way through it? I’m new to circulars……
Jesse–That is actually a great question. I should have mentioned that in the post. You can actually set the blade depth on most circular saws. This prevents the blade from cutting deeper than your desired depth. We set ours at 1.5 inches so that it only cut down into the wood 1.5 inches. Hope that helps! I will add this information into the tutorial. I think it will be helpful to most everyone else! Thanks for asking!
It’s beautiful!! I love the color and the succulents in it. Love it!!