
So happy to have one of my favorites sharing such a fun and creative DIY Bubble Art project with us today… 
Hey everyone, I’m Kim from Today’s Creative Life (formally Today’s Creative Blog), and InspirationDIY. If you follow my site, then you know I’m all about creating fun and beautiful things that don’t take a lot of time or skill
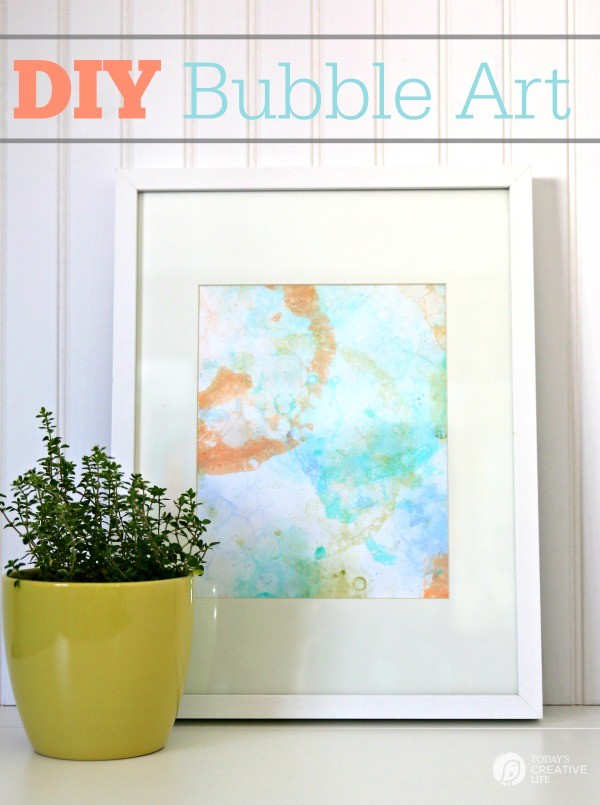
DIY Bubble Art
I love a craft that kids can get in on the fun and it creates not only a beautiful piece of wall art, but a memorable one. It will make the little ones feel pretty special to see their personalized wall art hanging proudly in their home!
And what’s not to like about creating quick and inexpensive creative wall art when needed. Because buying wall art can get crazy expensive!!
Who’s ready for some craft time?
DIY Bubble Art Supply List – You’re going to need the following.
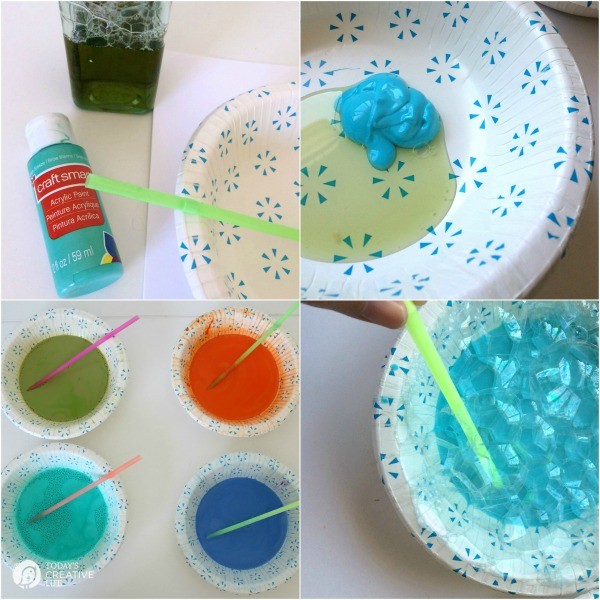
- Cardstock – I used a 12 x 12 inch piece of scrapbooking cardstock.
- Shallow bowl – I just grabbed a paper one from my party pantry, because who want’s paint in their good bowls, right?
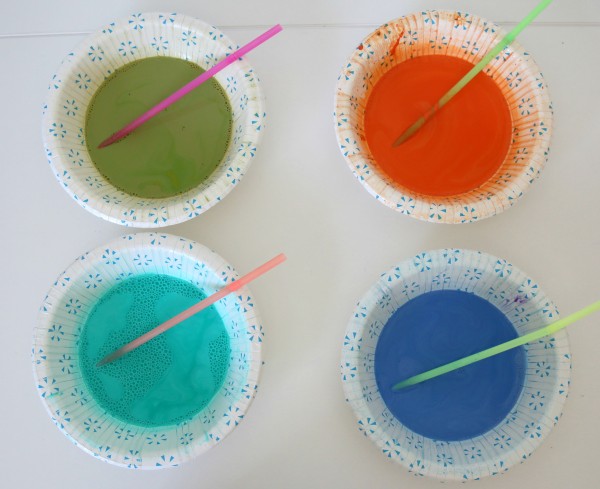
- Acrylic Paints – choose a variety of colors you want your art piece to reflect
- Dish soap
- Straw
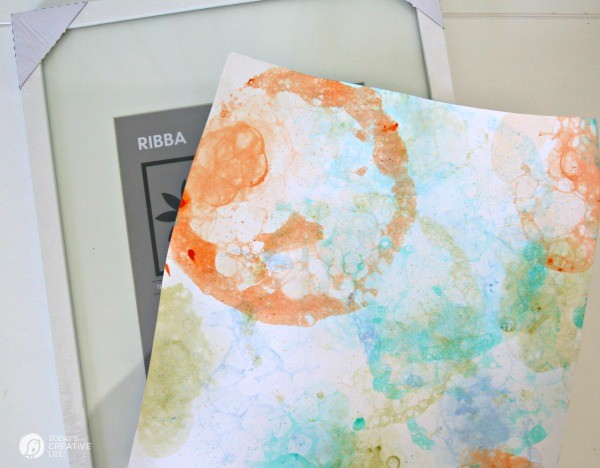
- Frame – I bought one at IKEA
- water
How to Create Bubble Art
- Gather your supplies.
- Place a good squirt of paint into the bowl with about a tablespoon of dish soap. Add just enough water to cover the bottom. Stir
- I think it’s easier to get all your bowls ready at the same time.
- Place your color bowl you’re working with on either newspaper or an old towel. You’ll get some splatters. You may even want to wear an apron.
- Using a straw, you’re going to blow into the paint mixture. Be sure to place your straw completely into the water / paint mixture. DO NOT suck up the liquid. Watch children carefully. Please use common sense.
- Once the bubbles get high enough, place your piece of paper over the top of the bowl. Lift and repeat with either the same color or a new one.
- Let it dry and then frame! You may have to cut it down to fit your frame.
This can also be done with Tempera Paint powder, but you’d add about a 1/2 cup water and 2 tablespoons paint powder with the soap.
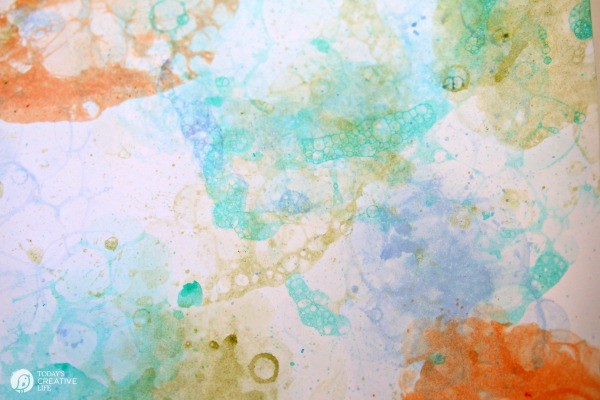
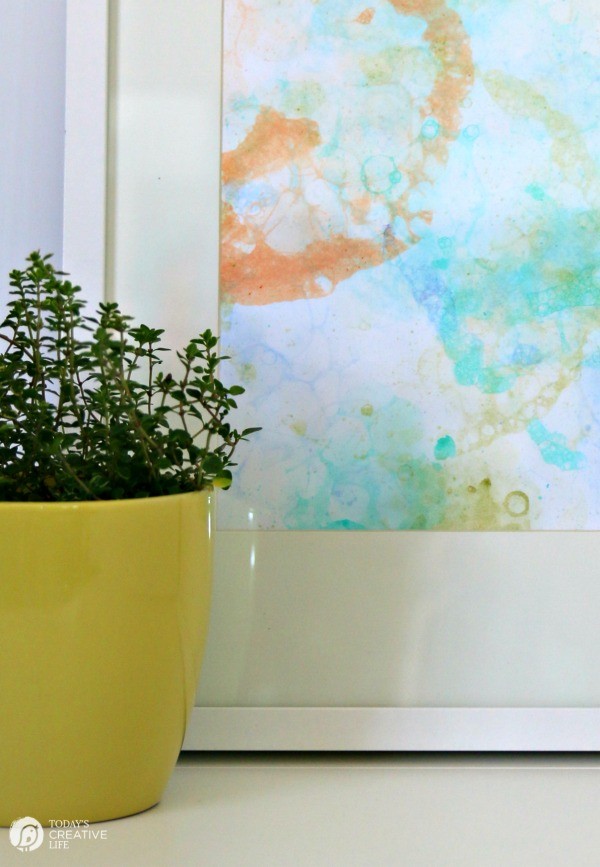
Isn’t it pretty? As the bubbles pop, it creates beautiful and mysterious designs. I love how it looks.
It’s got that dreamy look.
Time to Frame!
I thought at first, that the orange bowl mark was going to ruin it, but now that all the other colors are blended in, I love it! Have I mentioned how much I love it?
I trimmed about 2 inches off one side and placed it in a frame.
My 16 year old son walked into my craft room while I was photographing and suddenly felt the need to create his own!


Find more creative ideas from Kim on Today’s Creative Life, or submit your creative projects to InspirationDIY.com
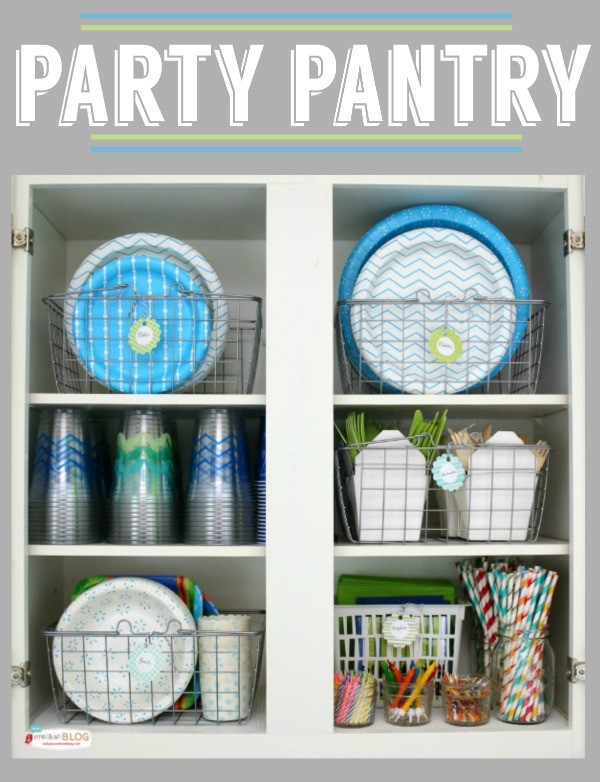
Create your own Party Pantry – See mine here.
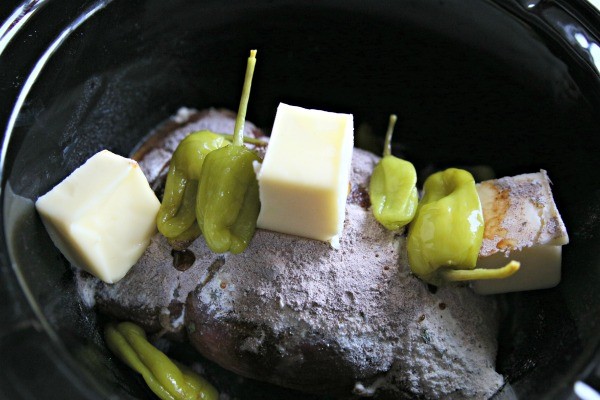
Slow Cooker Mississippi Roast – Yes that’s a stick of butter and this roast is delicious! Find more Slow Cooker Sunday recipes on Today’s Creative Life.

Come see my Craft Room while it’s clean!
Follow Kim in Pinterest, Facebook or Instagram.

JOIN OUR NEWSLETTER
Would you like more Recipes, DIY, Printables and Organization Ideas?
Subscribing to the newsletter will enable us to periodically send you creative content exclusively for Idea Room subscribers.
*View our Privacy Policy here.


Leave a Reply