
*This is a sponsored post of behalf of Frigidaire and Lowe’s.
I recently updated a few areas in our kitchen with the help of Frigidaire Professional and Lowe’s. Today I am going to share with you how we built our pantry and created an electronic charging station for our kitchen desk.
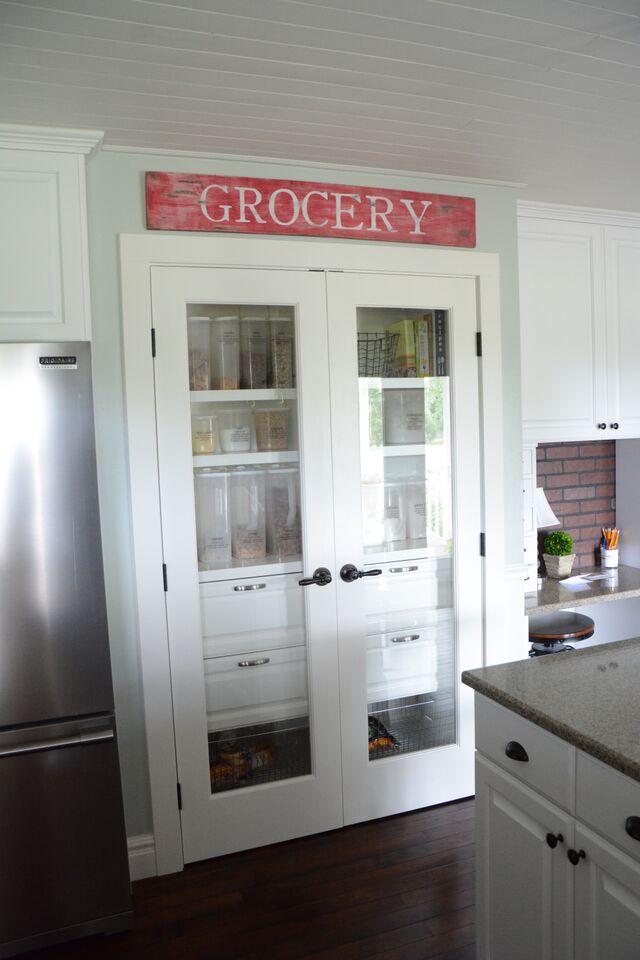
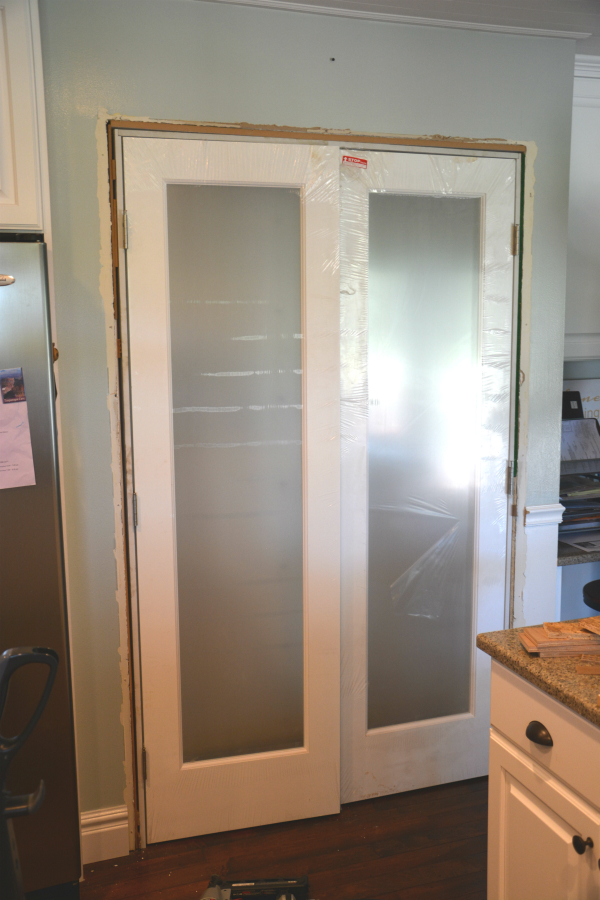
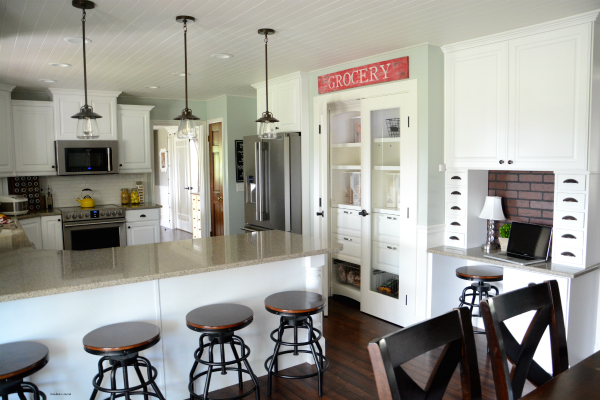
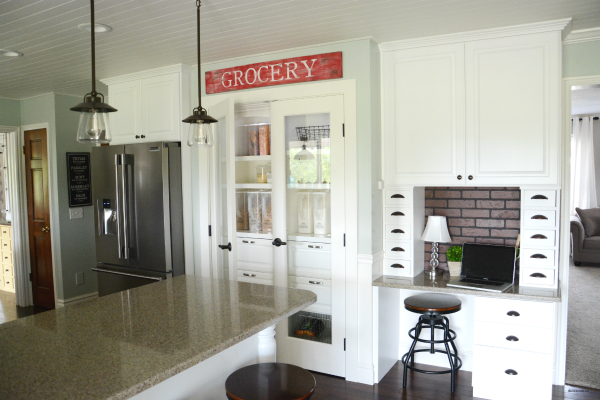
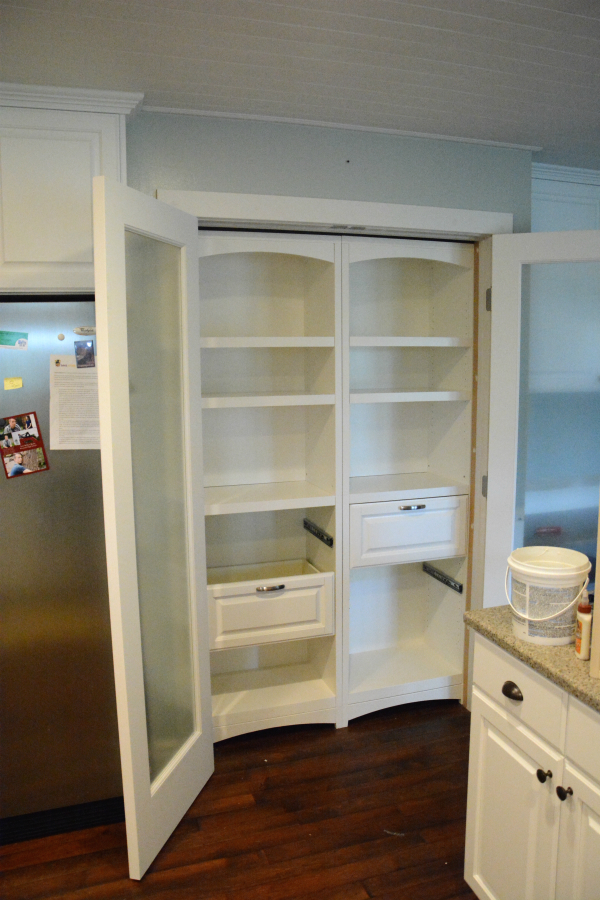
I LOVE pretty pantries! Our old pantry was just a simple closet with a set of bifold doors which hid everything from view…which was probably a good thing since our pantry can get pretty messy with 5 children who like to rummage through it. I have always wanted to have an organized pantry that you could see from the kitchen. I knew I wanted some glass french doors instead of the bi-fold doors.
Project Materials:
door handles
door hinges
1 inch poplar boards for cabinet drawers (we cut them into various lengths depending on the shelf or drawer we were building).
3/8 in. furniture grade plywood for drawer bottoms
trim for door frame (inside and outside)
trim for inside of closet around closet towers
wood shims
level
screws
drill
sand paper
nails
nail gun
wood glue
wood putty
painter’s caulk
white paint
paint brush
foam roller
matte finish varnish
drawer pulls
power strip
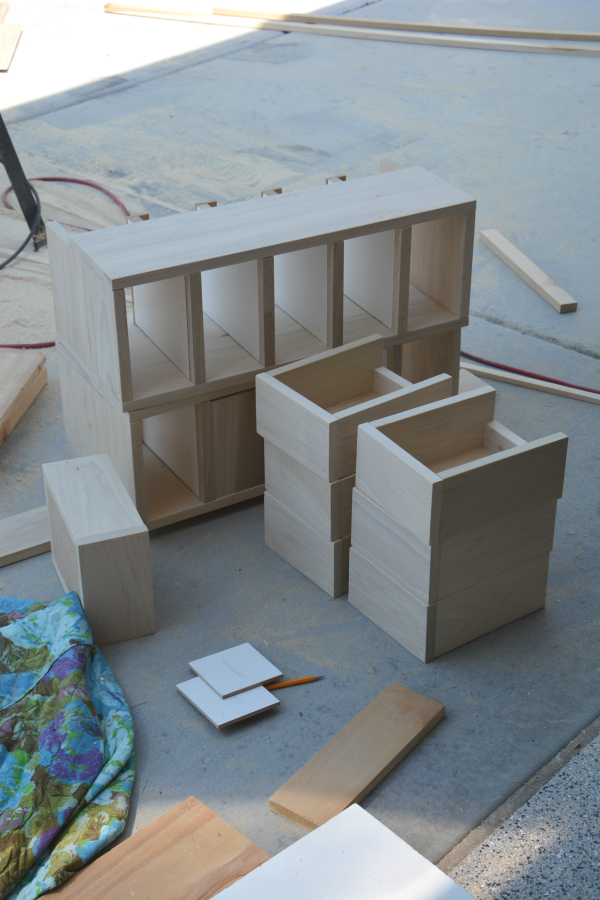
Lowe’s had some glass french doors that were exactly what I was looking for and they fit our space perfectly. I also wanted to have a nice set of shelves to go into the pantry. We were planning on building some until we spotted these pre-made closet shelves at Lowe’s. We measured our space and realized that if we removed the old shelves, (which was particle board from the previous owners) two of the closet towers would fit perfectly in the space side-by-side.

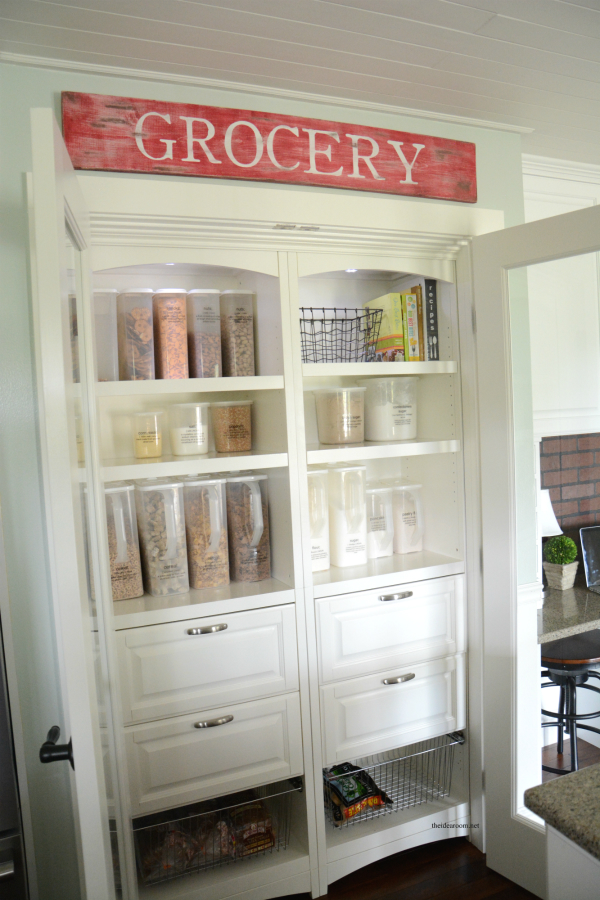
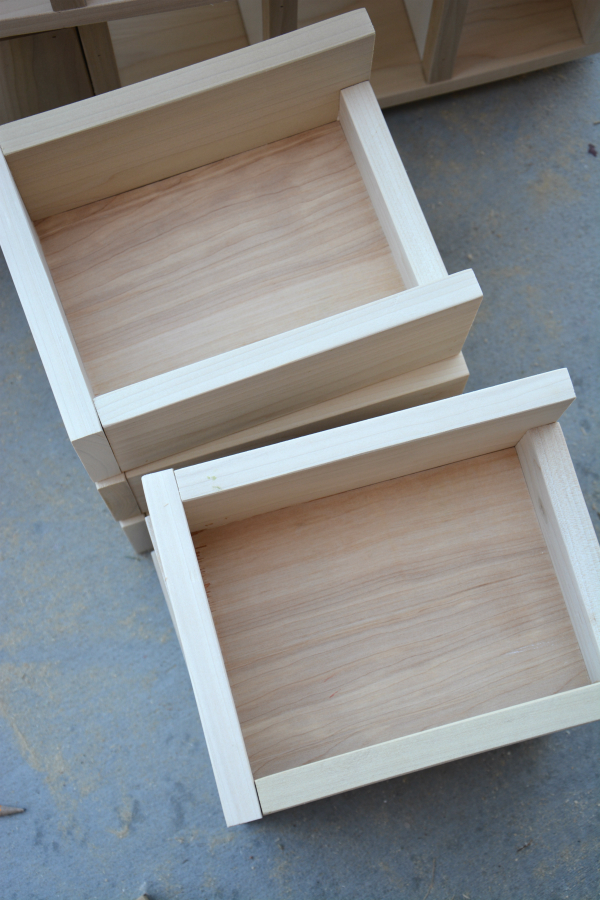
The closet towers come with either drawers or the baskets. You can pick and choose what you need. We decided to go with 4 regular drawers and the two bottom basket drawers. That way we could have some hidden storage space for those “not so pretty” pantry items.
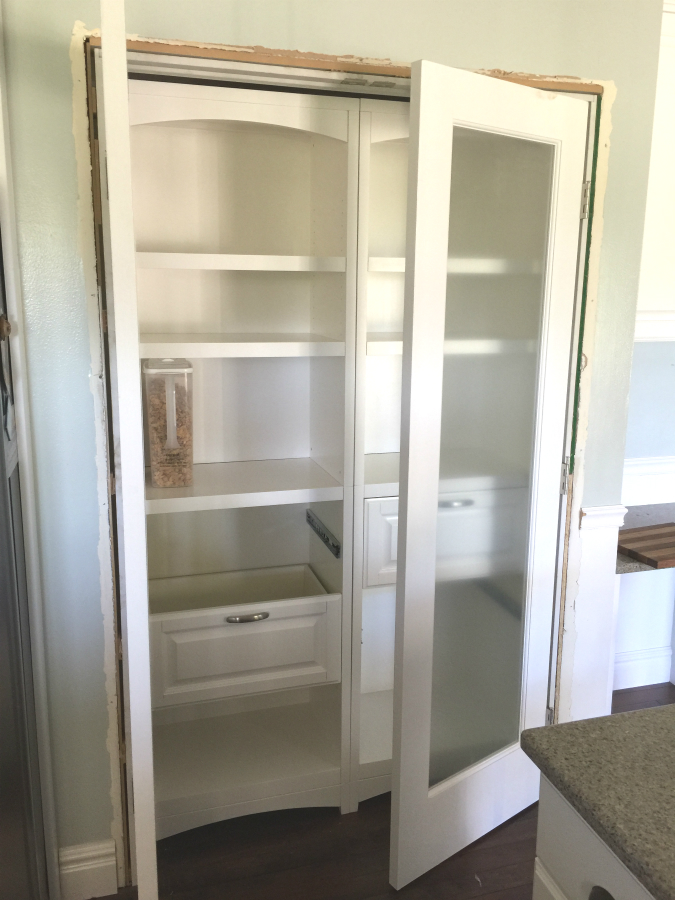
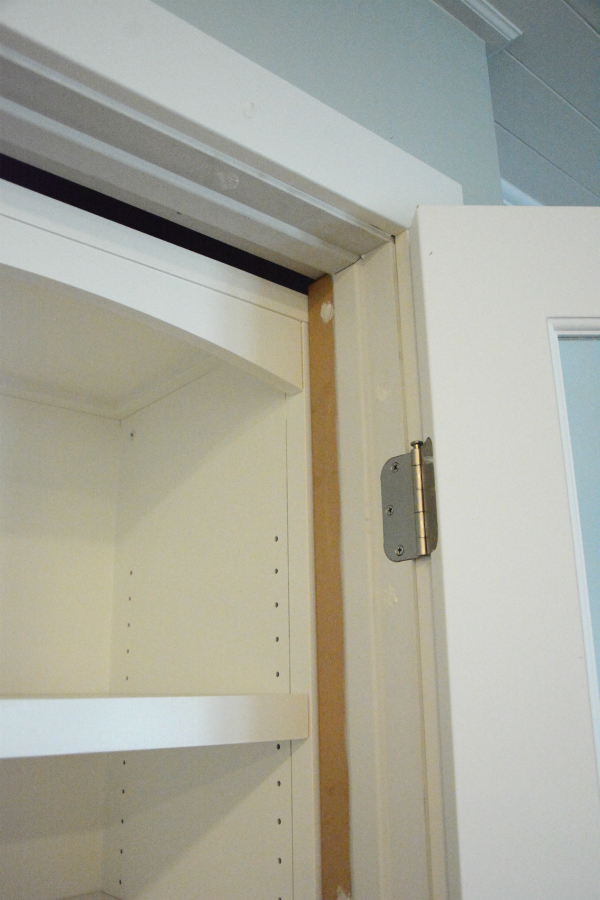
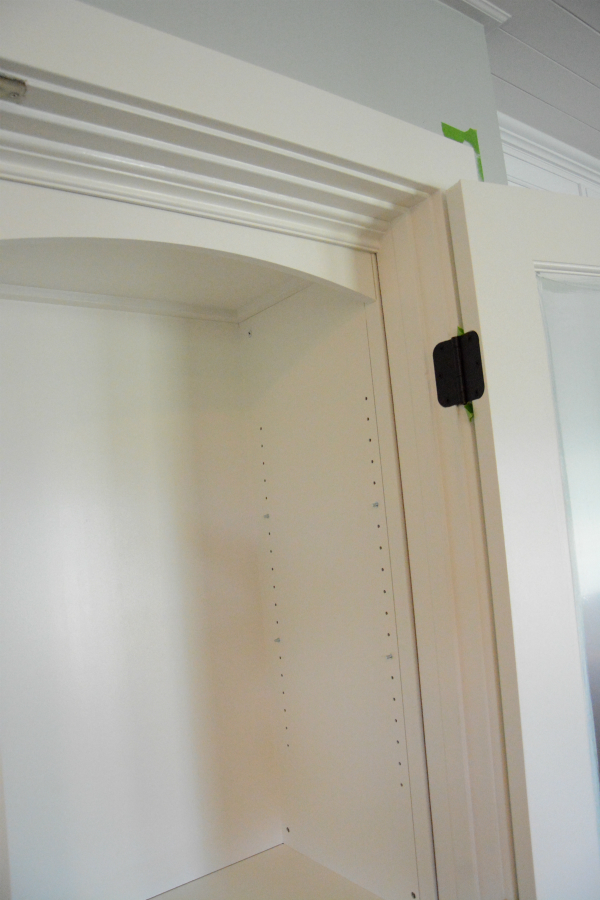
We gutted the closet and took off the bi-fold doors and the casing around the closet. Then we hung the french doors and the door frame in the space. Use shims and check that the frame is kept square, level, and plumb.
Once we had the doors installed, we put together the two closet towers. We ended up painting the closet towers even though they were finished in a white paint, simply because it didn’t totally match the white in our kitchen. I knew it would always bug me if they weren’t the same color of white. We also changed the hinges of the french doors out to an oil bronzed hinge to match our kitchen hardware.
When the paint had dried, we placed the cabinets inside the closet. We added a couple of anchor screws to hold them into place and to keep them from tipping out in case of an earthquake or kids climbing on them. There was a small bit of space around some of the edges, but otherwise, the shelves look like they were custom built for our space!
We framed around the pantry with a simple piece of molding. We decided to do this in a very basic flat trim from Lowe’s. We filled in the nail holes with wood putty, sanded them and painted the trim white.
We added some trim molding around the edges of the shelves to finish off the cabinets. Fill all your nail holes with some wood putty and fill all the edges and crack with white painter’s caulk. When it has dried you can sand it down so that it has a nice, smooth surface. We added a few layers of matte varnish on the shelves to help protect and prevent the paint job from getting scraped and chipped with everyday use. We will see how long it hold up before it needs to be repainted.
Can I just tell you how much I LOVE it!! We already had the containers with the fun pantry labels on them from a previous pantry organization project. It makes me happy to see everything organized inside the pantry. The kids have been doing a great job keeping it clean and organized and have been putting things back in their correct place. It’s pretty much been a Christmas miracle! :)
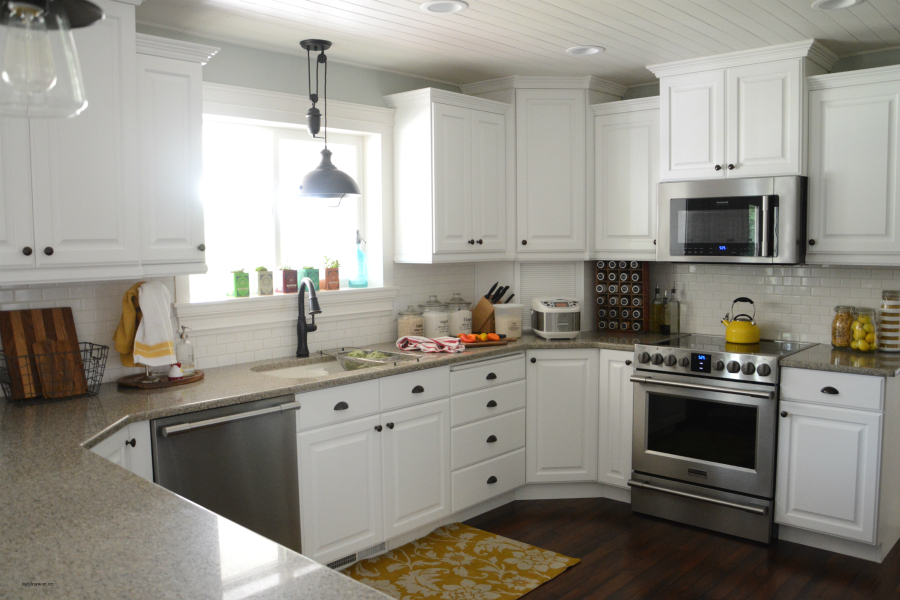
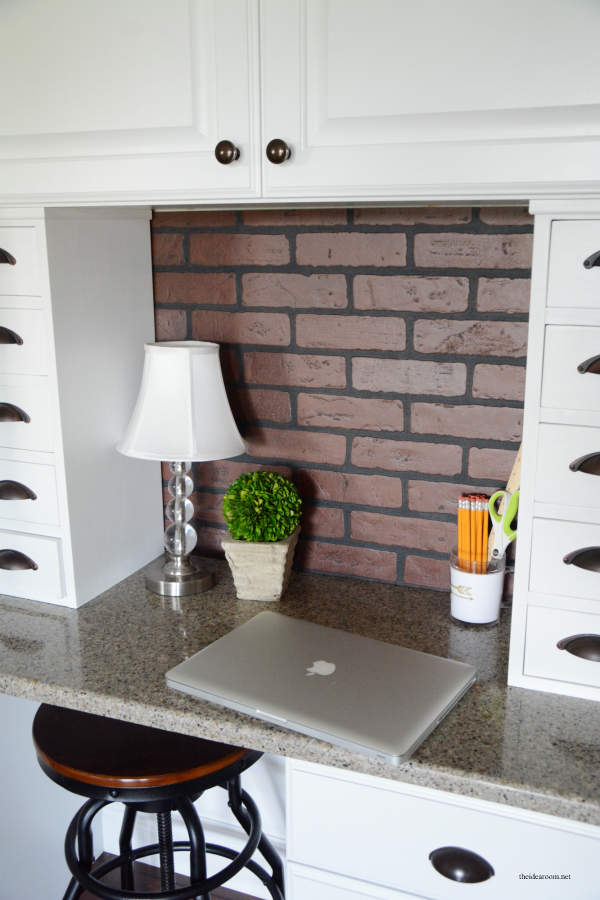
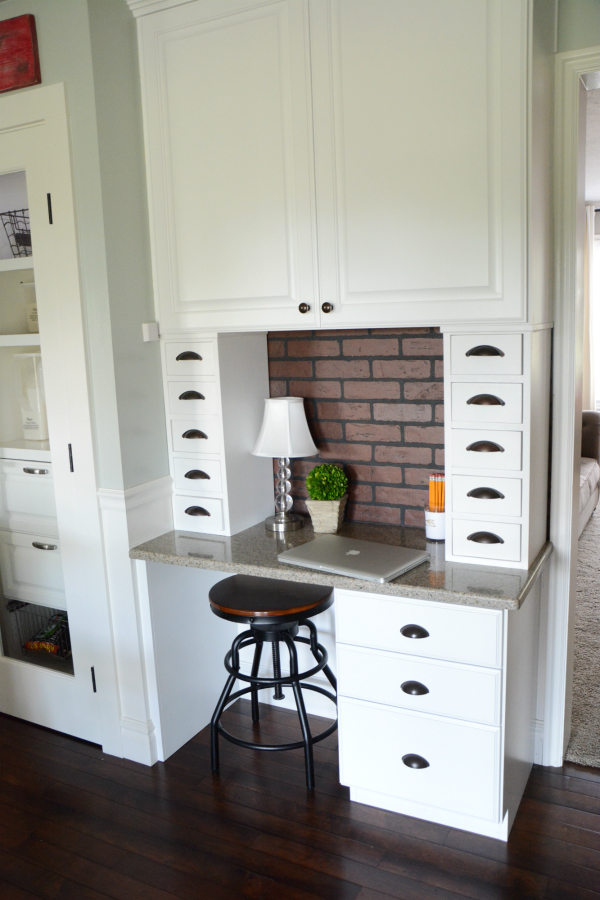
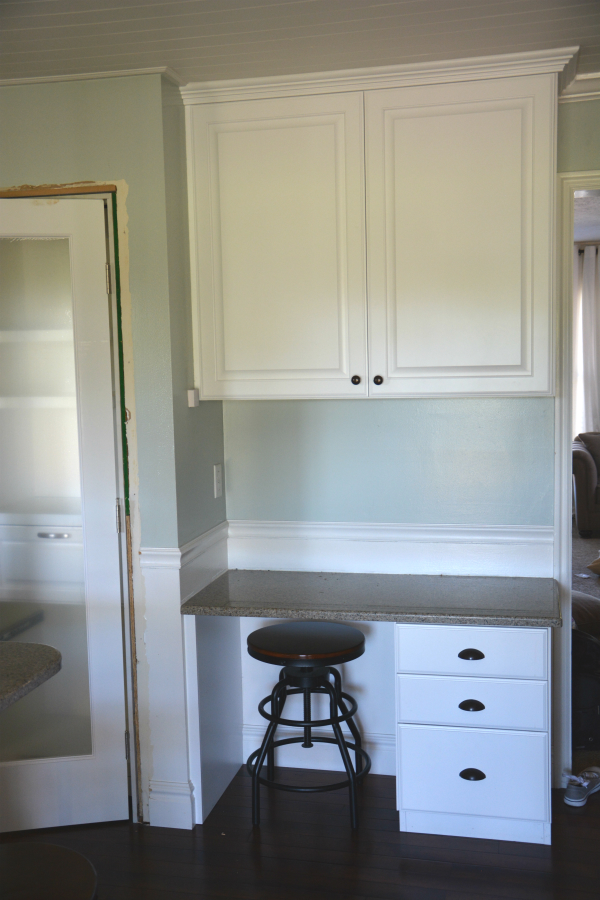
The kitchen desk area was admittedly pretty boring. When we originally remodeled our kitchen, I should have gotten a bit more creative with this space. I have always regretted not making this area more interesting with the shelving, instead of this boxy and boring cabinet.
The kids do use the desk quite a bit and so I knew we would keep this area as an area for the kids and their homework supplies. The computer for the kids is usually used mainly here out in the open area for internet safety. We also like to gather up the kids electronic devices all in one spot so we can keep track of them. In our home, the kids turn in their devices before bed time so they are not tempted to be up all hours of the night texting their friends or playing on them. I know…we are mean parents…but when I was growing up…night time was for sleeping and getting a good nights rest.
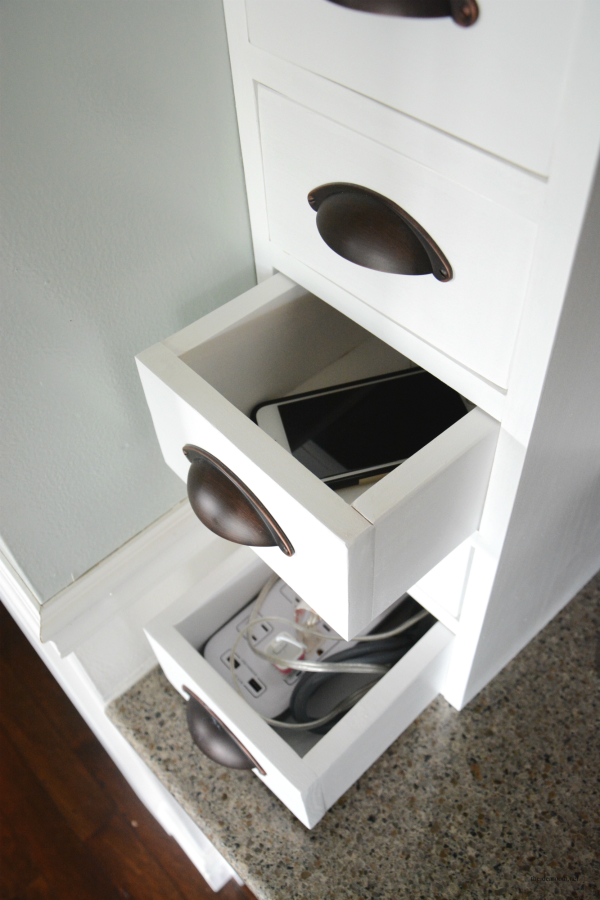
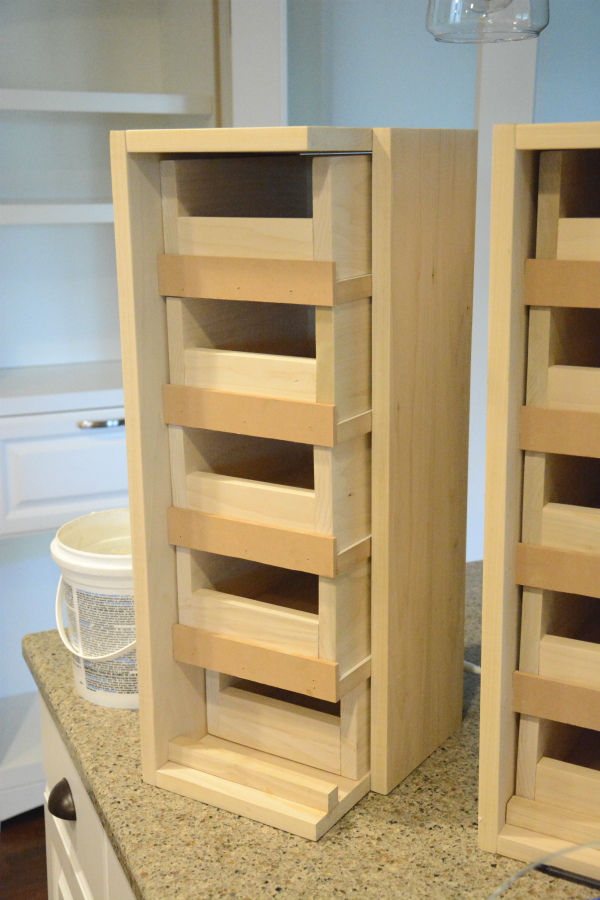
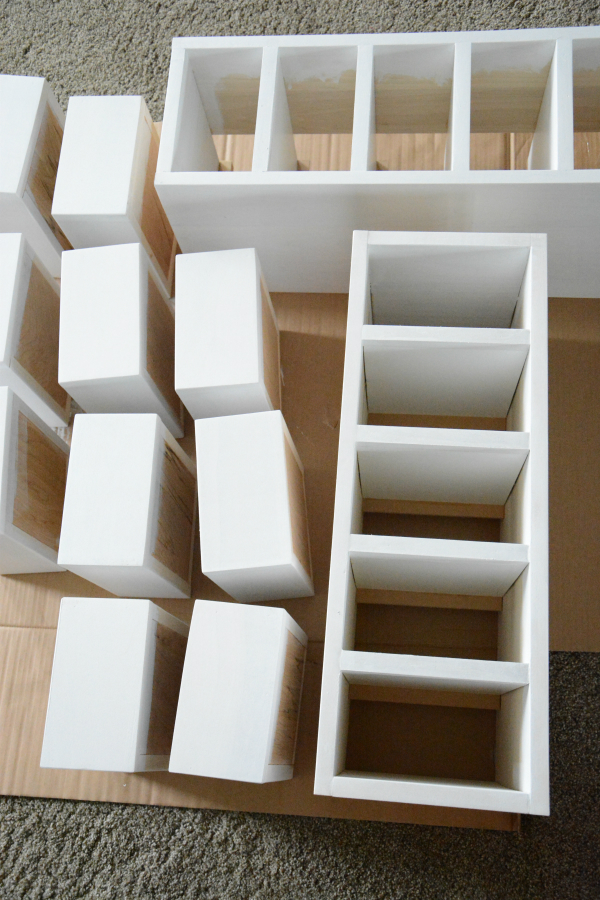
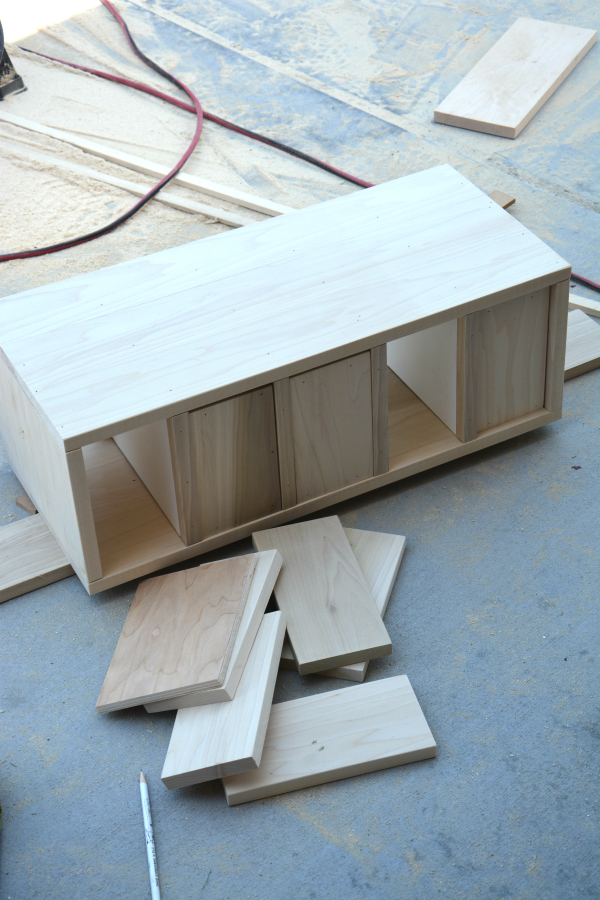
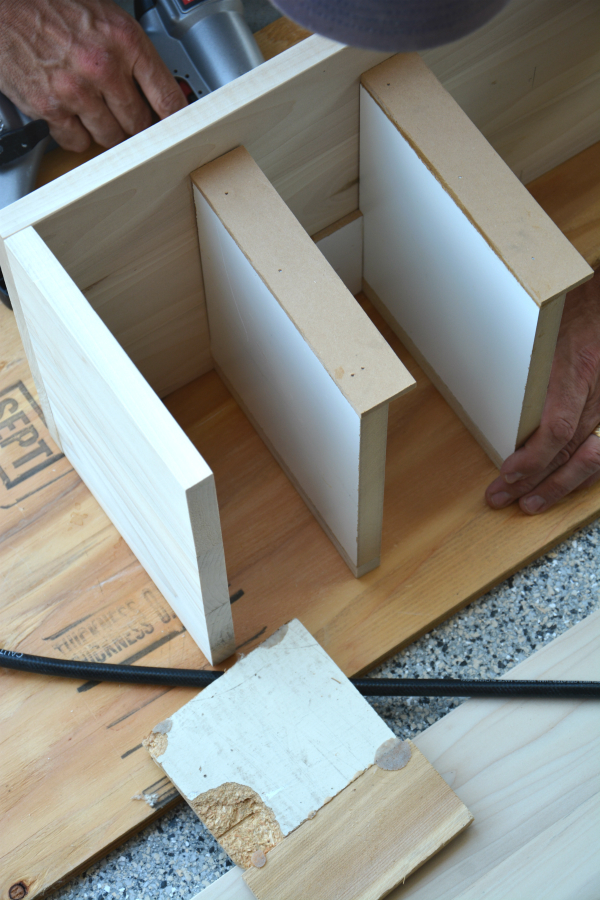
We designed and built 2 sets of these side drawer units to hold the kids electronic devices and to be a charging station. The bottom drawer holds the power strip for their power cords. Then the cords can go up the back of the unit and into the individual drawer. Each child has a drawer for their own device. At night, all the devices are turned into the charging stations to charge.
We built the left shelf so that it would fit over the electrical outlet while still laying flush with the wall. There is space in the back of the drawers for the electrical cord to fit in the back of the shelf unit.
The picture below shows the back view of the shelves and cabinet. A spacing template can be seen between the two shelves. We used the template to ensure the shelf spacing is at least 1/16 greater than the drawer height. We attached a strip of wood to the back of the shelves to be a drawer stop. The shelves were attached to the sides with wood glue and a couple nails.
We built the drawers so that the back was lower to allow space for the electrical cords.
There is a section of the side of the left hand shelf that is not as wide. This is the side wall piece. The space allows the drawer to sit flush against the wall to make room for the electrical outlet on the wall. This way you can plug the power strip into the outlet and have the cords hidden inside the shelving unit.
Make sure the drawers and shelves fit your space. Then paint them white. We added some oil bronzed drawer pulls to each drawer. We used a simple template with a scrap piece of wood with two holes in it. This allowed us to get the drawer pulls in the exact spot we wanted each of them.
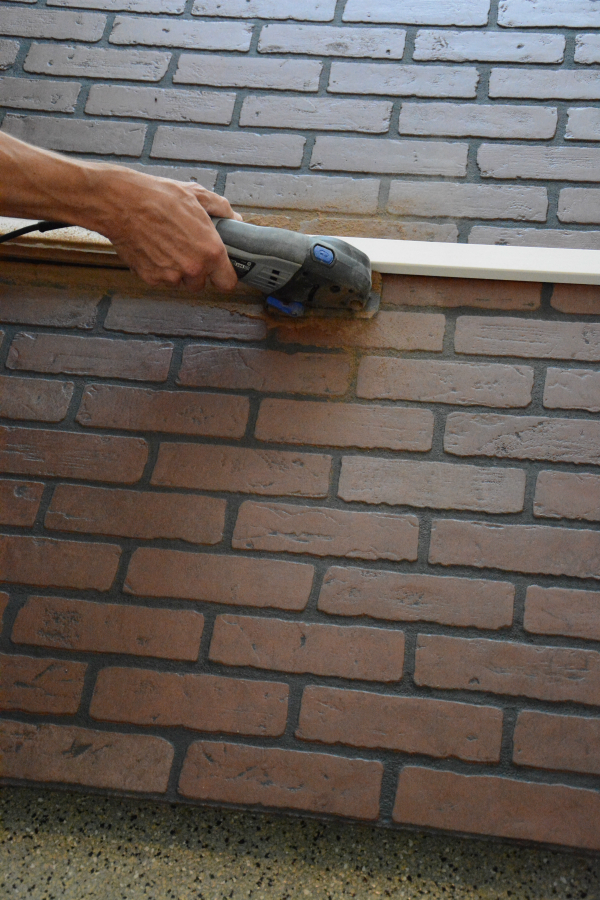
We added a small piece of faux brick to the back of the desktop to tie in with a red brick fire place which is in the family room which is right next to the kitchen desk. I love me some exposed brick :). To cut the sheet of “brick” we clamped a piece of straight wood on each end to give us a straight line to use as a guide for our Dremel Saw Max.

We now have a cord free charging station! Yay! Visible cords drive this momma crazy! The kids also have a specific spot for their devices which helps us to keep them from getting lost and misplaced.

I love it when an idea in your head becomes a reality. Here’s to hoping the kitchen pantry and desktop area will stay clean and organized for more than a few days :)! To see more details on the kitchen you can refer to these past posts.
Kitchen Reveal (Frigidaire Professional Appliances)
*This is a sponsored post on behalf of Frigidaire and Lowe’s. All opinions are mine and mine along. I was given product and/or compensation for this post.
JOIN OUR NEWSLETTER
Would you like more Recipes, DIY, Printables and Organization Ideas?
Subscribing to the newsletter will enable us to periodically send you creative content exclusively for Idea Room subscribers.
*View our Privacy Policy here.


I absolutely love your kitchen! It seems so bright and cheerful with the white cabinets and the pops of yellow everywhere! :) The small portion of brick wall is quite fabulous as well. Thanks for sharing, I love reading your posts!
Thank you Kaylan! I am so glad you are following along!
The French Doors are not available at Lowes.
Check with your local Lowes and see if they carry it or can special order it for you!
Oh, I have pantry envy! What an incredible transformation! I love it! xo
Thank you so much Amy! xo
Will you please post the link to the premade shelves that you used at Lowe’s?
Thanks!
Love your kitchen! I think the glass doors are much better than the bi-fold doors. I have a pantry/ laundry room and that was the first thing to go on mine.
Renee- Thank you so much!
I love what you did with your pantry space. It now looks so custom.
Michelle- Thank you so much!