
*Update 10.20.13–DIY Tufted Headboard–Part 2 has been posted.
You guys! I am so excited to finally be sharing the DIY Tufted Headboard and bed we just finished making for our youngest daughter. This bed has been in my head for a couple of years now and it is so exciting to finally see something you have been thinking about for so long become a reality…a reality that you actually LOVE!
I was contacted by Dremel and was challenged to take part in their Dremel Weekends Challenge and I knew that I would finally have an excuse and the push I needed to tackle this project!

This is the third headboard (second whole bed) we have made for our girls and I am always surprised at how easy it actually is. The beds/headboards we made, I shared with you here: DIY Headboard & Bed and here: Pallet Headboard if you are interested.

I think that this bed is my favorite! We have had such a crazy last couple of weeks at our house and I am surprised we were able to get this finished. But we were planning on surprising our daughter with the bed for her birthday so we spent a late night getting it all finished so it would be ready on time. I love it when a deadline forces you to get something done!

The entire process was actually pretty simple. I was a bit nervous about the tufted headboard and was quite pleased with how easy it actually was. It just takes a bit of time so keep that in mind if you want to give this a try at your house.

I will be breaking this down into two separate tutorials since it was pretty involved. I will be sharing how we created the headboard form today and the tufting later. WE made the bed frame using Ana White’s tutorial for her Twin Farmhouse Bed, but modified it so that we did not have a foot board.
Step 1: We took a 4 x 8 sheet of 3/4 inch MDF board and had Lowes cut it to measure 41 inches wide by 50 inches tall.
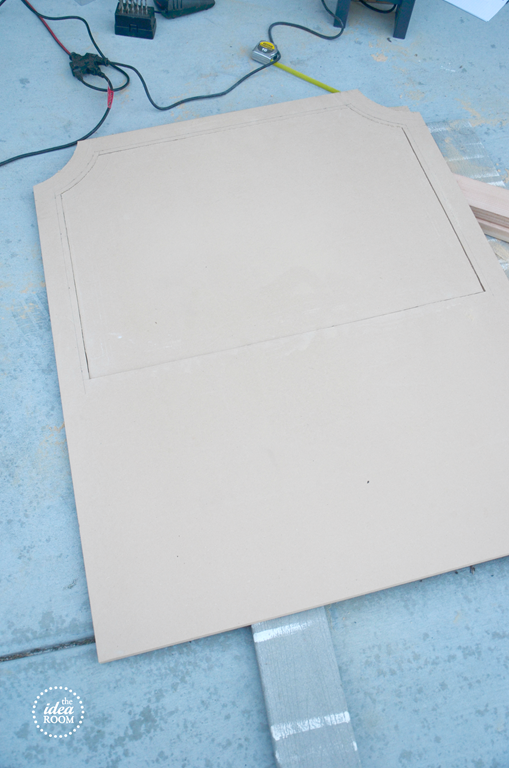
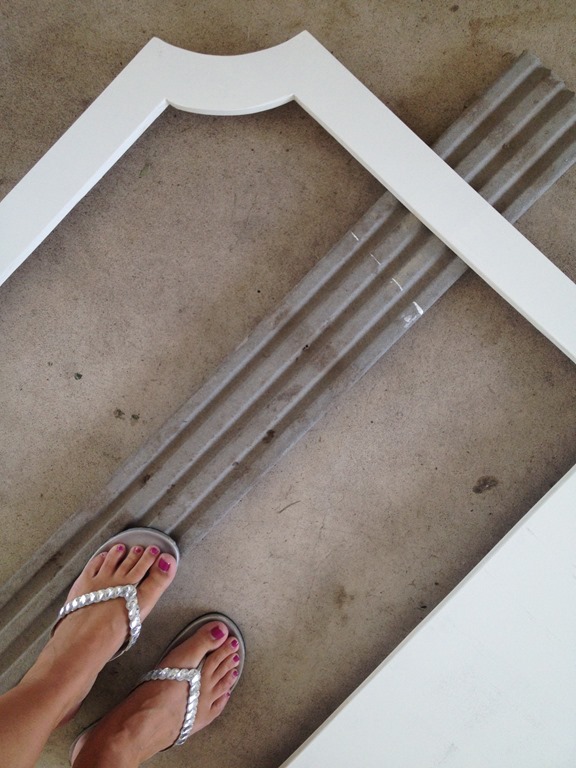
Step 2: We decided we wanted to go with a Belgrave style headboard shape. I wanted to have a bit of a white frame around the tufted material and we decided that the best way to get a clean look with the curved detail was to cut out the center of the board and use that as our tufted headboard, which would be able to slide right back into place. This would hide the edge of the tufting and give it a nice clean look.
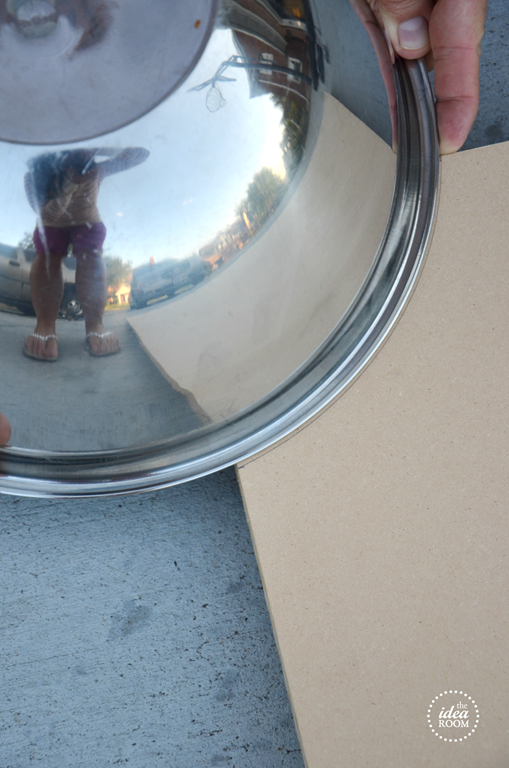
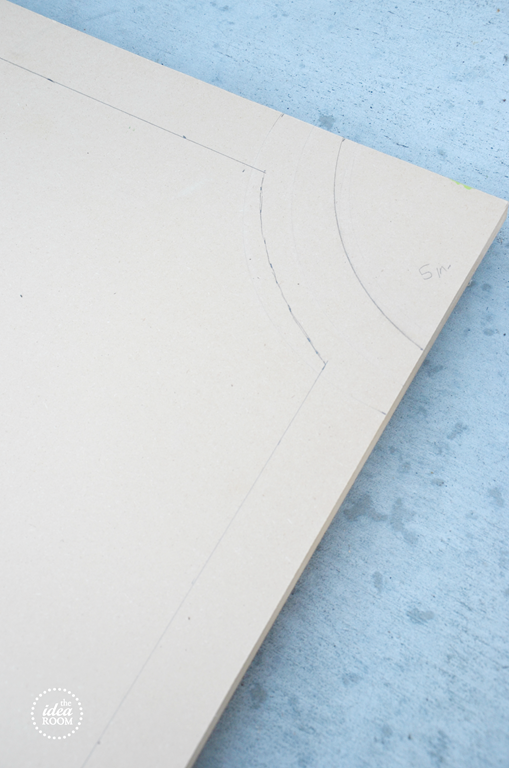
Step 3: We took a large bowl and used it as a pattern for the side of the headboard. The larger the bowl, the less of an arc you will have…which is what I wanted. The edge/corner of the cut out from the bowl on each side measured 5 inches.


Step 4: Then you will need to cut out the middle section. The middle section (the tufted headboard part) measured approximately 36 inches wide by 25 inches tall. This gave us a 2.5 inch frame around the top and the sides with 28 inches on the bottom for the base of the headboard (which the bed frame will later attach to).


Step 5: We used Dremel’s Saw-Max to cut out the inner section of the headboard frame for the straight cuts. It was so easy to use and you can start cutting right in the middle of the board. We also used it to cut the boards for our bed frame. It is nice to have when you don’t want to pull out your larger table saw. We found it to be really manageable (especially in a woman’s hand) and it comes with blades to cut through metal and masonry.
For the curved portion, we had to take a small drill bit and drill a few holes along the curve so that we could cut the curves with a jig saw.
*Ignore the double pencil lines on the right picture above…we had initally thought to have a 2 inch frame and changed it to a 2.5 inch frame at the last minute to give the headboard more stability…which is a choice I am glad we made.
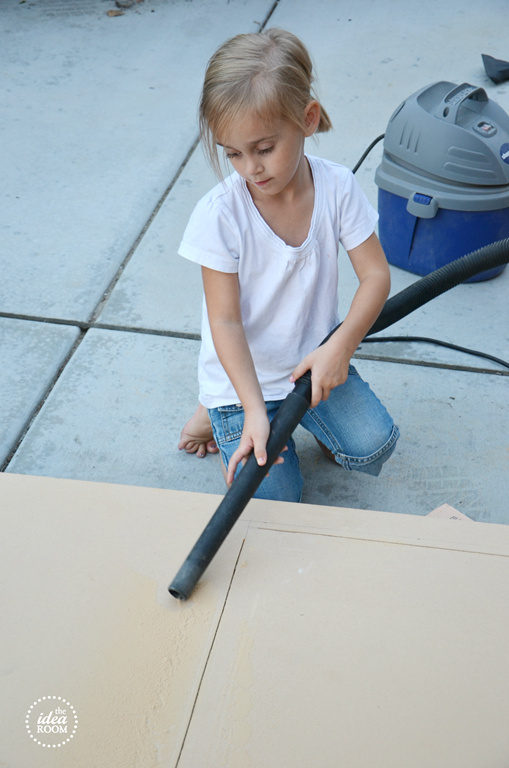
Step 6: After the middle section has been cut out…find some cheap labor to clean up your work site. :)…Sand both pieces of wood well and then paint the outer frame.
I will share how we made the tufted headboard in a later tutorial next week! I will include a link to it here when I have it ready!

In the meantime…I need to figure out what to hang above her bed now. I am terrible at the final staging of a room! Any suggestions? You guys are always so helpful with these sort of things! I make the big items and you help me decorate mmm kay?

Using some existing supplies we had on hand we were able to make this bed for just over $110 which is a pretty good price for a bed…especially a tufted bed…and the best part? You can make it so that it fits your style and tastes EXACTLY!! I like that!

*I was provided a Dremel Saw-Max and a gift card to complete this project from Dremel. However all opinions and statements are mine and mine alone.
*Update 10.20.13–DIY Tufted Headboard–Part 2 has been posted.
JOIN OUR NEWSLETTER
Would you like more Recipes, DIY, Printables and Organization Ideas?
Subscribing to the newsletter will enable us to periodically send you creative content exclusively for Idea Room subscribers.
*View our Privacy Policy here.


it’s gorgeous and soophisticated! her room is so lovely!
Thank you so much Cassie! I really appreciate you stopping by and taking the time to comment.
Love it! Great job. Can’t wait to see the next tutorial.
Thanks Joanna! Hoping to get it up sometime next week!
The second tutorial has been posted! http://www.theidearoom.net/2013/10/diy-tufted-headboard-part-2.html
This is gorgeous Amy!! Love love love it. Come teach me in person how to make one! Or better yet- just make me one? xoxo
Thank you my friend! You know I would love that! Any Mique time is awesome!
BEAUTIFUL!!! What color paint is that on the walls? I really like it!
Thank you Ann-Marie! The paint on the walls is Benjamin Moore’s Rockport Gray at 50%.
It’s beautiful and so sophisticated!! Love it!! Thanks for the tutorial!!
You are welcome! Thanks so much for your sweet support!
My daughter has been talking about a tufted head board for awhile now. Can’t wait to see that process! Great job. Just the inspiration I need.
Oh yay! I was surprised at how easy it actually was. Just a little time consuming all together…but you can totally do it!
I just added the other tutorial for this bed if you are still interested! http://www.theidearoom.net/2013/10/diy-tufted-headboard-part-2.html
I love your tufted headboard! A princess crown would look sweet above the bed. I’m sure you could cut one out with your handy Dremel!
Oh! A princess crown. She would definitely LOVE that!! Great idea!
I love the pillows on the bed! The texture is so fun!
Thanks Nikki! I LOVE pillows. They are an easy way to add some color and interest to a room! Thanks so much for taking the time to leave a comment!
Love the grey nightstand, did you make that too? It’s a really lovely room, your daughter is one lucky girl!
Thanks Brooke! I did not make that! I found that at Target several years ago. It was in my older daughters room and was white. I simply spray painted it to give it some new life. I used Rust-oleum Spray Paint in Granite in a Satin finish.
I’m just wondering where you got that perfect nightstand or if you built that too?!
It’s perfect for my own bed, as it’s a taller bed. Thanks so much, and the room is gorgeous!
Thank you Lisa! I did not make the nightstand! It was from Target a few years ago in another daughters room. It was originally white and I spray painted it gray. Rust-Oleums Granite in Satin finish!
Wow this is so stunning! Perfect bed!
Thank you Cindy! Thanks so much for the sweet comment! Miss you!
Amy, this is absolutely beautiful! You did an amazing job. The colors in her room are so nice & soft too. What an impact!!! Gorgeous.
Thank you so much Kellie! You are so sweet! The colors match her sweet personality for sure!
Love the pillows too! Where is the bedding from?
The bedding is from The Land of Nod and I believe it is still available. It also comes in a soft yellow!
When are you going to post the secondary part of the tutorial?! I want to do this!!
Hoping to get it up here soon! I am heading out of town again here so hopefully I can get it done!
Rachel–I just posted the second tutorial! http://www.theidearoom.net/2013/10/diy-tufted-headboard-part-2.html
Love the room! Where did you get her bedding? I am loving it! So shabby and chic! Perfect for a little princess!
Thank you Jen! The bedding is from Land of Nod and I think they still have it available!!
Please tell me the color paint you used in that adorable room! I am having the hardest time picking paint colors and I love!!!
Thank you Andrea! The paint is Benjamin Moore’s Rockport Gray cut in half by 50%. Just tell the hardware store who is mixing your paint to make it at 50% and they will know what to do…or at least I hope so! :)
What kind of sander did you use? I am looking to buy one. Also, what is the paint color on the headboard?
Love the bed! Also, curious where you got the night stand?
It is a hand me down from her older sister and is from Target about 8 years ago. I spray painted it this gray color.
Can you share the gray color used on the nightstand? Thks
I actually just used a Rustoleum Gray Spray Paint. Thanks.
What a beautiful headboard! Fit for a daughter. I imagine making this is quite challenging so thanks for posting this DIY project. And for $110, that is pretty affordable, considering how much you’d save if you bought one.
Allen- Thank you so much. I would love to see pictures of your finished project.