
I have been wanting to build a Growth Chart for a couple of years now. Growing up, we had a wall dedicated to tracking my siblings and my growth over the years and it has been so fun to look back and see how tall we were compared to each other and to my own children at the same ages.
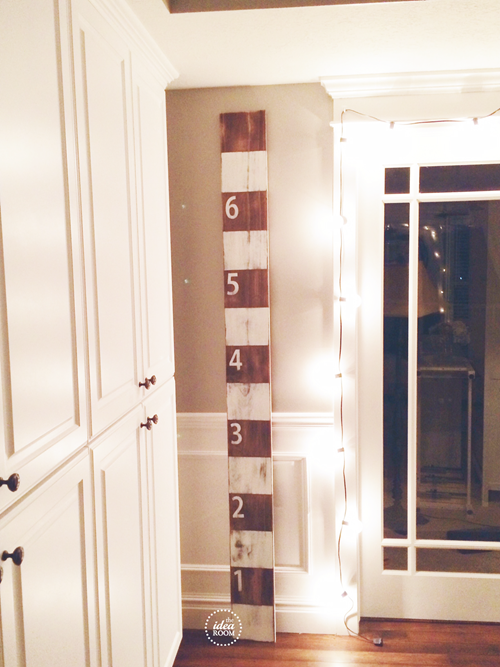
When we moved into this home almost 11 years ago we dedicated a wall in my youngest daughters room for the same thing. But, I always wanted to have a portable one so that I could switch things up cause well…I obviously like change…haha! I finally got around to making one.

I have seen several versions floating around on the internet and fell in LOVE with Cozy Cottage Cute DIY Growth Chart. Usually if I see something, I like to add my own changes to make it my own personal style…but hers was perfection…so I pretty much copied it with a few exceptions. Be sure to head on over to her site to see just how she made hers…
Materials needed:
a pine board 1 x 8 x 7 feet (actual measurements are 3/4 x 7 x 7 feet)
stain
white paint
painters tape
coarse sand paper
hand sander (if possible)
number stickers or vinyl 1-6
Directions:
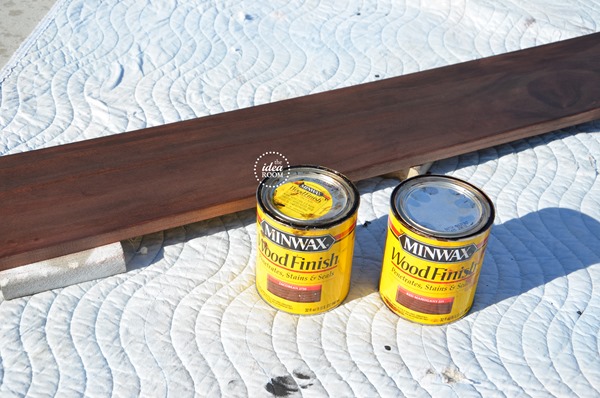
1. Stain your board. We used 2 stains…which is totally unnecessary. We only did two because we wanted it to match the wood color in our home and the closest match we have found is to mix Minwax’s Jacobbean and Red Mahogony. Allow board to dry completely after wiping away any excess stain.
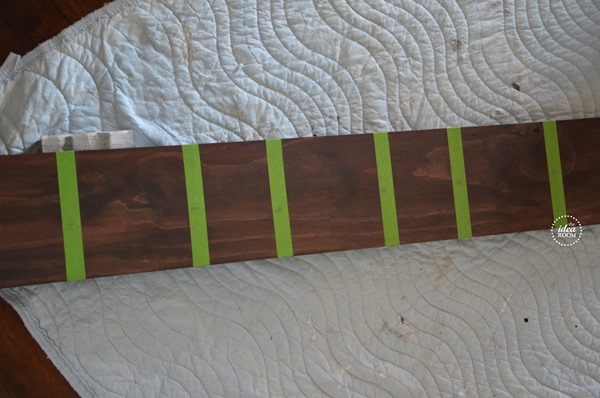
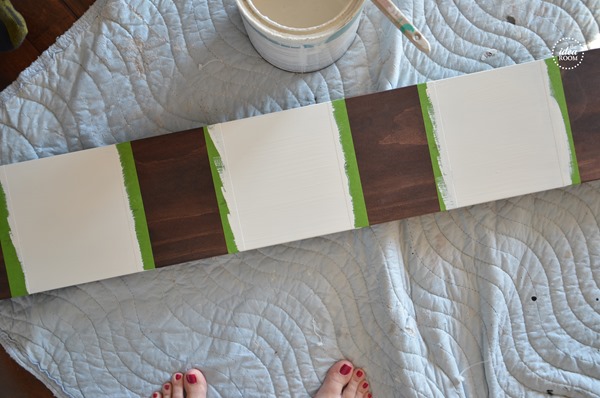
2. Then we taped off the board in 6 inch sections. And painted every other section with white paint and started so that the bottom 6 inches is white. We gave it two coats and let it dry completely. Be sure to pull off the tape while the paint is still slightly wet so you get a nice clean line without the paint pulling up.
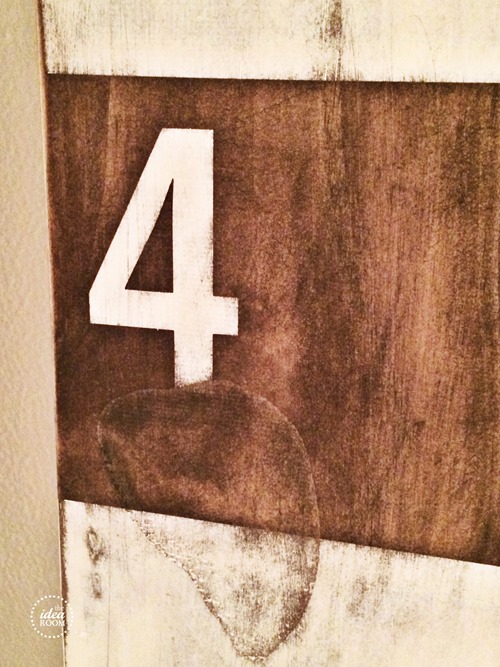
3. Attach your number stickers in the stained section just below the white line above it, which should be every foot on your board so that the white line marks the 1 foot length, the 2 foot length and so on. Paint your numbers using the vinyl as a stencil for the number. Pull up the stencil before the paint is fully dry. Let dry completely. I made sure I let it dry at least 24 hours so that when I sanded it, the paint didn’t smear.
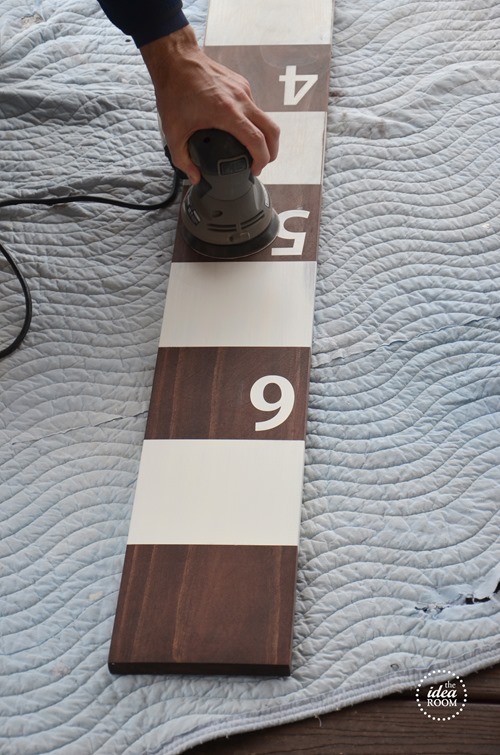
4. Then take your hand sander and go to town sanding this baby. I wanted it to have a real distressed look to it.
We used my new favorite hand sander, Rockwell’s 5 inch Random Orbital Sander.

It is the perfect size for a woman’s hand and is easy to hold and fully control because it only weighs 3 lbs. I also love that it has a cyclonic filter that sucks all the dust into a little canister instead of allowing the dust to fly everywhere. LOVE that feature. It has allowed me to sand my projects inside during the winter months without getting dust everywhere! It is also the quietest sander I have ever used!
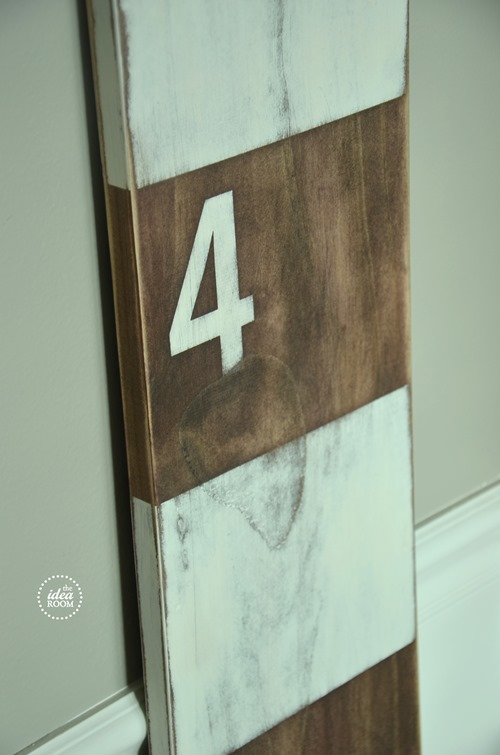
5. Pay special attention to some of the knots and fun unique characters of your piece of wood and sand those areas to add some interest to the final Growth Chart. Wipe down the board and you are ready to go!

The hardest part will be trying to figure out WHERE to keep it. Everyone seems to want it in their room. We plan to transfer our past measurements to this new chart and marking them on the board with a fine black sharpie. We just draw a line on one edge of the chart with the child’s initial and the year and month they are in. For example if we were to measure me right now we would mark a line at 5 feet 8 inches and write ___ A 40.6 yr.
Yes…I am 40!
And yes…my camera is still dead and I have yet to replace it. All these photos were taken on my iphone and the quality is killing me people! So bear with me!! Hoping to get my new camera by this weekend!!

JOIN OUR NEWSLETTER
Would you like more Recipes, DIY, Printables and Organization Ideas?
Subscribing to the newsletter will enable us to periodically send you creative content exclusively for Idea Room subscribers.
*View our Privacy Policy here.


This is adorable. And you are old. (jk! ;) Dang broken camera. I think the pics look great! xo
Yes…yes I am! Thanks!!
This is so cute! I was just thinking about a growth chart the other day, so this is perfect timing…pinning! ~Lisa
Yay! Glad I could give you some inspiration so you can build the perfect one for your home and taste!!
Where did you get the numbers/stencils from?
I cut them out on my cutting machine. I used a four inch number. You can print out numbers on cardstock and then cut the number out and stencil it the old fashioned way. I know that the Cozy Cottage Cute said she used stickers from Michaels! Hope that helps!
Thank you so much for mentioning my site. Your growth chart turned out lovely. :)
Thanks Sarah! Thanks for creating something lovely for me to copy! I truly didn’t want to change very much on it!! Thanks for stopping by. Hope to send some traffic your way.
Love the stripes! So cute!!
Thanks Jamielyn. They for sure are one of my favorite parts of this!
I’ve been meaning to make a growth chart for, oh, about 7 years. Maybe this will be the push I need! Love the 6″ sections.
haha! Sounds familiar! Always too many projects on my plate!
Oh my heavens – LOVE this!!! Great job, Amy!!
I love this idea. I would never mark on the walls and never found anything pretty enough in lieu of that, but this is awesome! I def want to make one!
Such a cute ruler!
We love our wooden growth ruler. Hubby made ours too look more like a traditional ruler, with our family name where a company name would be and “est 20xx” for the year we were married. Its been fun to make a few for siblings’ families etc.
Instead of stencils, we printed our numbers/letters on printer paper and did the old school pencil transfer (shading the back of paper with pencil and then tracing). Our boards were soft wood tho so that helped us see our tracing when we went over it with paint pens.
http://dowdeyfamily.blogspot.com/2014/03/6-pinterest-ideas-you-can-find-at-our.html