
Recently I shared with you how we made this Tufted Headboard for our youngest daughter’s room. I just covered the first part for how we made the bed and the cut out headboard. Today, I want to share with you how we did the actual Tufting.

To see the first tutorial you can find it here:
{DIY Tufted Headboard—Part One}

You will need the following supplies to make your Tufted Headboard:
-
Piece of MDF board cut to your specifications
-
2 inch foam (we found ours at JoAnn’s use your 40% off coupon)
-
Waxed Thread (JoAnn’s)
-
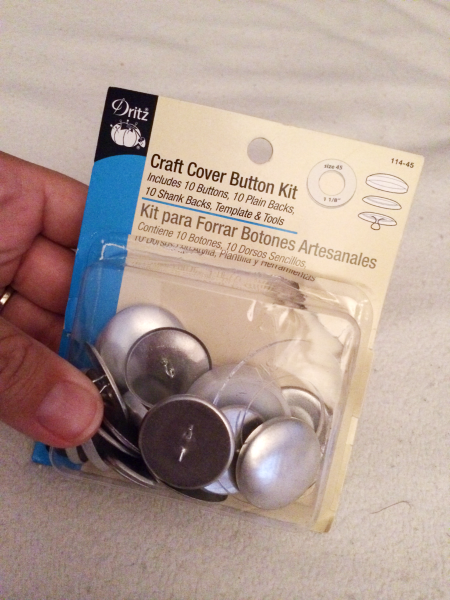
Button Making Kit with enough buttons for your project (JoAnn’s)
- Large Upholstery Needle
-
Material for the tufted headboard

(Cut your MDF (if needed) to the specific size you need. Ours was cut out from the headboard, so we did not need to cut it anymore). See Part One for more details on this:
{DIY Tufted Headboard—Part One}
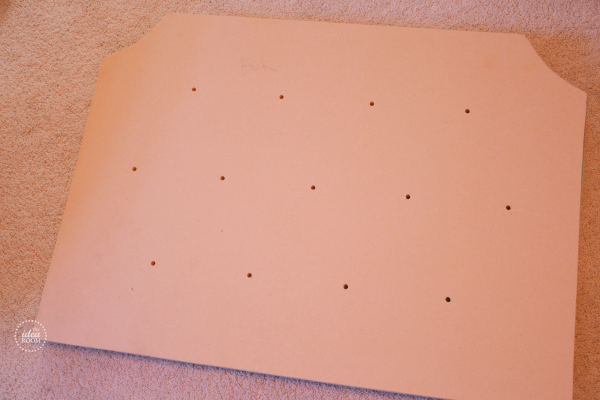
Figure out where you want your buttons. Do you want a square tuft or a diamond tuft? We went for the diamond tuft. Draw a dot with a pencil on the headboard where you will be drilling your holes. Then drill all the way through the MDF board with a drill and drill bit. We used a 3/8 inch drill bit.
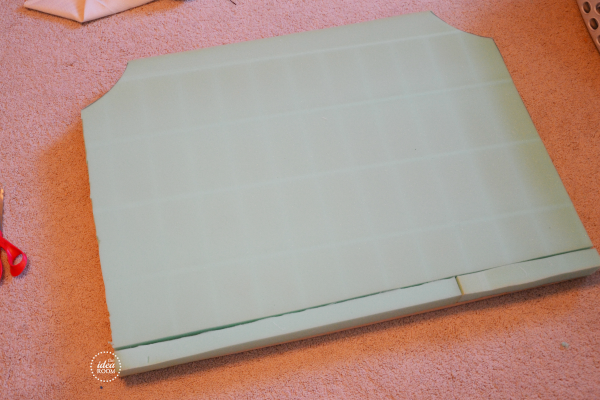

Cut your foam so that it fits your MDF headboard with just a tiny bit of overlap around the edges. We had to piece ours at the bottom. We added the piece to the bottom where it would be more hidden by the pillows on the bed just incase it didn’t piece well together. We did not end up having any issues with this though at all in our finished head board.


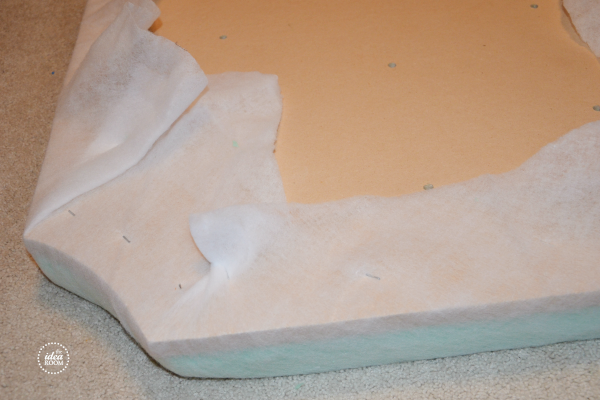
Cover both the MDF headboard and the foam with your quilt batting. Then pull the batting around the sides and secure it using a staple gun to the back of your headboard. Pull it so that it is nice and tight with no puckers or ripples on the front of the headboard. This will hold everything nicely in place and will give you a nice smooth finished product. Cut off any excess quilt batting.
*You will most likely need two people to do this and the following steps.

Now take your Fabric you are using for your headboard and wrap it around the headboard the same way you did the quilt batting. Be sure to be very careful with the edges. Pull the material tightly and secure with several staples on the back of the headboard. Trim any excess material.


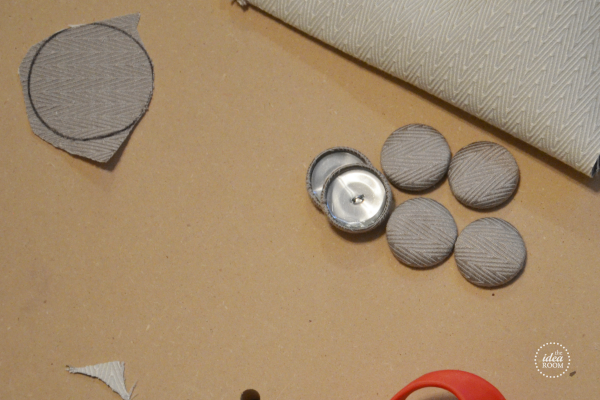
Set aside your headboard and use your Fabric scraps to make your tufting buttons. Simply follow the directions on the back of the package and make enough buttons for your headboard. We used the buttons that were 1 1/8 inches in size.

Take a large needle, we used a very long and large quilting needle that had a large eye. It needs to be able to be long enough to go through the 2 inch thick foam and the headboard. We threaded the buttons onto the needle with the waxed thread and doubled it for strength.
My husband was at the back of the headboard and I was at the front. He poked the needle through the hole from the back end, just to make a small hole so we could see where to put the needle and thread so the button would be in the right spot. Then I took the needle from him and threaded it with the button (or you can use two needles so you don’t have to keep swapping). I pushed the needle through the front and he took it on the back. I pushed the button in to make a deep tuft while my husband pulled from the other side and simultaneously stapled the thread several times on the back of the headboard to hold the button in place.
We repeated this process for all of the buttons.
Be sure to push in each button the same so that they are even in the front. This is important for the overall look of your tufting. We ended up fixing one button that was not pushed in far enough after inspecting the final headboard.

That is it! You should be done with the tufting! Wasn’t that easier than you thought it would be?

We then took the headboard and inserted it into the cut out from the original bed. This now gives us a nice frame around the headboard and also hides the sides of the tufted head board and gives it a nice clean finish!

On the back of the headboard, we screwed in some metal brace plates to hold the head board in place and so that it would not fall out on our little one’s head. This secures it nicely in place.

I have to tell you…this is seriously one of my FAVORITE projects we have ever built. I LOVE it! I can’t wait to finish up the rest of her room. The other side is currently a mess. Next thing up is to paint her dresser!

I had many ask about her night stand. It is from Target and it is a few years old and is a hand me down from her older sister. It was white and in need of some serious TLC. So I cleaned it up and spray painted it gray with Rust-oleum Spray Paint in Granite in a Satin finish.

Would love to know if any of you end up making one! xo
JOIN OUR NEWSLETTER
Would you like more Recipes, DIY, Printables and Organization Ideas?
Subscribing to the newsletter will enable us to periodically send you creative content exclusively for Idea Room subscribers.
*View our Privacy Policy here.


Can you make one also for me? :)
Julie’s blog
Ha! I would love too! :) After I make one for myself!
What is the gray paint color in the room?
Thx!
I love this bed!!! It’s totally what I’ve been looking for!! I’m going to try it out this weekend but may I ask what color fabric this is??? It’s the exact look I’m going for!!
So sorry! I didn’t see this till now…weird! The fabric is from JoAnn’s in their home fabrics collection. I for the life of me can not remember the name. It is on the big large rolls. Hope that helps…but I realize this is way over due!
I love this room it looks so pretty. Can I ask what color paint you used? Its the perfect shade of grey.
Thank you Jackie! The Paint color is Benjamin Moore’s Rockport Gray cut by 50%
I love this.. and how easy.. you did an really awesome job on this ..
I am a very picky one when it comes to diy projects.. some look very sloopy and not nice.. this is so perfect.
LOVE IT!!
Wow! Thank you so much Erika! That means a lot to me! I too tend to be pretty picky. Thanks so much for sharing that!
Did you build the frame that the headboard is attached to? Is there a tutorial for that? I love this project and think it would be perfect for my 5 year old daughter’s room. Just trying to figure out how I would attach the headboard to regular metal frame or what I could do instead. Thanks!
Yes…we did! There is a link to part 1. You should find the tutorial for that there. Let me know if you can’t find it in the post.
I LOVE this headboard! im considerinf making it for my own bed! but i have a question and This may seem silly but did the tufted part just fit back into the piece it was cut out of? I would think with the fabric and batting and foam, that it wouldn’t go back in? Did you have to cut the white frame part again or something? Or does the tufted part not sit flush with the other white wooden part? I know I would get to that part and then be stuck. Thanks!!
Great question. I worried about the same thing. We did not have any problem getting it back in place. It fit fairly snug…but that is a good thing because you want it to stay in place.
I LOVE that color grey! When you say cut by 50% what do you mean?! If I go into them and say that will they know?! Thanks!
What does it look like in the back? Thank you.
Does it matter what type of fabric you use? And if so, what type of fabric would you suggest?
I would use a heavier home fabrics that come on the larger rolls. Linens work nicely and have a luxurious look.
Did you secure the tufted part to the white part at all? Or was it a tight enough fit without out?
What were the measurements of the spacing between the button holes?
Did you just cut your shape out of MDF and reinsert it?? and secure it in back
Yes. We secured it with some metal braces with screws on each side of the insert and the back of the frame.
Just found your blog and love the headboard project. Been wanting to buy one but maybe I’ll give this a try. Question, how do you get a clean straight cut on your foam rubber? What did you use to cut it with? Thanks