
Last spring we updated my daughter’s bedroom because I was eager to build her a Tufted Headboard. The hubs and I had recently built a DIY Tufted Headboard and Bed for our youngest daughter that I was absolutely in L.O.V.E. with! It turned out being a lot easier to make than we had originally anticipated, so I knew it would be a project that we could finish pretty quickly.
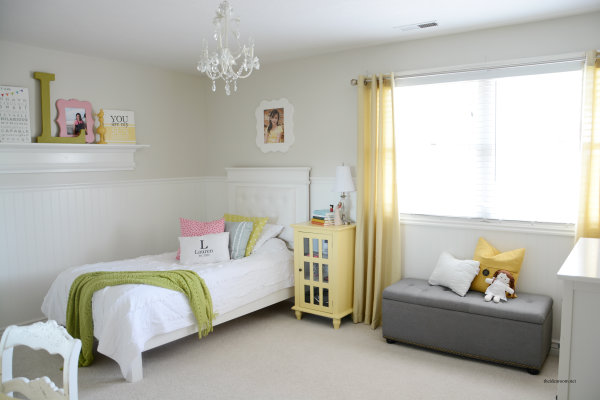
Several years ago we built this Farmhouse Bed using a tutorial from Ana White. We had added our own twist on it by stenciling the middle section. You can see that older version here: DIY Stenciled Headboard
But it was time for a change…because…well…I like change!
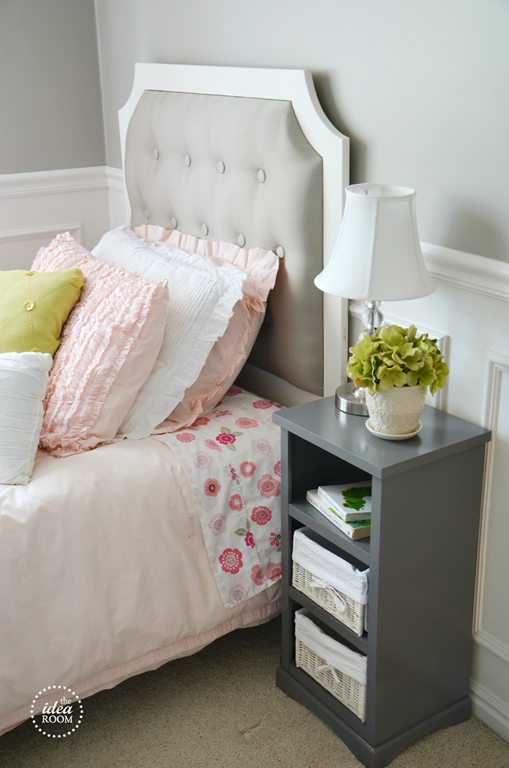
I wanted to turn her Farmhouse Bed into a bed with a tufted headboard. I simply needed to take a piece of plywood and cut it to fit the middle section of the bed where the stencil was. I knew we could then drill holes in the wood (where we wanted the buttons), add a foam pad the same size and then cover it with fabric and tuft it. We could then attach it with screws from the back of the headboard to hold it in place.
We already had all of the materials needed from when we made the youngest daughter’s tufted headboard so it would be easy to make.
*This tutorial is taken directly from the first Tufted Headboard we shared. I am adding it here so that I don’t have to write the tutorial twice. This is why the images show a different shaped piece of wood and different color of fabric.
You will need the following supplies to make your Tufted Headboard:
-
Piece of MDF board cut to your specifications
-
2 inch foam (we found ours at JoAnn’s use your 40% off coupon)
-
Waxed Thread (JoAnn’s)
-
Button Making Kit with enough buttons for your project (JoAnn’s)
- Large Upholstery Needle
-
Material for the tufted headboard (I l

(Cut your MDF (if needed) to the specific size you need. Ours was just a piece needed to insert into our existing headboard. To see how to make an ENTIRE Headboard Frame you can check out this post here:
{DIY Tufted Headboard—Part One}
Figure out where you want your buttons. Do you want a square tuft or a diamond tuft? We went for the diamond tuft. Draw a dot with a pencil on the headboard where you will be drilling your holes. Then drill all the way through the MDF board with a drill and drill bit. We used a 3/8 inch drill bit.
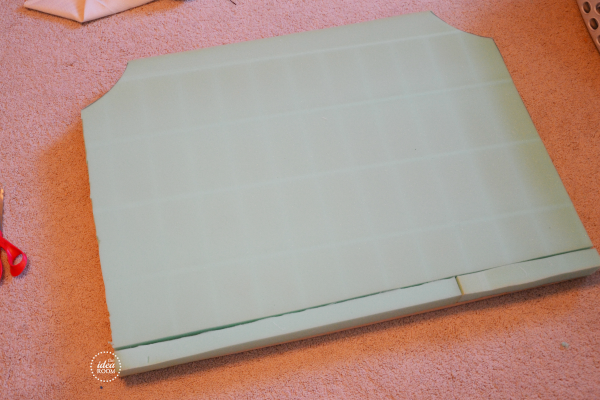

Cut your foam so that it fits your MDF headboard with just a tiny bit of overlap around the edges. We had to piece ours at the bottom. We added the piece to the bottom where it would be more hidden by the pillows on the bed just incase it didn’t piece well together. We did not end up having any issues with this though at all in our finished head board.


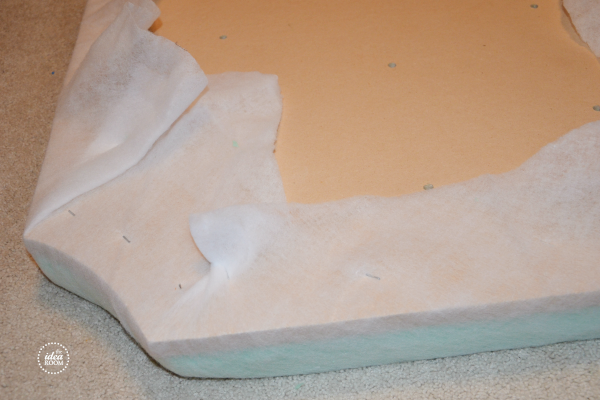
Cover both the MDF headboard and the foam with your quilt batting. Then pull the batting around the sides and secure it using a staple gun to the back of your headboard. Pull it so that it is nice and tight with no puckers or ripples on the front of the headboard. This will hold everything nicely in place and will give you a nice smooth finished product. Cut off any excess quilt batting.
*You will most likely need two people to do this and the following steps.

Now take your Fabric you are using for your headboard and wrap it around the headboard the same way you did the quilt batting. Be sure to be very careful with the edges. Pull the material tightly and secure with several staples on the back of the headboard. Trim any excess material.


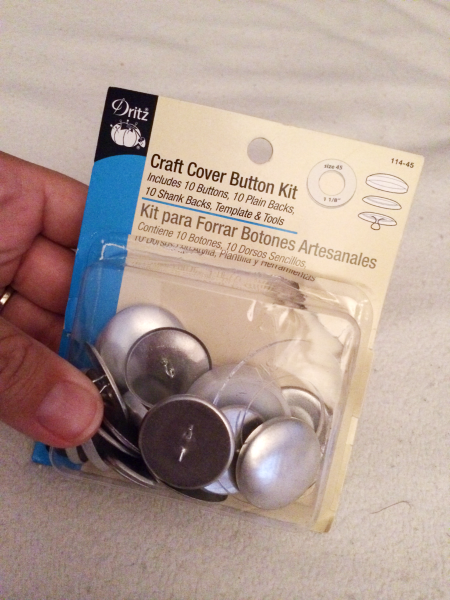
Set aside your headboard and use your Fabric scraps to make your tufting buttons. Simply follow the directions on the back of the package and make enough buttons for your headboard. We used the buttons that were 1 1/8 inches in size.
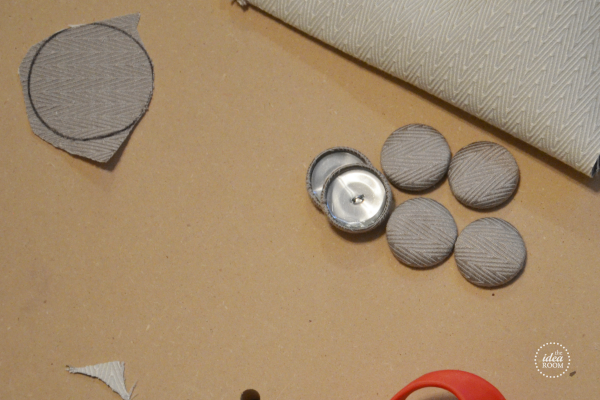

Take a large needle, we used a very long and large quilting needle that had a large eye. It needs to be able to be long enough to go through the 2 inch thick foam and the headboard. We threaded the buttons onto the needle with the waxed thread and doubled it for strength.
My husband was at the back of the headboard and I was at the front. He poked the needle through the hole from the back end, just to make a small hole so we could see where to put the needle and thread so the button would be in the right spot. Then I took the needle from him and threaded it with the button (or you can use two needles so you don’t have to keep swapping). I pushed the needle through the front and he took it on the back. I pushed the button in to make a deep tuft while my husband pulled from the other side and simultaneously stapled the thread several times on the back of the headboard to hold the button in place.
We repeated this process for all of the buttons.
Be sure to push in each button the same so that they are even in the front. This is important for the overall look of your tufting. We ended up fixing one button that was not pushed in far enough after inspecting the final headboard.

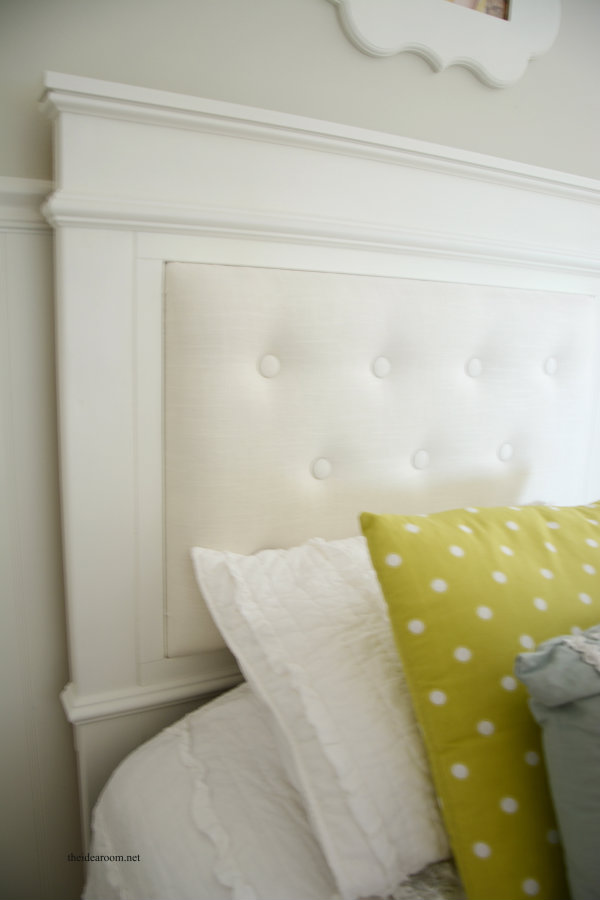
I just love it!! I am happy we decided to go with the white material. I do have to tell you to make sure if your foam is a green color (which ours was) and you have a light material…be sure to cover it with a few layers of batting or else you will be able to see a green tint through the material when finished… Oopsie! Lesson learned. We had to undo all the buttons and wrap a few more layers of quilt batting around the foam to prevent the green from showing through! Don’t make the same mistake!
And in case anyone is wondering, the paint color on the walls is Benjamin Moore’s Winds Breath. I love it! It is a nice soft, warm bone grey color.
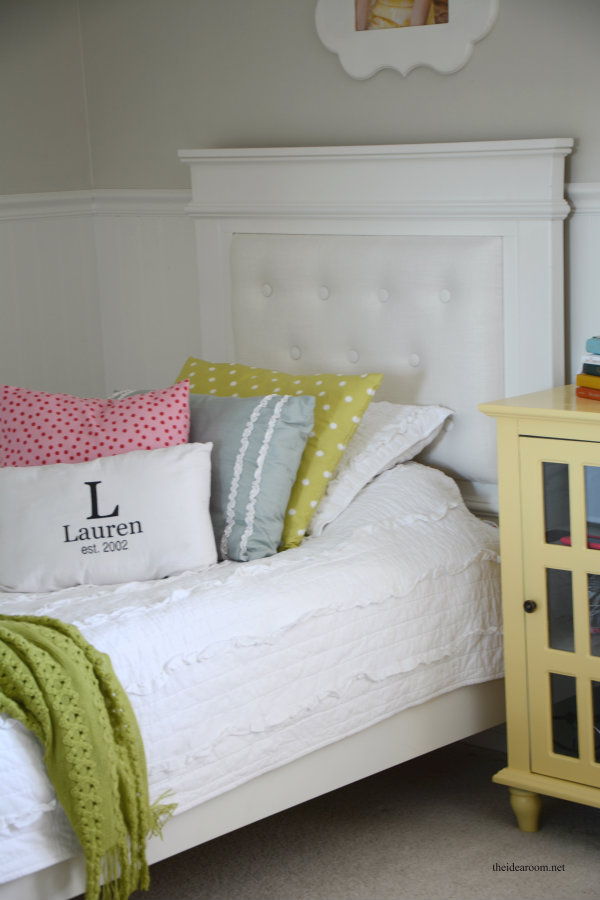
Here is the first Tufted Headboard we made for our youngest daughter’s room.
You may be interested in how we updated our daughters room here.


That came out absolutely lovely! It looks professional. Nicely done :)
Thank you so much Christine! xo
I love it! It’s so fresh and sweet. Between your fun tutorial and the warming weather, the DIY bug is hitting hard! :)
Thanks for the sweet comment! I get the same way!! I am excited to be able to work outside on DIY projects again!!
Can you please tell me the source for the chandelier? I love it!
Yes! I got it from Home Depot online. It is by Hampton Bay and is fairly inexpensive considering chandelier prices! Here is the link to it: http://www.homedepot.com/p/Hampton-Bay-Kristin-3-Light-Hanging-Antique-White-Mini-Chandelier-HB3430-44/100665765?cm_mmc=shopping-_-bingpa-_-27-_-100665765&ci_src=328768002&ci_sku=100665765
Thank you! Your daughter’s room is perfect!
This is exactly what I want for my daughter’s room, can you tell me the name of the wall paint in your younger daughter’s room?
The gray wall paint is Benjamin Moore’s Rockport Gray reduced 50%. The paint store can reduce it for you if you tell them.
Where did you get the bedspread? I would love something like that in my room?
That one is from Target a few years ago!
This is beautiful! I’ve been wanting a headboard like this for my own room, but I’ve been worried it’s a project I wouldn’t be able to handle. -_- Absolutely gorgeous, though!!
Amy, I absolutely LOVE this! I’ve been begging my husband to help me make one of these for our room. Awesome step-by-step guide. Can’t wait to do it now. I’ll post a pic and tag you when it’s done. Thanks Amy!!
Fun! I would LOVE to see it! xo
What color of white trim did you use with BM Wind’s Breath?
I can’t remember the color of white but it is BM White. Thanks.