
*This is a sponsored post on behalf of Cricut.
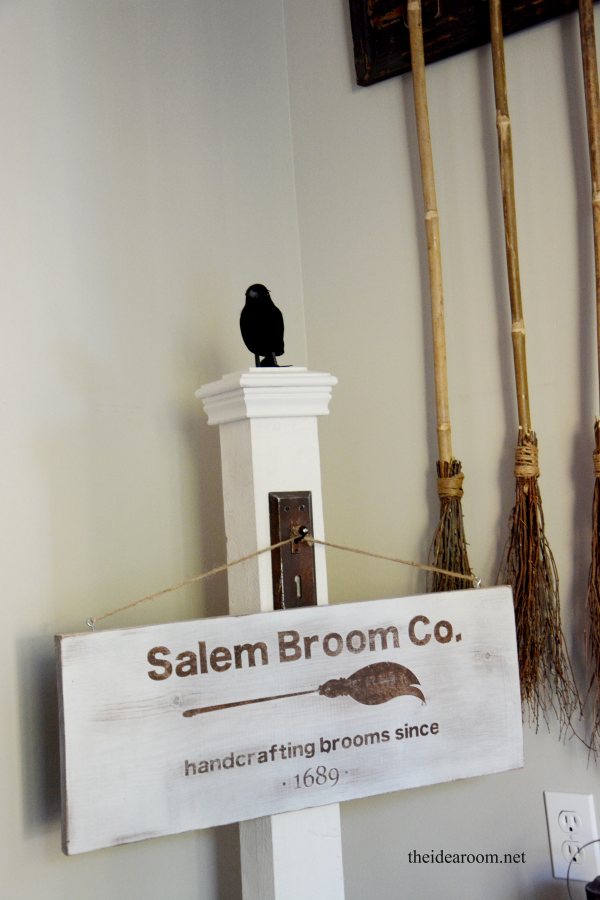
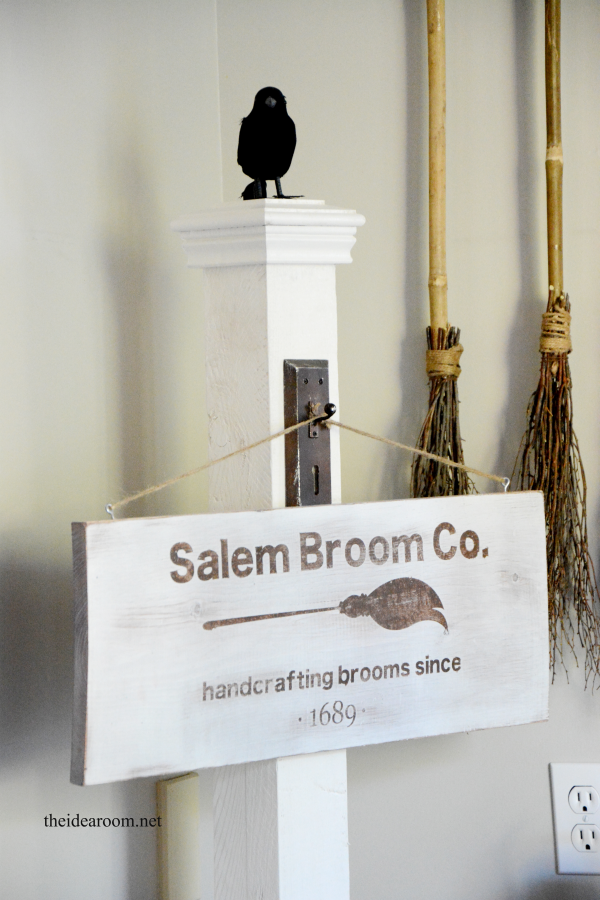
I LOVE decorating for the Holidays! Don’t you? I also love to come up with new and different ideas for the Holidays. I have a small corner in my entry way that is the perfect little spot to add some fun Season decor items. Well…I have had a JOY sign hanging in this corner since last Christmas! haha! It was time to finally create a unique Halloween Sign for that space.


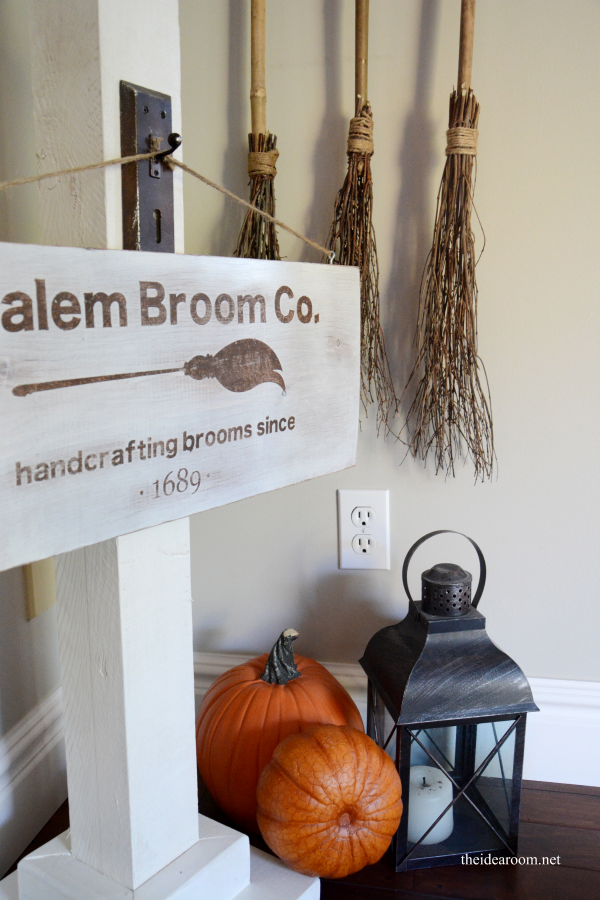
So, because I don’t ever do anything half way (which can be a curse…LOL) I created a couple of different Halloween Signs to decorate the area. Today I will be sharing this Salem Broom Co. Sign with you. I created it with my Cricut Explore and you can make it today!
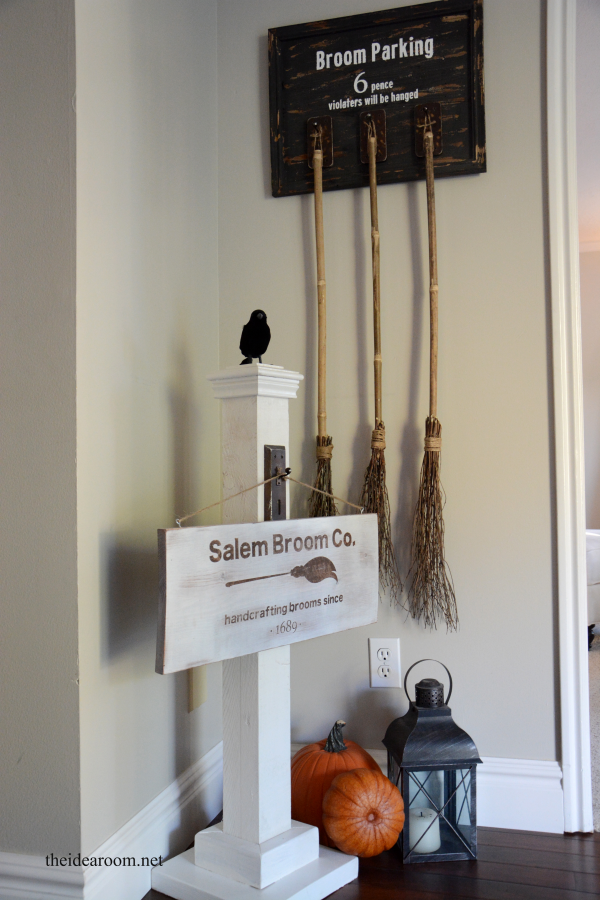
I also created this Broom Parking Sign which I really love! I will be sharing that in a later post for you as well! I had initially wanted to hang the Salem Broom Co. Sign on the wall, but couldn’t get it to fit well on the space I had. I needed a vertical sign but the vertical sign option wasn’t working out how I had envisioned it…so…not one who is easily deterred, decided to build this white post to hang the sign from. And of course I will also share how I built the post in a later post.
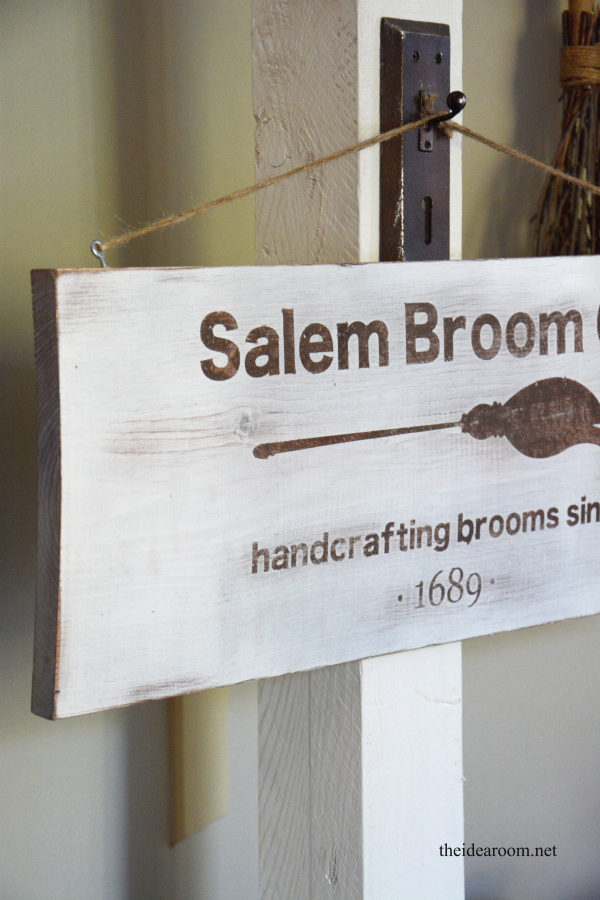
You will need the following to make the Salem Broom Co. Sign…
Supplies:
Piece of Wood 9 x 24 inches
Wood Stain (I used Minwax’s Red Mahogany Stain)
Stencil Paint Brush
Paint Brush

Directions:
1. Cut your wood so that it measures 9 x 24 inches.
2. Sand around the edges and smooth down any rough spots. Dust off the board with a damp, clean rag.
3. Stain the board with your stain color of choice. Let dry 24 hours.
4. Paint over the entire board with your white paint and let it dry. I only painted one coat over the board because I wanted some of the stain to show through. You can paint yours to your desired look.
5. Cut out your vinyl on your Cricut Explore machine which you can do right now by clicking here:
![]()
6. Pull the vinyl LETTERS out of the vinyl so that you can do a reverse stencil and paint the words on the sign in your brown paint.
7. Attach the transfer paper to the vinyl and transfer it onto your wood…be sure to center it.
8. Stencil the lettering with your brown paint and stencil brush. I did it fairly lightly so that the sign had an aged look.
9. After the paint has dried, sand the edges and the surface of the board in different areas to create a worn look.
10. Attach the eye hooks to the top of the sign or attach the picture hooks on the back of the sign depending on how and where you want to hang the sign.
I would love to see photos if you make one! I always love to see when you guys make something that I share here! Happy Halloween Crafting!
If you you don’t have a Cricut Explore but were looking to get one, they are having some amazing deals on them right now! You can see what they are offering here:


I love it….but i think i will put “violators will be burned at the stake”!!! really cute halloween idea!!
Love that idea! Thanks Cindy!
So fun! That’s it- I need a Cricut! I saw a cute Halloween sign that said “Witches Parking- violators will be TOAD.” lol.
haha! That is funny! Darn! Wish I would have seen that! LOL!
These signs are so fun! Love them!
Super cute!!! Did you diy the brooms too?
Thanks Chatie! No! I was going to and then found some at Michael’s!!
Love this, Amy!! I totally want to make one. :)
Love it!
Thank you so much Hani!
Love your little entryway decorations. Thanks for sharing with us how you made this and I’m looking forward to some more of your posts.
Awww! Thank you so much Judy! What a fun comment for me! You made my day! xo
Hey Amy,
Love the signs, so making the salem broom company one, which cartridge pack did you use?
It is a custom design that I made. If you click on the link in the green box that says make it now it will take you to the actual page in Cricut Design Space that you can then cut your vinyl directly from. You can make it instantly! Let me know if you still need help!
Is there any way you would provide a pattern for a stencil for Salem Broom Company? I love it, but don’t have a machine. Thank you.
I just bought this to make but now I’m realizing that maybe I need a cricut explore and I only have the Cricut expression 2. I bought the 12×24 mat to make this, too. Will it work on my Cricut?
You will need the Cricut Explore and the 12×24 mat will work on the Cricut Explore!