
Learn how to create beautiful portraits for your home with engineer prints with these tips and tricks for creating your own DIY Engineer Prints. It’s so easy and affordable and makes a great home decor display you will enjoy for years to come.

Hi there! I’m Laura from Inspiration for Moms. I’m so thrilled to be joining The Idea Room’s Summer Series. Today I’d like to share with you an easy DIY project that will help you decorate your home with engineer photos for cheap!
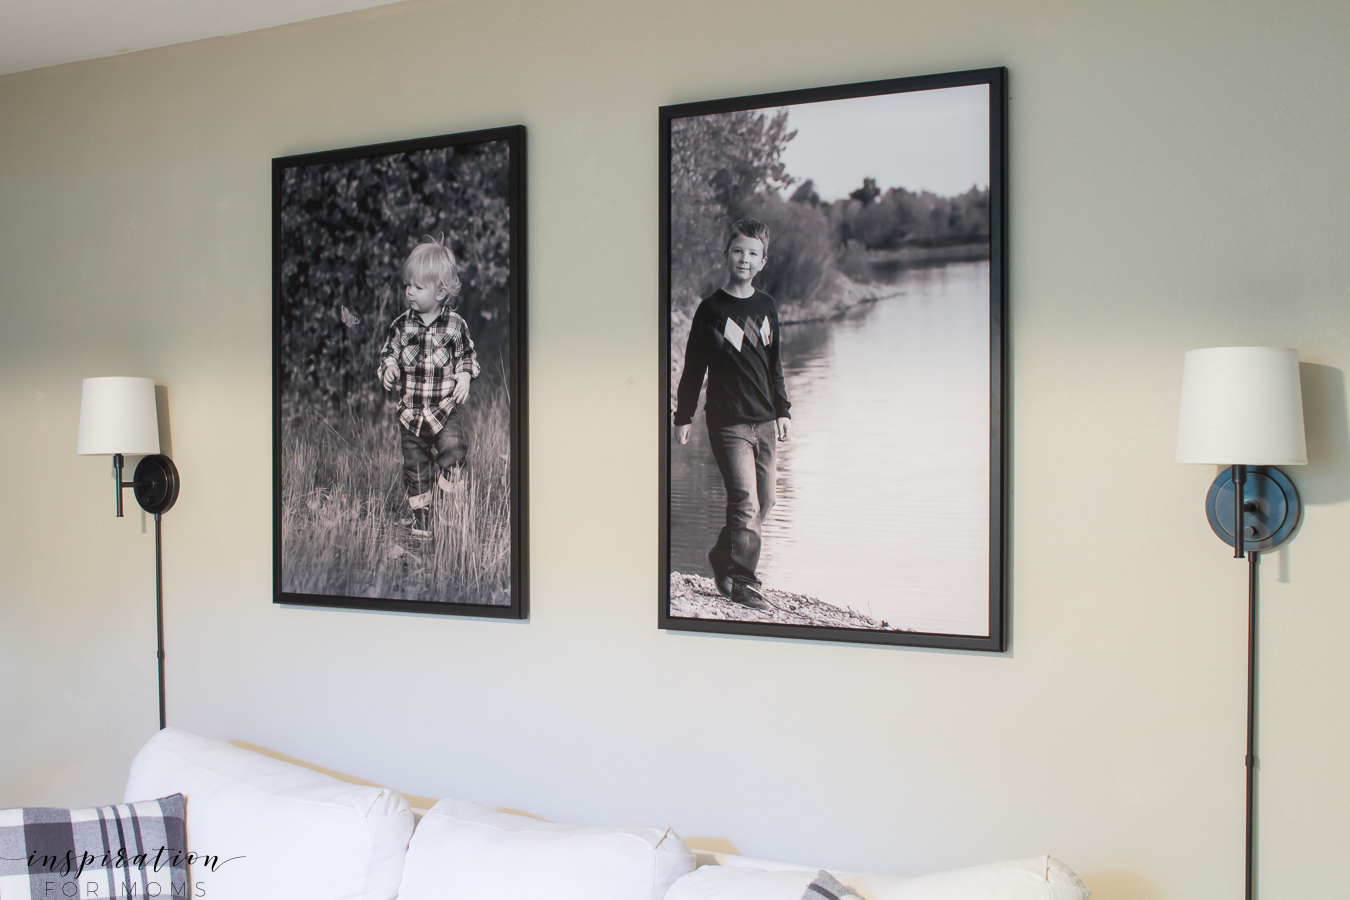
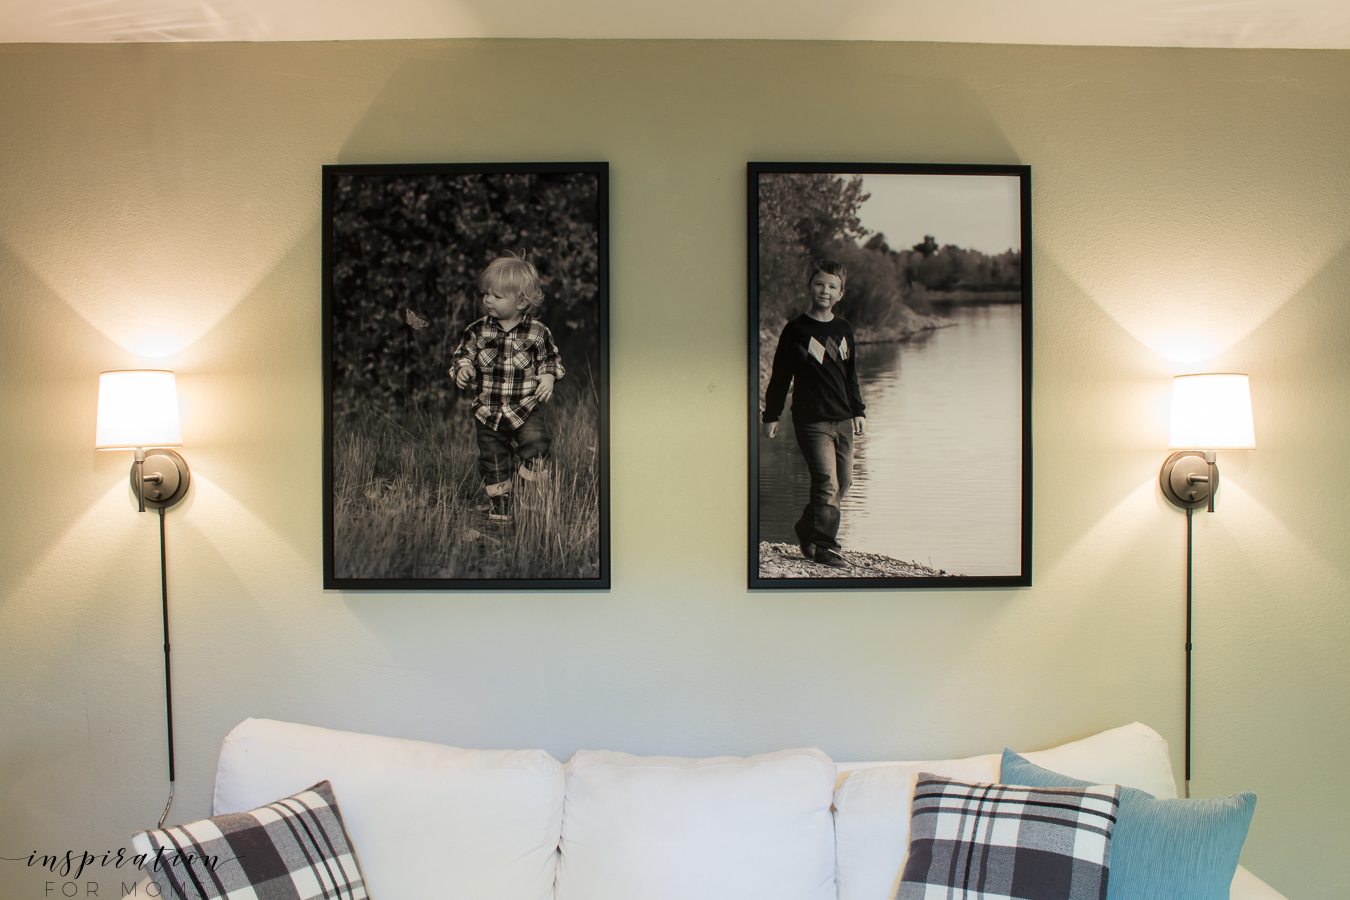
Last Fall my family had portraits taken in the beautiful Colorado foliage. I loved all the pictures and I still want to create a gallery wall for all of my favorites (the never ending to-do list!). But there were two particular pictures that really stood out in that photo shoot for me and I wanted to give them their own place to shine. Our family basement had an empty wall that was screaming for some huge, blown up size prints. I knew that engineer prints was exactly what I needed for this project and I was right!
Hi there! I’m Laura from Inspiration for Moms. Today I’d like to share with you an easy DIY project that will help you decorate your home with engineer photos for cheap!
Last Fall my family had portraits taken in the beautiful Colorado foliage. I loved all the pictures and I still want to create a gallery wall for all of my favorites (the never ending to-do list!). But there were two particular pictures that really stood out in that photo shoot for me and I wanted to give them their own place to shine. Our family basement had an empty wall that was screaming for some huge, blown up size prints. I knew that engineer prints was exactly what I needed for this project and I was right!
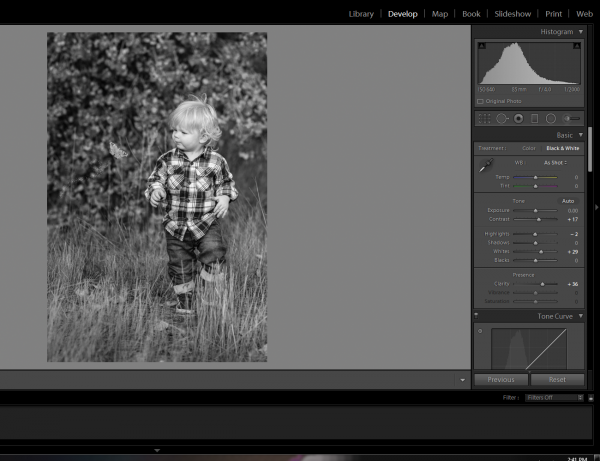
I really loved the gorgeous Fall colors in the original pictures but for the playroom I wanted more of a black and white look. So I did a little bit of editing on my own before sending them to be printed.
WHAT ARE ENGINEER PRINTS?
Engineer prints are giant prints are made on paper typically used for architectural plans, making them an extra light, industrial chic statement. Engineer Prints are an easy and affordable way to fill your blank walls with unique large-scale art, and bring your most storied moments to life. These prints cost only a few dollars. They’re available in black and white, which is a little cheaper, or color for a few dollars more.
Sometimes these engineer prints are also referred to as architectural prints or construction prints.
WHAT SIZES ARE ENGINEER PRINTS?
The engineer prints usually are offered in a few different sizes. Be sure to check what available sizes there are for the company you will be ordering them through. Here are the most common engineer print sizes that I was able to find.
- 18” x 24”
- 24” x 36”
- 30” x 42”
- 36” x “48

HOW TO MAKE DIY ENGINEER PRINTS
You may think that blowing up a photo to a size of 24 x 36 would cause the finished picture to be extremely pixelated and expensive. Well, actually if you do some quick editing first and know where to get it developed, the results can be quite impressive! I have some great tips that can help you get the best images quality and price for such large prints. The original files end up looking like a beautiful higher-resolution photo by simply following a few of my editing tips I will share with you below.
IMAGE FILES
Make sure you are using images that are in the png files or JPEG (jpg) file formats. I started by editing both of my photos using Lightroom. Once I had them open in Develop, I adjusted them from the original color photo to black and white. I think it’s important to do that in the editing process here before it’s sent to print.
ADJUSTMENTS
As you know, engineering prints are not the best quality when printing images, and that’s why they’re so cheap. So to counter that, I also adjust the contrast, whites and clarity— just to help keep the pictures as sharp as possible when it prints.
I did the same edits for the other picture. But there were two additional problems with this original photo, it was in landscape and included more of the lake. I wanted to focus a little more on my son. Go figure, right? ;) So I had to crop it as well.
RESOLUTION SETTINGS
The last step I do when editing is adjust the resolution. Most photos are usually around a 72 ppi (pixels per inch) resolution but if I up to around 200 it will help reduce that pixelated look, which I’m trying to avoid. Be sure to save your edited photo as the biggest file-size you can.
Following these tips can help you to create the best quality engineer print to display in your room.

WHERE CAN I GET ENGINEER PRINTS?
Now that the images are completed in editing, it’s time to send them to print. I use Staples for all my engineer prints. But there are several options where you can have your engineer prints printed for you. Check your local store that does images and prints, or the chain stores like Staples, Office Depot, FedEx Office or the UPS Store.

HOW MUCH DO ENGINEER PRINTS COST?
Engineer prints are typically only a few dollars each which is significantly cheaper than printing a full color or black and white image.
HOW DO I ORDER ENGINEER PRINTS?
- I simply select Shop Services at the top of Staples home page then Engineering Prints from there.
- I select the size that I want and click Design Now.
- Once I loaded up my picture, I made sure to select black and white print. But if you prefer you can request a full-color printing to create color engineer prints.
- That’s pretty much it. I sent it in and in about 20 minutes I had an email telling me the print was ready for pickup. Though delivery time may differ according to your area and the shop you use. Some places may even have rush shipping or international shipping available if you need it but be sure to check their shipping rates if you need it shipped to your location.

HOW I DISPLAY MY ENGINEER PRINTS?
After I picked them up, I grabbed a couple of black IKEA frames to put them in. I just love how the whole project turned out. They fill that wall beautifully and for only like $8 bucks! Here they are in 24 x 36 frames already on the wall.
OTHER WAYS TO DISPLAY ENGINEER PRINTS
If you don’t want to display your prints in frames there are several other ways you can display them in your homes or offices.
- picture frames
- mounted on wood
- mounted on foam core
- skeleton clips
- hang on a nail with a set of wood poster rails (like these maple rails or in oak)
- command strips or a command jumbo hook
- poster clips
- poster tacks
So if you’re looking for a creative and inexpensive way to add big beautiful portraits to your home and display large wall decor, I hope you will give this DIY project a try.


Leave a Reply