
Using skeleton leaves in your home decor is a fun way to add some festive fall to your home. You can also use dried leaves in other home decor or craft projects . Today we are sharing how to strip a leaf to its skeleton!
CAN YOU MICROWAVE LEAVES?
You can microwave leaves to dry them out if you are looking to preserve the leaves. However if you are going to do so, be sure to monitor them constantly. The leaves could very well catch fire. So place the leaves in the microwave resting on a paper towel. With constant adult supervision and only for 30 seconds the first time and then in 15 second intervals.
HOW ARE LEAF SKELETONS MADE?
The skeletonization of leaves is a natural outdoor process. Most fallen leaves green leaf tissue gradually breaks down under environmental and the natural breakdown by microorganisms. The “skeletal” components of the leaves, the veins or vascular tissue, that move water and nutrients through the leaf take longer to decompose, so they are t is left behind. The leaf skeleton is very delicate and can be difficult to find in nature naturally.
Today we are going to share with you a process to show you how to get a leaf skeleton from a leaf so you can create your own.

WHAT LEAVES WILL PRODUCE BEST LEAF SKELETONS?
There are a large variety of leaves, and some leaves are easier than others to get to the leaf skeleton…or have the strongest leaf skeleton. Waxy leaves work best. I would try to stay away from using really delicate or lacy leaves as you won’t have the best results.
Here are the leaf types we suggest you use:
- gardenia leaves
- magnolia leaves
- hydrangea leaves
- maple leaves
- oak leaves
CAN YOU BLEACH LEAF SKELETONS?
After you have stripped the leaf pulp from your leaf using the process below you can bleach the leaf skeleton to be a pretty creamy white color. This is fun for decorating or creating a beautiful monochromatic look. Instructions below.
CAN YOU DYE LEAF SKELETONS DIFFERENT COLORS?
Yes! After they have been skeletonized the leaves you will place them in a small dish and add several drops of food coloring or dye. Let them soak in the dye until they reach the color you want them to be. Pull them out and let them dry on a paper towel.

HOW TO USE LEAF SKELETONS IN DECORATING OR CRAFTS
There are limitless ways you can use your leaf skeletons in your home, gift giving, scrap-booking or crafts. Here are some of our favorite ways to use them.
- decoupaged on homemade cards
- scrapbooking
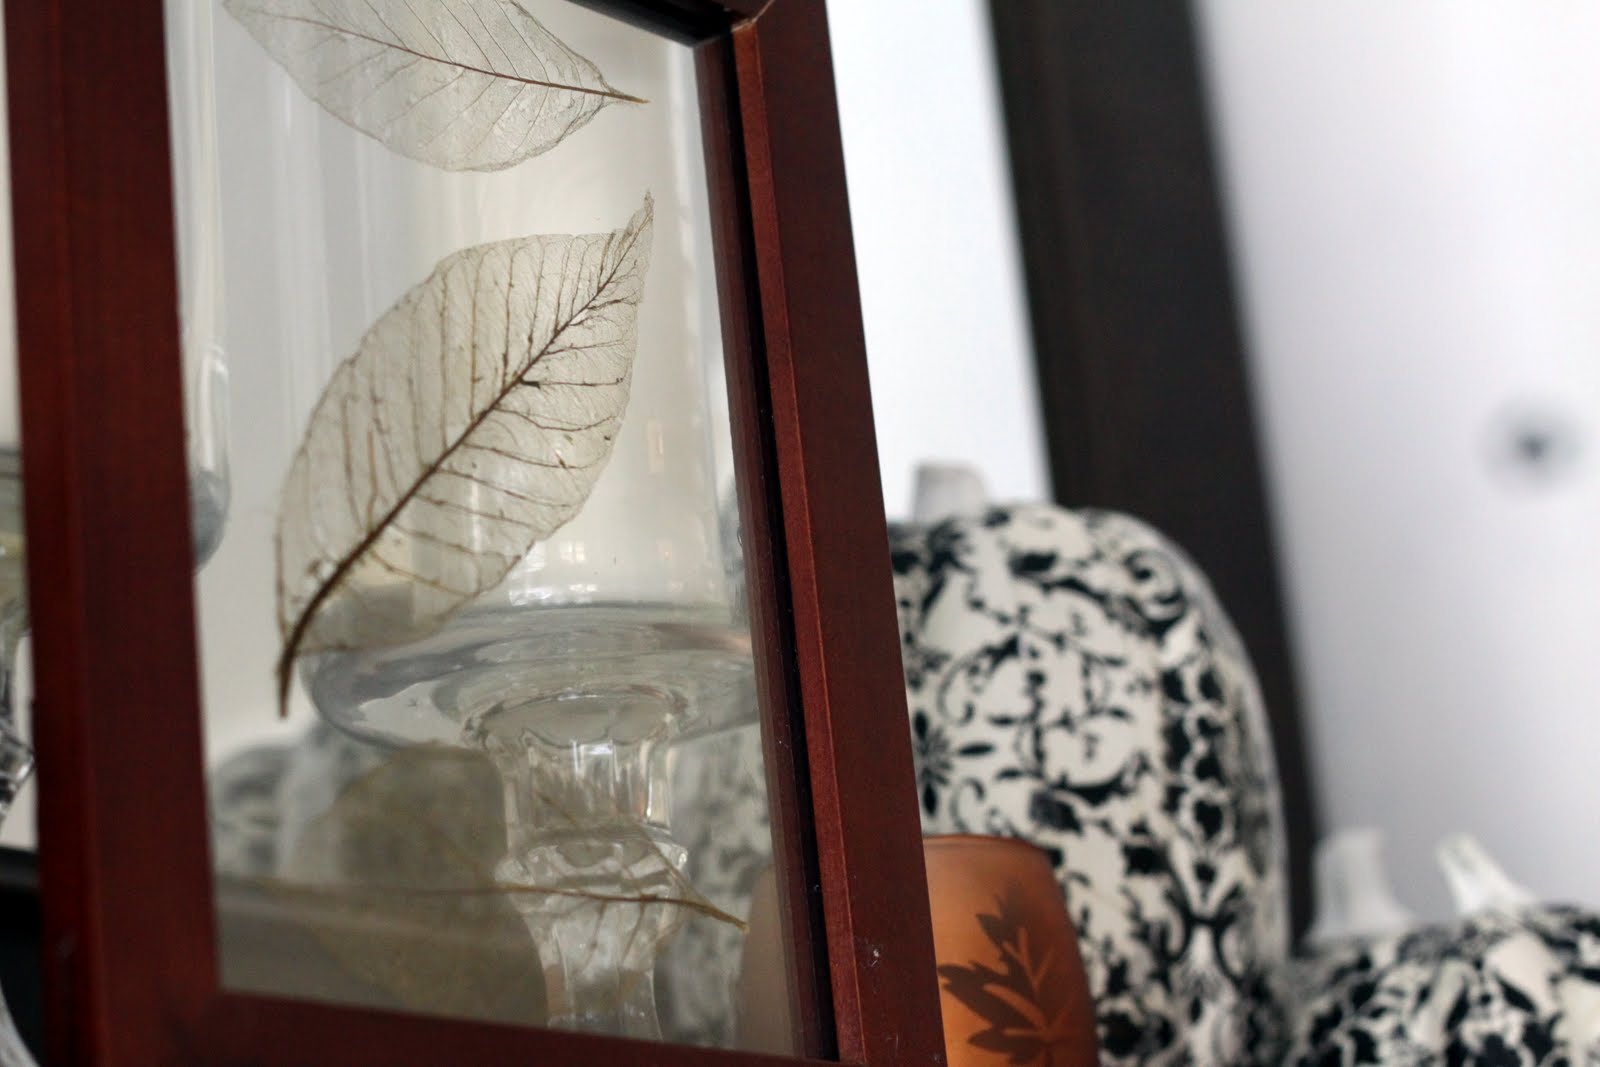
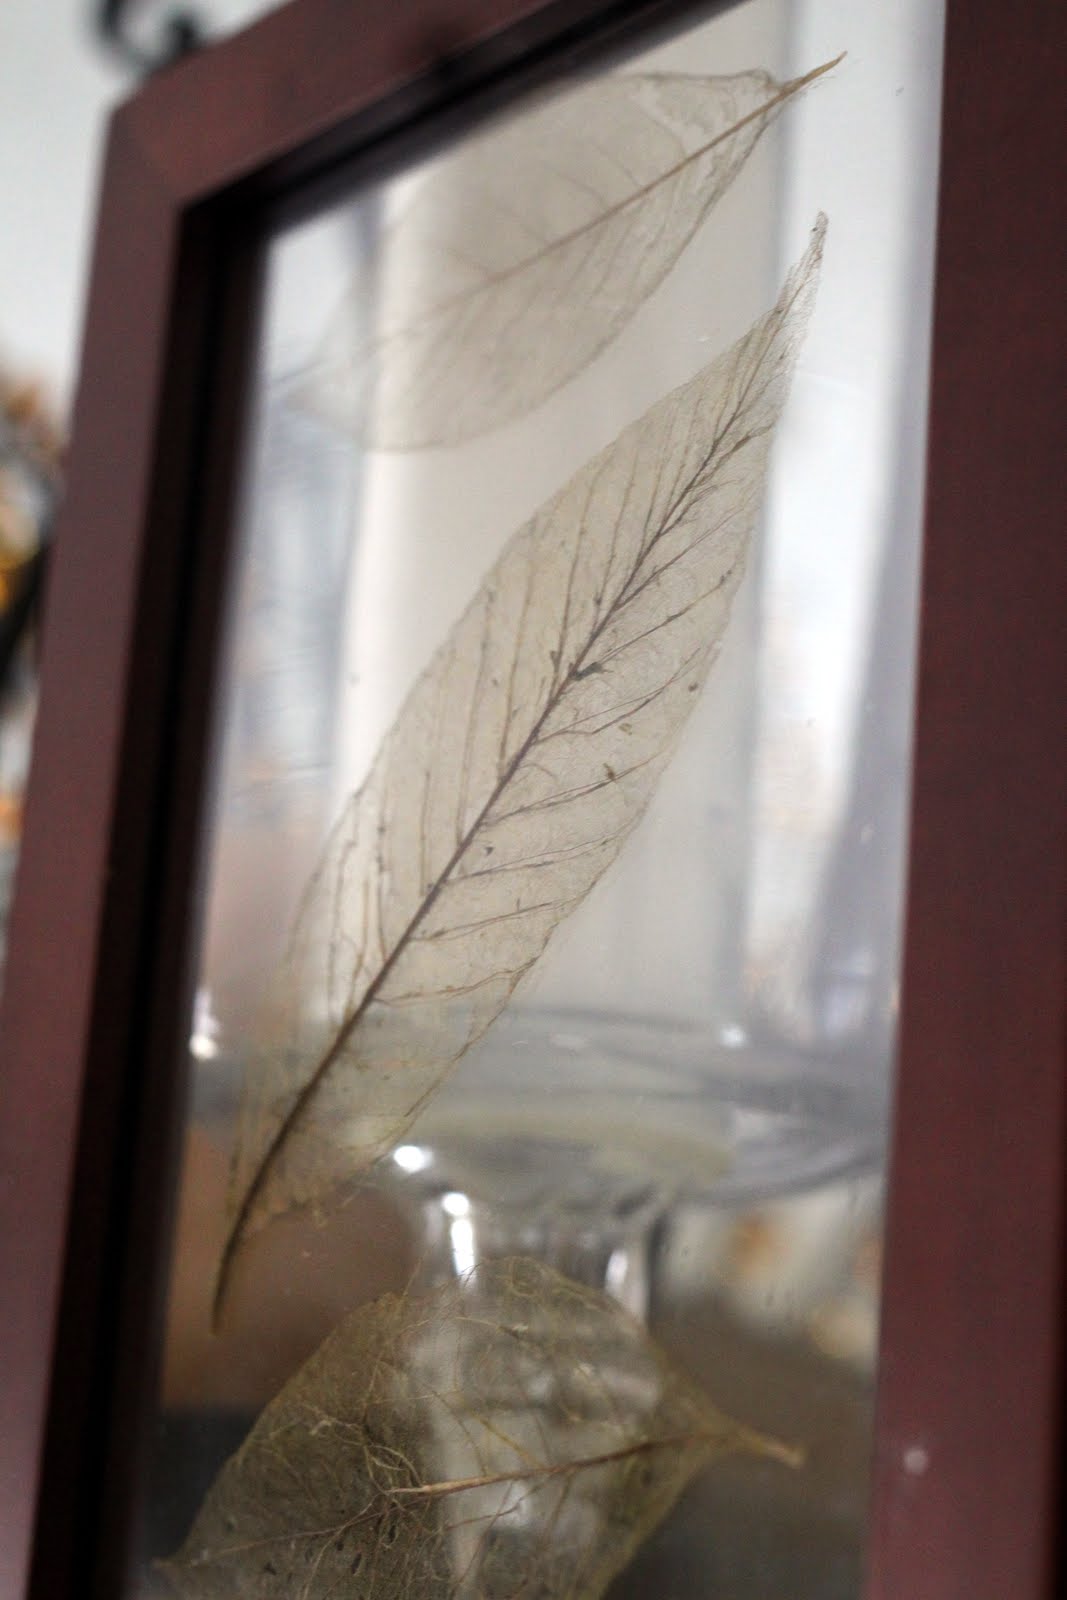
- display in picture frames
- homemade party invitations
- gift tags
- laminated bookmarks
- christmas ornaments
- decopauged on rocks
- decopauged on lamp shade
- decopauged or pressed on outside of candle
SUPPLIES NEEDED TO STRIP LEAVES
- protective gloves
- colander
- super washing soda
- medium pot
- spatula
- shallow baking dish
- small brush (toothbrush or small blunt paint brush)
- paper towels
- bleach
- food coloring
- clear poly coat

HOW TO STRIP A LEAF TO REVEAL ITS LEAF SKELETON
- Gather your leaves directly off of the plant or tree.
- Remove any debris from your leaves by rinsing them off in a colander.
- Be sure to use washing soda, not baking soda! They are very different. Baking soda will not work.
- Place the leafs in a pot large enough to accommodate the amount of leaves you want to skeletonize.
- Washing soda is a strong base so you may want to wear gloves when handling the leaves.
- Add 3/4 cup of washing soda and 4 cups of water to your pot of leaves.
- Turn the stove on high heat and bring the water to a boil. Once you have a rolling boil, reduce the heat to low and simmer the leaves.
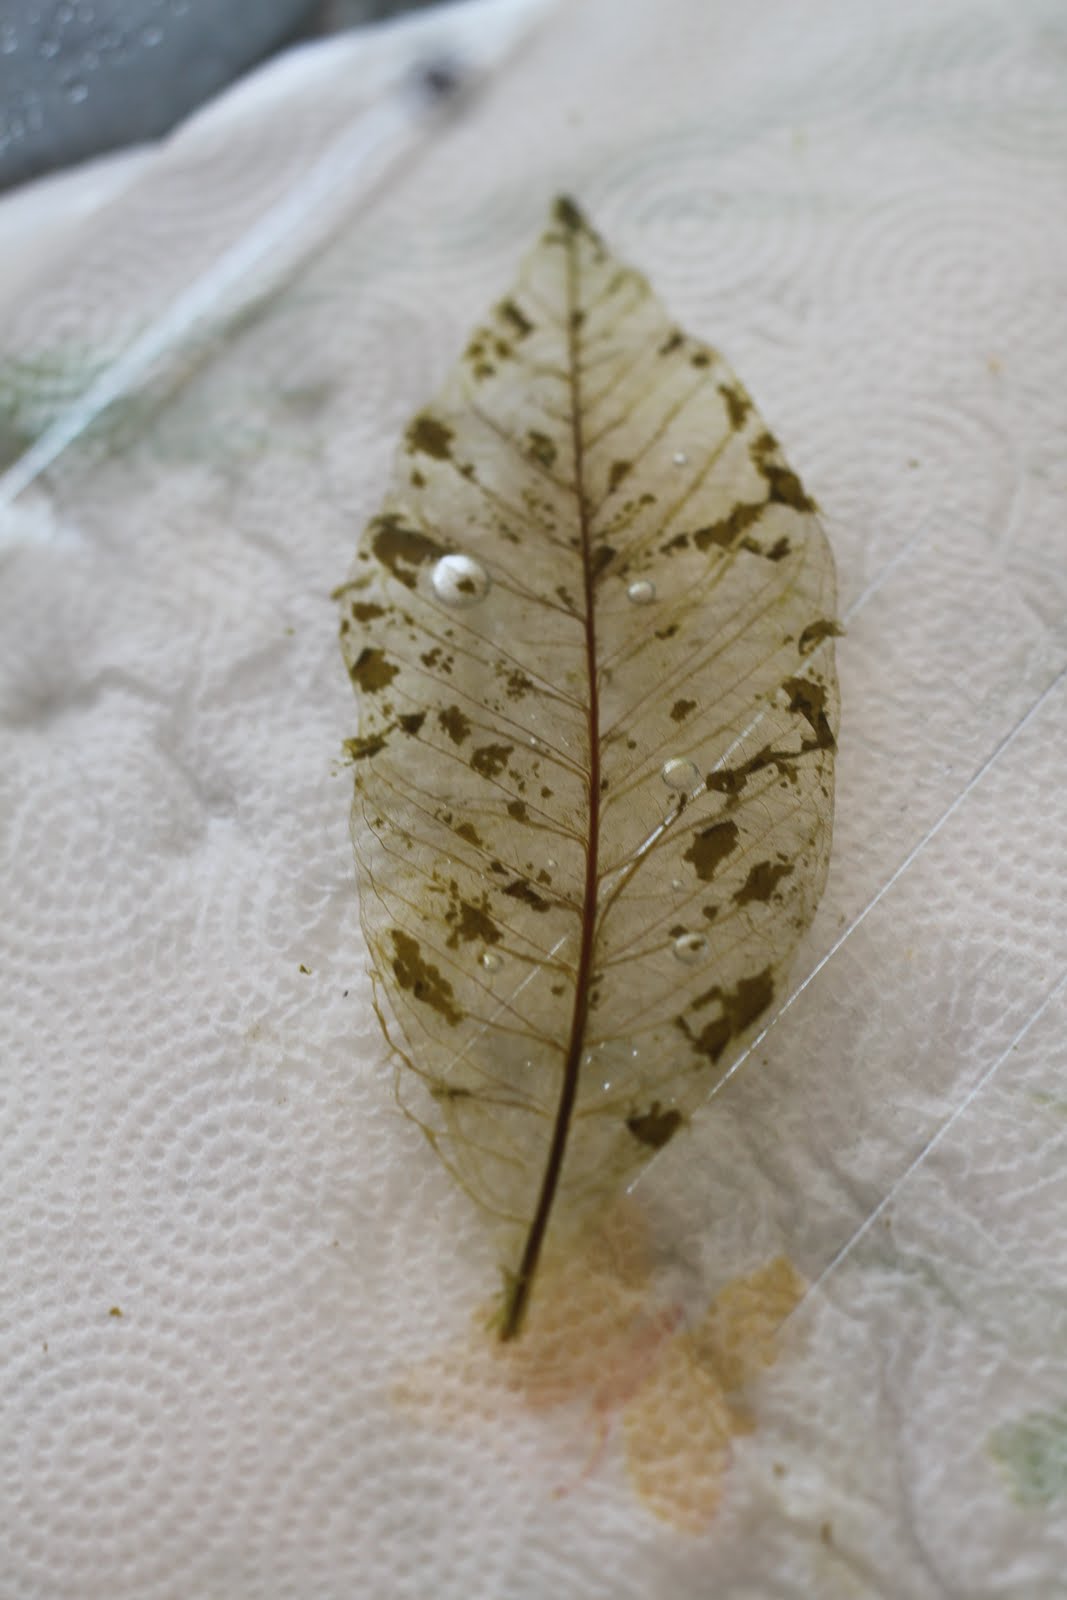
- I left mine for an hour and forty five minutes. After 40 minutes it begins to look really ugly….your boiling time may differ due to the leaves you are using.
- Be sure to check your leaves often to make sure the water is not too low and the leaves dry out. Add more water if needed. The washing soda will crystallize on top this is normal.
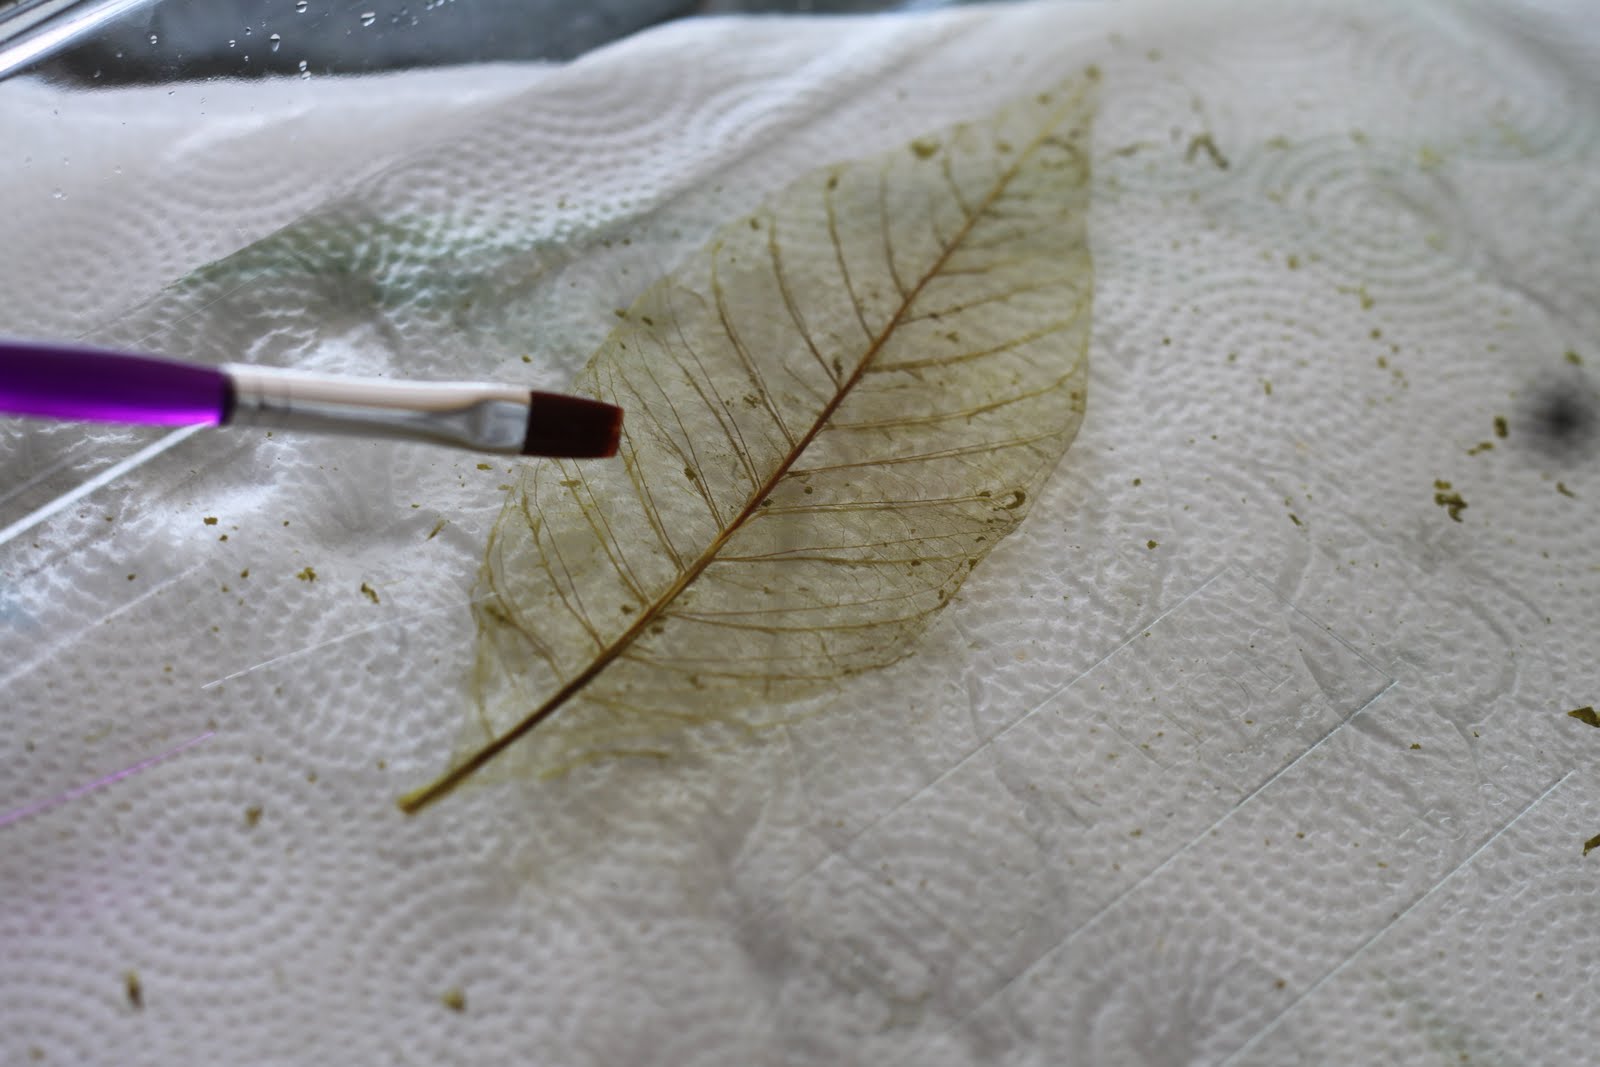
- When 1 3/4 hours are up fill a glass baking dish with cool water. Gently remove your leaves from the pot with a blunt spatula.
- Place leaves in shallow baking dish with cool water and use a small blunt brush to remove the remaining leaf pulp. I gently brushed at them to remove the remaining pulp.
- Carefully remove the leaves from the dish and rinse with water. Be sure to add clean water to the pan.
- After the skeletons are clean, remove the leaves to dry on a paper towel.
- Let dry completely. Spray with clear poly coat to keep them lasting a long time.
- *If you want to bleach your leaf skeletons, leave them in the shallow dish and add some bleach. Let them soak for several hours until you are happy with them. Then move to a paper towel to dry.
- **If you want to dye your leaves, place them in a small dish and add several drops of food coloring or dye and let them soak until they are the color you desire.
You can spray paint them, coat them with a clear poly-coat to preserve them longer.

DIFFERENT WAYS TO PRESERVE LEAVES
- Pressing Leaves– Simply place picked leaves between the pages of a heavy book and place more books on top of them. I like to put my leaves between paper towels or parchment paper so that the book doesn’t get damp. Remove the leaves after several days so they have time to dry out.
- Laminated Leaves– Use a laminator to press the leaves between the plastic sleeve. You can create a sheet for a scrapbook, invitation or bookmark this way.
- Glycerin Bath Leaves– Use one part glycerin to two parts water. You only need enough to submerge the leaves — about one cup. Pour the solution into a flat pan, place the leaves in the solution, and then put the weight on the leaves to keep them submerged. Keep the leaves submerged in the solution for 2-6 days. Dry the leaves gently with a paper towel. The leaves will be slightly flexible. Great for gift tags and decor.
- Wax Paper Ironed Leaves– Iron your leaves between two pieces of wax paper. Be sure to put a paper towel under it as you iron them so it doesn’t get your ironing board waxy or greasy.
- Candle Wax Tipped Leaves– Prepare a bowl of lots of ice and enough water. Melt a candle so there is a large amount of melted wax. Dip the fall leaves in the melted wax, and then quickly submerge the wax covered leaves in the ice bath. Let dry on a paper towel.
- Mod Podge Leaves– Simply Mod Podge leaves onto a piece of paper, glass or other surface. I like to paint it on with a brush on the back and stick it to the surface and then add a layer over the top of the leaf. Let it dry. Add a second coat if needed.
This project was contributed to The Idea Room by Heather. You can find more great projects from Heather at her blog The Other White House.


that is VERY cool! who knew?!
What?!!! That is sooooo amazing. I love this. Who would have thought!
What if the leaves are already changing? Do you think they would still work?
~Carol
[email protected]
Wow! Those turned out so pretty.
I LOVE this! They're beautiful!
This is SO COOL. I never would have guessed something so pretty could be so simple.
Very unique. I had no idea you could do such a thing! I love how you framed them in between glass!
Amy,
Thanks so much for sharing!
Heather @ The Other White House
Holy heck I love this. I am totally making them. I think I might have all the supplies on hand already.
SO awesome! I've wanted to make these too — thanks so much for sharing this project and her blog with us!! :)
That is so amazing! Thank you for sharing!
This is a completely awesome idea!! Love it – thanks for doing all the hard work to figure it out!
great tutorial, thanks for sharing this with us :)
THis is gorgeous!
Wow, those are awesome!
featured these today on my blog.
kimboscrafts.blogspot.com
Has anyone really tried this? i have been cooking leaves and wasting my gas all day trying to make these.
I used the washing soda, and cooked it for 2 hours.
i have have is crusty base that foamed and, and added more water the whole time. after 2 hours i tried another sites idea and that didnt work also.
AND
"this 'recipe' is the only one out of a million that have worked! " has a different measurements
which do i use?
anyone willing to help, thank you :)
This recipe did not work for me at first. HOWEVER, I remembered from biology that sometimes waxy leaves have an outer coating to help keep in moisture, which was further supported by the fact that my leaves filled up with the liquid in which they were being boiled. By removing a section of the leaf’s edge, I found that the leaf had three layers, a top membrane, a bottom membrane, and the middle skeleton and surrounding pulp. Once the top and bottom membrane were scraped off very gently with my fingernail, the pupl could be washed off of the skeleton by softly rubbing it off with my thumb. It was extremely tedious, and easy to mess up, but it got me the skeletons in the end. Hope that helps some.
The recipe is converted from teaspoons to cups. It's the same recipe. You can add more soda, as you add more water so your pot doesn't dry out. Also, what type of leaves are you using? I tried maple and they did not work nearly as well as the gardenia leaves. It's hard to see from your comment where the trouble might be. I have made a number of batches and it is time consuming.
Heather @ The Other White House
Thanks Heather,
Have you experimented with bleach alone, or as a followup to remove more?
The bleach would probably work if you left the leaves alone long enough. The pH is roughly the same as the washing soda. I did try it, but I'm not that patient. The boiling helps to speed everything along. You need to break down the pulp. I did bleach a few in the end, to make them white. You could possibly take a scrubby sponge to the leaves and then try to soak them.
Again, gardenia and magnolia have worked for me.
HTH, Heather @ The Other White House
I've always wondered how to do this, thanks so much for the tutorial.
I will totally be using this technique for mothers day, she loves all the different leaf shapes and this is so elegant! Great work :) http://www.kate-inspired.blogspot.com
Really interesting to learn how to do this – the photos helped too.
I love this idea and always wondered how to do it. Any ideas on how to use the finished product other then just framing them?
These are wonderful! I get really excited seeing your final product because I can only imagine how much something that simple would cost at retail price. Thanks!
ow..this is just awesome..so gonna give a try to this one.. :)
Awsome… This will make some great inexpensive christmas presents…. thanks soo much for sharing.
This has to be the coolest craft that I’ve seen yet. We’re looking for decorating ideas for a wedding and a new home. This could well work for both. I can’t wait to try it out.
Finding this totally saved me. I was trying to find a way to do this for a big project I’m working on, and this turned out great. How did you get so much of the pulp off the leaves without tearing them? I can’t seem to manage it :)
This is an amazing trick – I can’t wait to try it!
Who would ever think to do something so artistic!!!
I bet Cannabis leaves would look awesome as skeletons.
That is such a great tutorial! I wonder if you could use marijuana leaves? I think it would give an awesome effect!
The skeletonized leaves work great in printmaking. They can be used in collographs (glued down with Golden Medium), inked and printed. They can also be directly rolled with ink, laid on paper and run through a press. If the veins are thick enough you can get a good embossment too.
Carol, thanks for the note about printmaking. I LOVE printmaking and this would be a great way to embed an object into my work.
Have you tried this with montotypes?
Beth
Does this work with flowers by chance???
Hi! I am interested in trying this craft and I think yours turned out so pretty! But I was confused on your final project. How did you get them in the picture frame and on the vase? It’s probably a stupid question but I reread your tutorial and still couldn’t find out how to get them to stick to them. Sorry if you already answered this question before.
Wow!! LOVE this!!
Great idea! I’m not surprised that washing powder does such a good job as I also use strong solutions of the same to clean old motorcycle parts via a process known as electrolysis.
How did you get them to stick to the vase?
I love this, thanks for sharing!
Thank you Amanda!
Long lived leaves work best. I’ve done this very slowly by just soaking the leaves in water and changing the water every other day… Requires patience, but come out really, really clean, with out any danger. If you walk down Janpath(New Delhi, India) you’ll find several shops selling miniature paintings on the leaves.
Thanks for the tips. That sounds amazing! Would love to see that.
Thank you so much for sharing this. I might try it with some eucalyptus leaves and other Australian natives. Leaves are such beautiful things and this just adds to what we can use them for.
Liz
I loved this idea SO much, I ran out and got everything needed, and decided to use magnolia leaves. Well, long story short, my leaves are STILL simmering after 2 !/2 hours and look no different (ok, maybe soggier) than when I started, no pulp even appears to be coming off ! Help ! What am I doing wrong ?????
every leave can not be treated u can try other leave i use to do other local one
you can also pick leaves and put them between two tissue sheets and keep them in a fat book for a month or perhaps less. mine turn out the same as this method!
Great idea for a post.Thank you!
I have a question on how to preserve them. Do you just paint the bleach on?
What an incredible idea! Love it!
What a great idea. It’s winter now but I will try next summer.
I want to know about the bleach too! Anyone tried this with pool chemicals? I had put washing soda (soda ash) in my above ground large kiddo pool so it didn’t get funky. I don’t have the pool and am stuck with a ton of pool chemicals. I had read online I could use soda ash instead of pool shock. Just wondering.
Also be really really careful when pouring the washing soda. It’s sodium carbonate. It’s used to open the fibers of celluloids and is very caustic. Wear glasses and cover your face with a mask or cloth. Never pour around children or pets and clean up all powder with water. You don’t want this stuff floating around your house, let alone your kitchen. you can also get 1lb of soda ash for less than $3 at the art material supplier dickblick.com. I have some I bought there for tie-dye with my students.
Thanks for the awesome project idea! I’ve always wanted to know how these are made!
I’d say this is a science project that has gone very right. thank you for sharing.
Michael Sage airbushes leaves white and jewel tones and mounts them in shadow boxes. Visit phantomleaves.com for inspiration.
That is AWESOME! I had no idea it was possible to make your own leaf skeletons, thank you so much for sharing. This will be a fantastic project with my son and afterwards we can craft with our new leaves :)
Nikki
Eveningsong Ink
Got to try this. Thank you so much for sharing.
If you can’t find washing soda you can use PHup. It is for pools and goes on sale really cheap at the end of the season. I use it for fiber reactive dying. I am going to have a go at this in the summer when I can cook it outside.
That’s excellent, thanks a lot. I have two bags of washing soda for degumming silk, now I just have to wait a few months for the leaves to grow :)
A1 USA Limousine 773-774-8383 offers the best quality service for the most unbelievable prices. We offer service and special packages for Airport Runs, Proms, Weddings, Dances, Concerts, Bachelor /ette Parties,Engagements,4th of July, Nights on the Town, Site Seeing, Amusement Parks, and much more
the leaves can be applied the following way. http://www.icgiyims.com/bayan-ic-giyim/562-yaprak-baskili-dantelli-askili-atlet-kilot-takim-ant4073.html
This is superb, thanks for the tutorials
i love this!!!!!
Your directions were spot on –What a very delicate looking leaf. Absolutely a perfect end result .. WOW I must try this ..Cher
I’ve never heard of this. What a fantastic idea.
So clever! Love it.
Those are really pretty. That is a great idea. Thanks for a wonderful tutorial.
: 0 ) Theresa
The leaves are gorgeous and the directions were great.
This is pretty darned cool and I like the idea of just leaving them pressed and framed between two pieces of glass. Simple and elegant.
Did the simmering leaves make your house smell weird? ;)
This is awesome. And beautiful. Thanks!!
Okay, I’m a newbie. What is washing soda and where does one buy this stuff?
Hello,
I’ve tried your tutorial with washing soda… I’ve bought mine in the supermarket ‘Soda cristals’, Natrium Carbonate
I’ve boiled water with this washing soda and I’ve put my leaves in it (i used English Ivy leaves)
After an hour boiling at a lower heat, my water looks brown-green and my leaves are much darker… but the ‘flesh’ doesn’t come off.
What am I doing wrong?
Thank you in advance!
Greetings,
Felke
WOW! You have our attention!
This is amazing! would this work with any kind of leaves? Im planning to use them on maple and banana leaves.
Hi.. Any alternatives for washing soda? I cannot find these in Mauritius :( or if someone could send me some… lol
Wao! Thank you so much! Atlast I know how they get these! :)
I just love it, thanks!!!
This seems brilliantly simple. I’ll have to do it this fall.
Hi : ) I’m going to try this way. From a YouTube video (that only partially worked) it said to add 3 TBLSP of the Washing soda to 2 cups water.. Boil 20 mins and wah-la ….. that was soo bogus !!! I was all over the place looked for Washing Soda. First place I checked was Wal-mart.. they were out, then went to K-mart almost 5 bucks a box ( for 3 tblsp?) so I passed, checked grocery stores , they too were a tad on the pricey side when it said I only needed 3 tblsp. FINALLY went back to wal-mart and they had some in stock so I grabbed a box as shown above in the process steps. But back to the first way, I then proceeded to do the 3 tblsp to 2 cups water. and boiled and simmered and nothing.SO I thought maybe i Had too many leaves so tried doing one at a time ..STILL NOTHING…..I then put them in a dish pan ( 97Cents at wal-mart) covered the leaves with water, added a little bleach as it stated to do so the water wouldn’t go rancid and they have been sitting in my kitchen and on the porch back and forth for over a week now…..I still can’t get the leaves to skeletonize ( is that a word?) I used Fruitless mulberry leaves. I will say that 3 of them have turned snow white but that’s as far as they are going. I have tried to gently brush them thru the week and nothing comes off .. The green of the leaves aremottled however Seems they are tearing just sitting in the bleach water (which I have changed out, adding fresh water and bleach) Hope the above works because I have big plans for these ( BEFORE Xmas !!) : ) BTW Thank you for sharing your process. Wish me luck !
Found this on pinterest…very cool!
Beautiful … but nothing for me that has not one gr of patience in me. Would love one of those on my bedside table.
Thank goodness I am not the only one that struck out with this DIY project. I picked hydrangea leaves as suggested and put some maple leaves in just for good measure. Nothing happened except I now have a dedicated DIY pot.
I pitched the lot and tried again. This time the only thing that happened was the pin oak leaf was transparent, but I had to put it in bleach to get things moving. This is after 2-3 hours in that solution too.
I have to ask why the emphasis on keeping the leaves at the bottom of the pot? Basic physics proves that is an impossible feat.
Also, I have no idea what kind of instrument one could use to burnish the pulpy parts. I tried 3 different stiff brushes and none of them worked. I wanted to make them myself for a piece I am working on to sell on etsy. However this seems to have been inspired by Martha Stewart’s cruel cruel staff managers. I’ll either try putting the leaves between paper in one of my many fat books, or buy them gilded at hobby lobby.
This really tried my patience. Can you tell?
Love this idea! Perfect little project with autumn around the corner. Love ideas that let me preserve parts of my favorite season. Thank you!! :)
Just letting you know that I linked to this post in a unit study I wrote about autumn leaves: http://www.zujava.com/leaf-study
Well over a month later and the same leaves I started back at the beginning of August ( See my Aug 14th post here) are still in the dishpan, white as snow from soaking them in bleach for over a month and still nothing. They’re all totally dried now too and still nothing comes off of the leaves. I have tried small paint brushes, sponge, small narrow house painting brushes, nothing brushes off to leave a skeleton GRRRRR
It would really help if someone would monitor these posts and reply . All I’m seeing are a ton of links back to this page but no answers to questions asked.. : (
I’m simmering leaves now. I chose to do this outside for fear of toxic fumes. Any worries about this?
Awesome work! It is tender and unique!
This defenitely can give so many ideas how to create more new beautiful things.
Super cool! Can’t wait to give it a go!
The look very pretty indeed.
bravo very good practice.
Ohhh I love youu!!! I am so trying this!
I am trying this now with a huge elephant ear leaf. So far upon putting it into the pot some of the leaf flesh + veins in between the huge stem like veins came right on out.. I hope it all doesn’t do that.
Hey there! I just wish to give you a big thumbs up for your excellent info you have right here on this post.
I’ll be returning to your blog for more soon.
I don’t know where you’re located when you skeletonized magnolia leaves, but Arkansas magnolias must be made of stronger stuff than yours. I have boiled the darned things for over 7 hours and they are not skeletons yet! After all the strong testimonials I thought it would be a breeze, but it hasn’t turned out that way. And, yes, I used Arm and Hammer Superwash. I was going to demonstrate ways to use them at a craft program next month, but scratch that!!!
Great DIY post! Love that it is so simple. I can so do this tonight! Thank you so much for sharing!
Has anyone tried to do this with Prickly Pear cactus leaves? I really want to get the skeleton from the leaf of the Prickly Pear but don’t know how… :(
This is so pretty, gosh I wish I was crafty, so much that I could do. I still have a bunch of things that I would love to do. I can live in hope I suppose.
Helpful information. Lucky me I discovered your site
by chance, and I’m surprised why this accident did not happened in advance!
I bookmarked it.
No way! I was just looking at buying some for my kids nature table. More fun to make our own! Thank you!
This is such an awesome idea. I can’t wait to try it! Thanks for providing the steps.
It did not work :/
I even used leaves with different thickness.
wow, it was just what I was looking for, thanks!
Adorei esse trabalho, vou tentar fazer. Obrigada!
Thnx for sharing such a good idea.
I am going to try this.
Awesome .?
Thank you!
Wow!!
On my highschool days we use guavano leaves And use detergent soap..
That sounds interesting. Thanks for the tip.
I like the pink ones in the intro…how did u do that. What kind of paint should be used?
Thanks for your help. I was really looking forward to learn this method.
Kavita- You are welcome!
Thank you.