
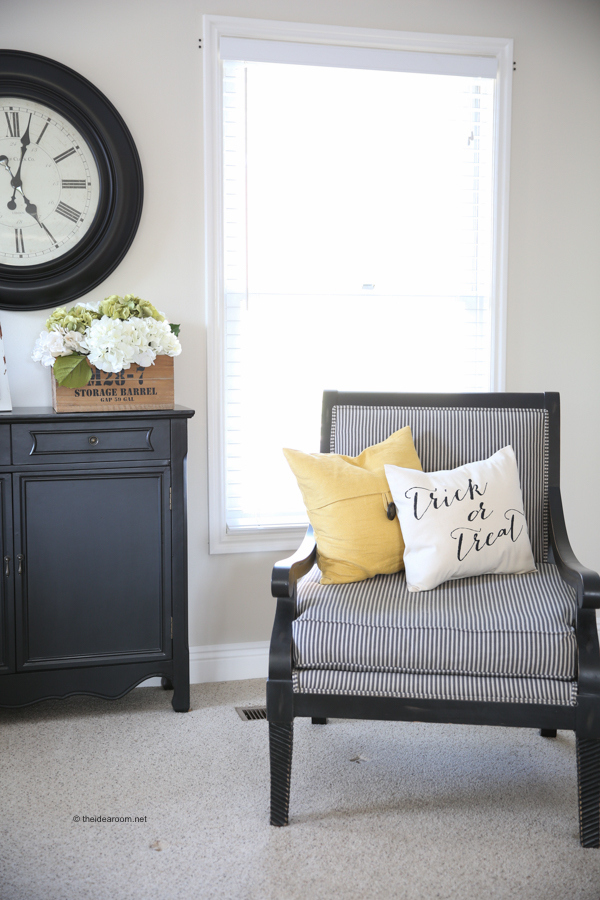
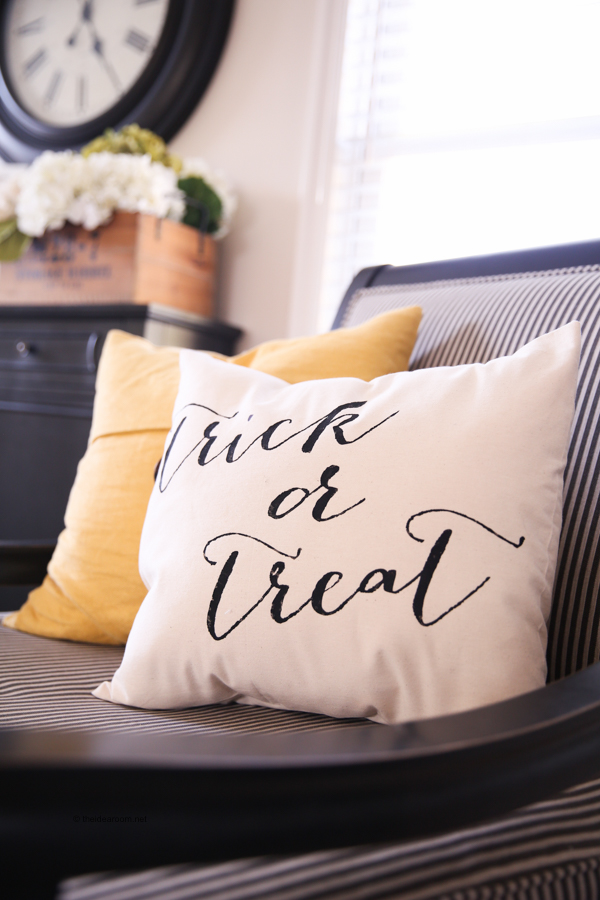
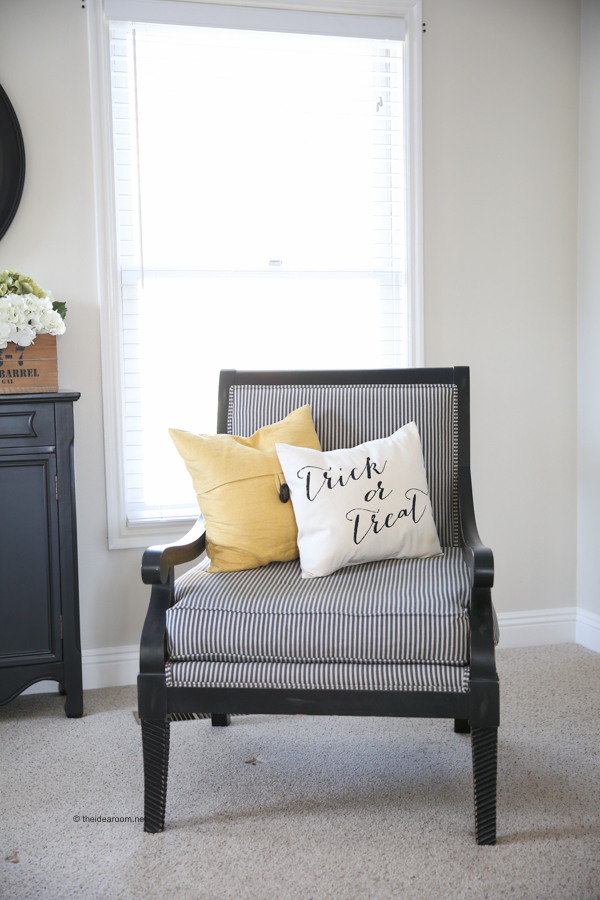
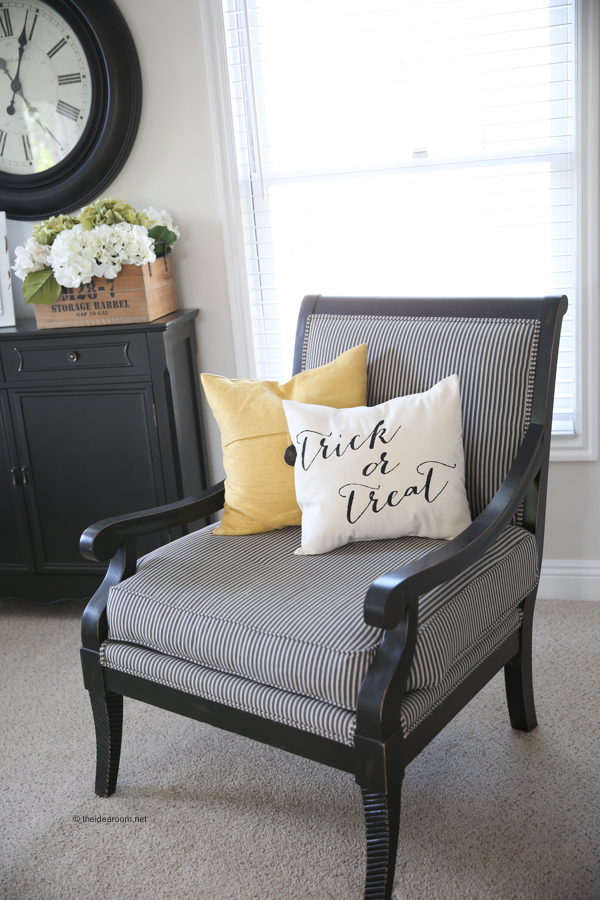
Want to make a last minute DIY Halloween Pillow to add to your Halloween Decor? This Trick or Treat pillow is super easy to make and makes a fun little addition to your home.
PILLOW COVERS
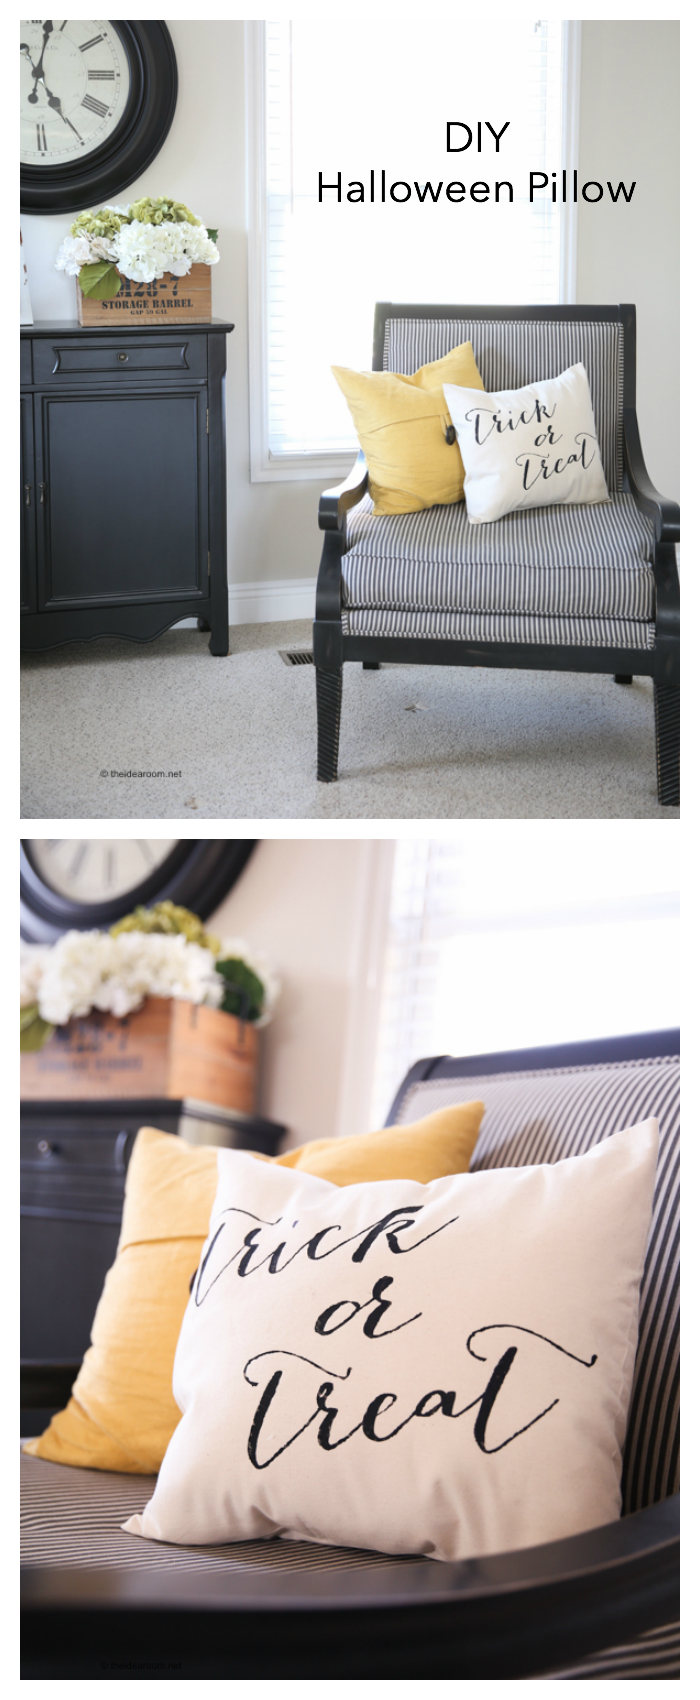
If you haven’t noticed, I like a simple look and this pillow is so simple! It literally can take you 15 minutes if you already have a pillow cover. If you need to make a pillow cover, I have a great tutorial that you can follow here.
Pillow covers are easy to make and once you know how to make them, you can literally have one whipped up in less than 20 minutes.
HALLOWEEN PILLOWS
Learn how to make a Trick or Treat DIY Halloween Pillow with this easy step-by-step tutorial. Get the download at Cricut for this Halloween Cricut Project!
- Easy/Beginner
- 20 minute project
SUPPLIES:
- Cricut Explore machine or Cricut Explore Air machine
- Light Grip Cricut Cutting Mat
- vinyl
- transfer tape
- vinyl tool
- 18 or 16 inch pillow cover (mine was 16 inches)
- pillow insert the same size as your cover
- black fabric paint
- paint brush or stencil brush
DIRECTIONS:
1. Take an 18 inch or 16 inch pillow cover and place some cardboard inside it so that when you stencil it, the paint will not bleed through to the other side.
2. Click on the Make It Now button below.
3. Pull project up in your Cricut Design Space. (adjust size of the project depending on size of your pillow)
4. Load vinyl onto your Cricut Cutting Mat.
5. Select “GO”.
6. Cut your vinyl.
7. Pull out the insides of the letters so the outline remains with your vinyl tool.
8. Use the transfer paper to apply the vinyl to the pillow cover.
9. Stencil the letters with black paint and let dry completely.
10. Insert the pillow into the cover and enjoy your new Halloween pillow.
![]()

I just love a fun and easy project idea! Especially one that can be made quickly while the kids are napping or you have an hour to yourself to be creative!
Loved this project? I would love for you to pin it! Thanks! xo


What’s the font name that you used?
Above one of the pictures it say Make It. Click on that to see the font I used. Thanks. https://us.cricut.com/design/#/landing/project-detail/11130