
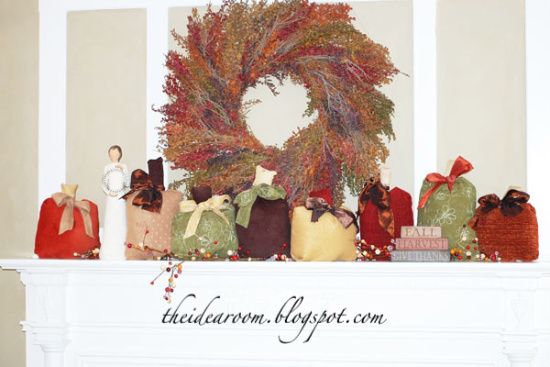
I love to decorate for fall and one of my favorite items to pull out every year are my Fabric Pumpkins. Want to know how you can make a pumpkin too?

I saw a tutorial to make these on another blog last year and absolutely fell in love with them, but the link for Holly’s tutorial is no longer working. I have had a few people ask how to make these so here is my version of her original tutorial as I remember it.
I went to JoAnn’s and looked through the Red Tag and Home Decor fabrics and found a lot of cute fabrics in autumn colors. I bought about a 1/4 yard of each. You don’t need much.
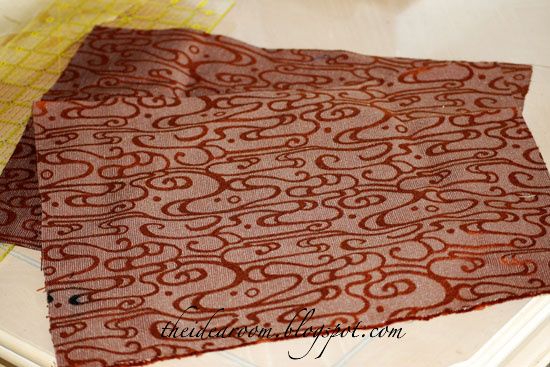
Then I just experimented. For taller pumpkins I cut 2 peices of material that measured 12 x 14 inches, with the 14 inch length being the height. For the smaller, wider pumkins I used the same 12 x 14 rectangles but made the 12 inch side the height. Does that make sense. I even added a third size of 11 x 13. It is really up to you.
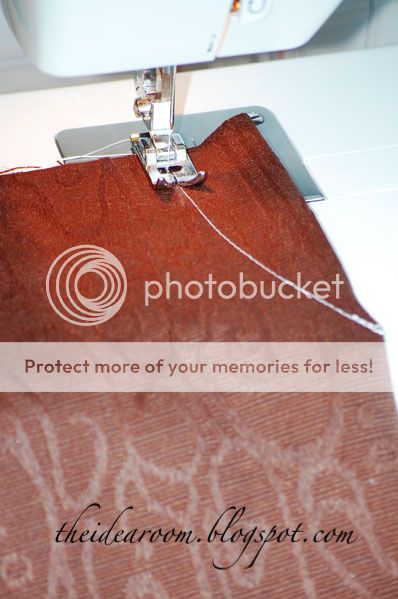
Then with what ever length you want at the top, fold each peice of material in half with the right sides together (or the side you want showing on the outside). Then sew a crescent shape on the folded edge like the picture. Do this for both peices of material.
Cut off the excess material near your seam.
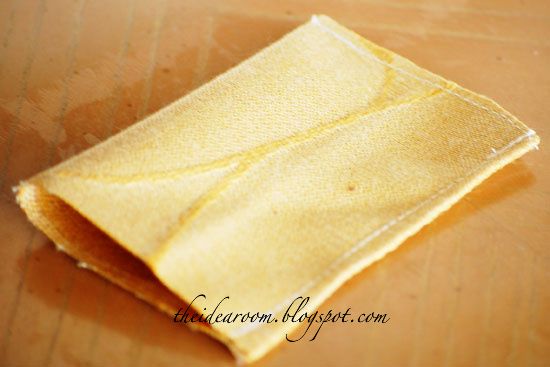
Now take some coordinating material (I used material that I had made other pumpkins with) and make a stem. I did not sew this as a perfect square, since stems are sometimes curved. Mine measured roughly 2 1/2 w x 4 inches.
Turn your stem inside out and stuff with batting.
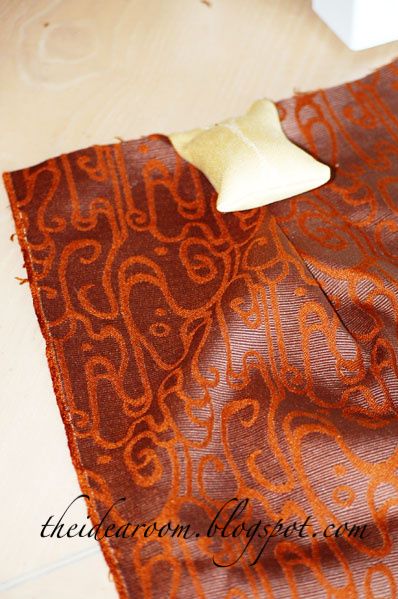
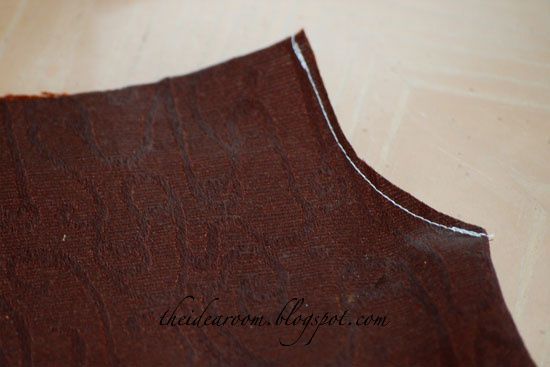
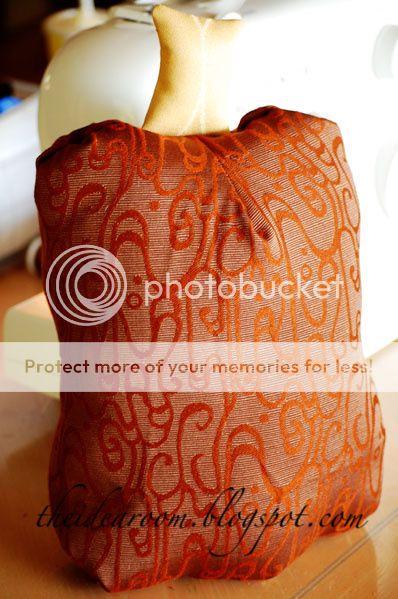
Take one of your pumpkin panels and lay it flat with the right side facing up and your sewn crescent up top. Pin your stuffed stem at the top middle with a little stem material poking above the pumpkin material like in the picture above.
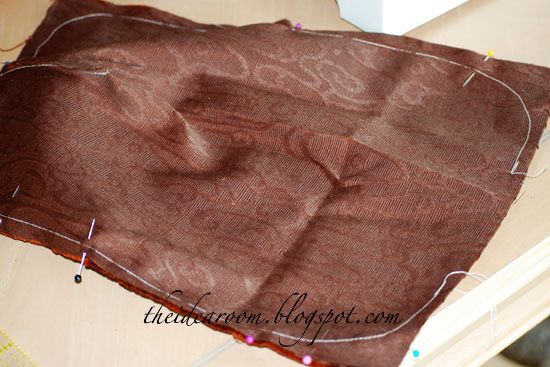
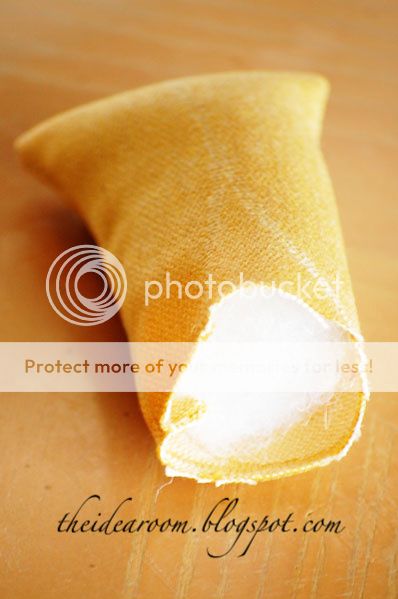
Now sew around the entire pumpkin rounding the corners and leaving an opening along the bottom so you can turn it inside out and fill with batting. Trim your corners.
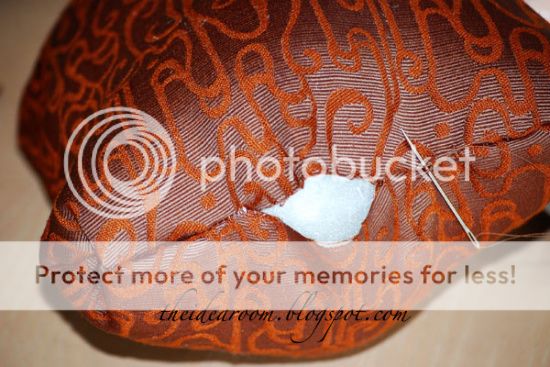
Turn inside out and fill with batting. Hand sew the bottom opening together.
**If your pumpkin has a difficult time standing up on its own, you may need to sew a small bean bag and place it in the bottom of your pumpkin before hand sewing it closed.
Now all you need to do is add a ribbon. I simply took a length of material and sewed the edges and made matching and coordinating ribbons. Or use some store bought ribbon.
Don’t they make you happy? I love FALL!
**update–one of my readers, Deanna, alerted me to the fact that Holly had recently reposted her tutorial which you can see here.
JOIN OUR NEWSLETTER
Would you like more Recipes, DIY, Printables and Organization Ideas?
Subscribing to the newsletter will enable us to periodically send you creative content exclusively for Idea Room subscribers.
*View our Privacy Policy here.


)
I wish that Australia had more traditions to celebrate like your Harvest (and Halloween for example)…it would give us an excuse to create gorgeous pumpkins like these…
we do have some tradiional day..like Australia Day on 26th January which is our summer so it is more a beach sports day, family, BBQ and painted body day….. i will have to blog some pics…thank you for sharing …just love your blog
Looks intresting. Something fun me and my daughter could do together. I love the Fall too! :o)
Ooooooh…these are gorgeous!! I would LOVE to feature these!
Holly posted the tutorial again at bloggingwithholly.blogspot.com.
Your tutorial is pretty darn close though!
SO cute… love these!! Thank you for sharing such a great project!
Oh my heck, those are soooooo cute!! I just love them and can't wait to make some for my house!! Thanks for sharing such a fun, and easy project!! You are the best!
Way cute!!!! Looking at what you did, it would be pretty easy to adapt it to other holidays. Like Christmas, for Example!
I am so glad you posted this. They were fun to make together. I also love the family image down at the bottom. So fitting! :)
Those are soooo CUTE!
So Darling!!!!
Oh!? Is it fall? Somebody please tell the weatherman down here. It still feels like summer, and it is SO HARD to get in the spirit of sewing beautifuly colored, richly textured pumpkins when it is 98 degrees outside!!!
LOL..despite my grumpiness, the pumpkins are darling! Thanks for sharing.
Thanks so much for posting this tut! I love it. In face, I'm heading to JoAnn's today on my lunch hour to track down some fabric suitable for my pumpkins!
I love your blog, it inspires me! Now if I could just find the time to make some of these things with my two babies at home! I was trying to get a small button for my blog and for some reason I couldn't copy it. Has anyone else had problems? Thanks!
Love the pumpkins, LOVE the wreath too! (any help on where that is from???)
Where did you get that beautiful wreath above your mantle? Stunning!
Amy those are very fun and I like the option of doing different colors…cute!
absolutely darling! after this weekend, it's becoming fall at our house i've decided. these may just have to kick off the action.
thanks for sharing.
~katrina
I have been saving the link so I could make these this year, here it is for Holly's blog:
Scroll down under the little people.
http://thoughtsandcraftsbyholly.blogspot.com/
just thought you might like it.
Hey Amy, I think you have such cute and inspirational ideas I have "splashed" your blog with an award. Check out the details on my post http://kingbrayden.blogspot.com/2009/09/look-what-i-got.html
These are really cute!!
I'd love to put your button on my "Blogs I Love" page, but since you have right clicking disabled, I'm unable to copy the code
~TidyMom
GET.OUT.
Just found your blog! LOVING IT! I put your button on my scroller!
Hi! I featured you this morning! Hope you get some hits!
Linds
Very darling. I featured this in a pumpkin round-up on somedaycrafts.blogspot.com
I just made bean bag version of these. THanks for the great idea. Very kid friendly decor.
http://deliascreativeoutlet.blogspot.com/
I need to find some cue fabric so that I can make these!!! I absolutely love them!
These are so cute that I had to make some, too: http://thecozyhousecrafter.blogspot.com/2009/09/pumpkin-patch.html. Thanks for sharing your idea!!!
Love the pumpkins!!! I added your link and button to my blog!
Many Blessings,
Melanie
I am nutso for all things autumn! I linked to this on my weekly roundup (post can be found here. Thanks for sharing!
I so made these tonight or this morning…hehe…I LOVED them and they were super easy to put together!
Come see them at my blog:
http://inspiredbymimi.blogspot.com/
So I found some orange and gold corduroy and brown fleece at a yard sale today for .25, immediately though of these that I had seen, sewed some up, filling them with the old drapes we inherited when we bought our house. So for a quarter, I'm got my own CUTE pumpkins sitting on my mantle!! Thanks. :)
Thanks so much for these instructions!! I started out making 7 for me… they are so adorable! But all of my friends have been admiring them, so I have made more and more of them. They are my new favorite Halloween decorations!
I loved these pumpkins and I already had some fabric laying around. Thanks for the idea. I posted a link at http://simplyhomeandfamily.blogspot.com/.
I love your blog and have linked it as a favorite on mine. Thanks again!!!
just made these today!! Thanks for the tutorial! We love them!