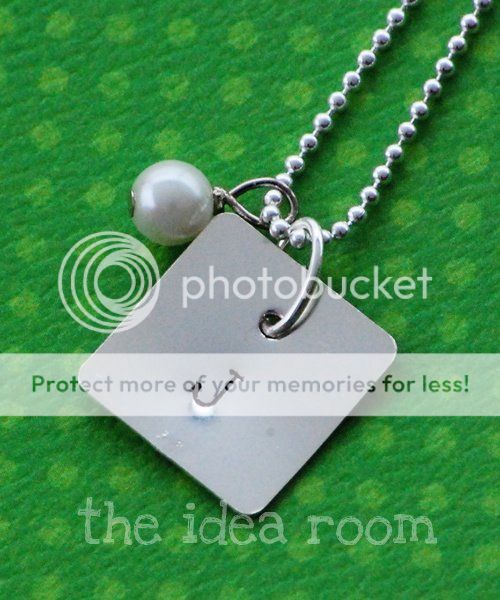
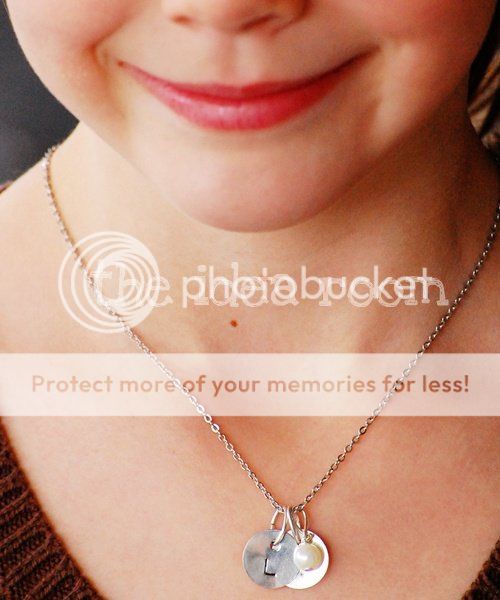
Mother’s Day is coming up…do you know what you are getting the Mother’s in your life? Why not make them some easy hand stamped necklaces. One charm with each of their children’s initials for them to wear close to their heart. Or make one for yourself!
They are really easy to make all you need are a few supplies.
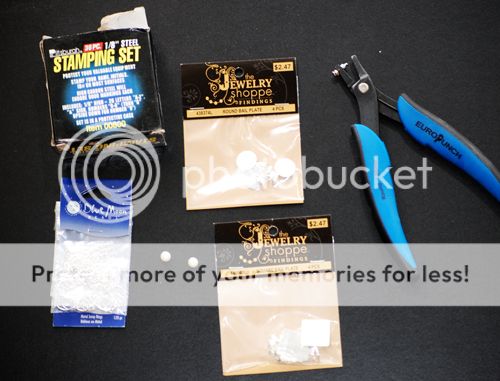
You will need:
some metal stamping discs or squares (Hobby Lobby)
1/8 inch steel stamp set (Harbor Freight which I had for this project)
Pearls
1.5 to 2 inch head pins
metal jump rings
1.8 mm (or whatever) metal punch
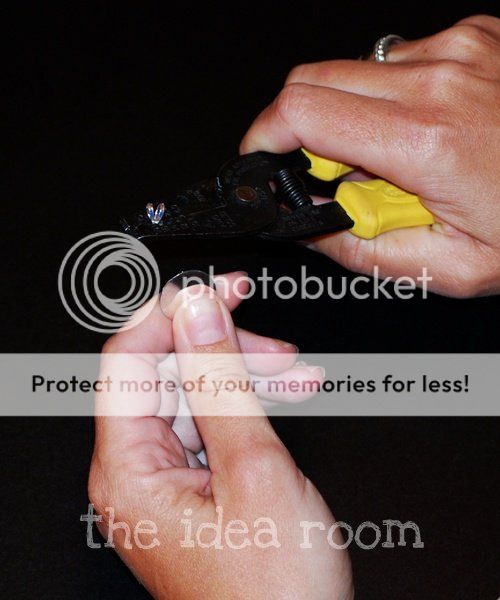
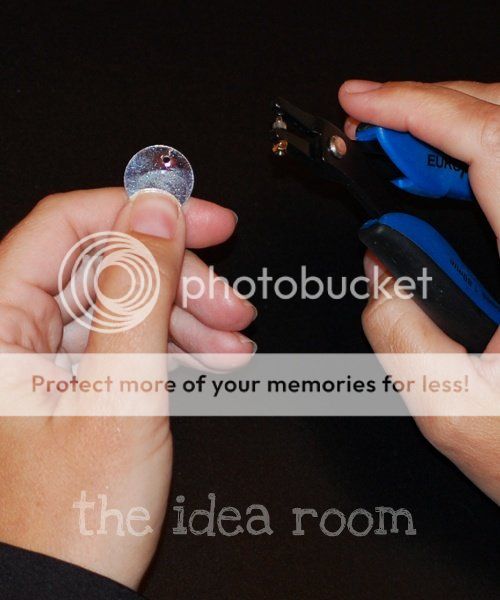
(I tried to find some “less expensive” metal discs with holes already punched in them and found several online. However with shipping and handling, they were a little more than I wanted to pay. Then I found these discs with pre-attached hangers (?). I didn’t like the look and thought that I might be able to just cut them off with wire cutters. Well it turns out, one little twist with pliers is enough to take that attachment right off.
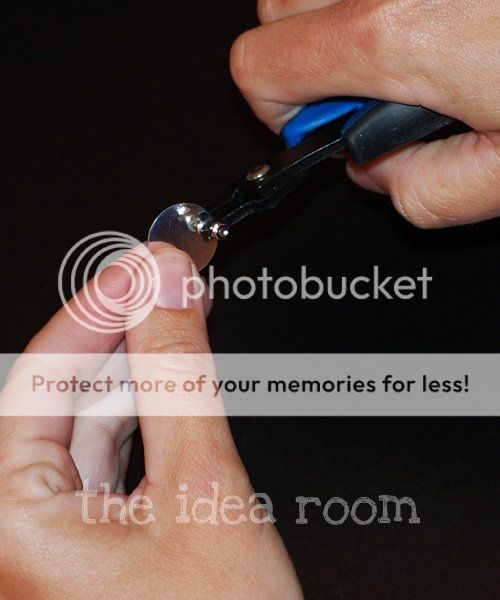
After you remove the attachment, take your punch and put a hole in the top of the disc.
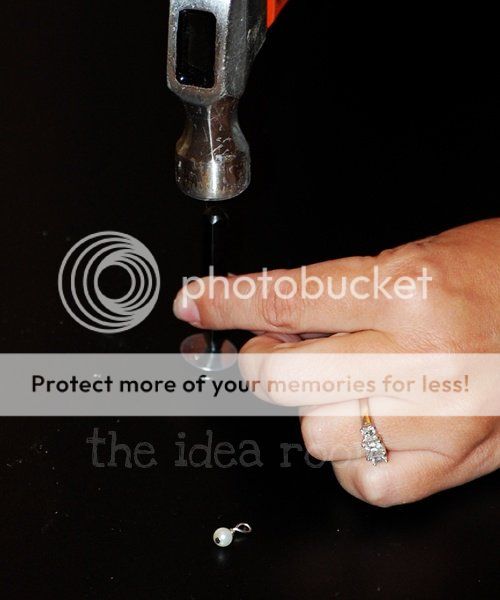
Take the initial stamp tool that you need and then place it directly on the disc. I did this on a very hard surface…the cement in my garage.
I set a thin washcloth under the disc to protect it from scratching. This will not work on a table, etc. Then take a hammer and while holding the stamp VERY STEADY hit the stamp firmly in the middle a couple of times.
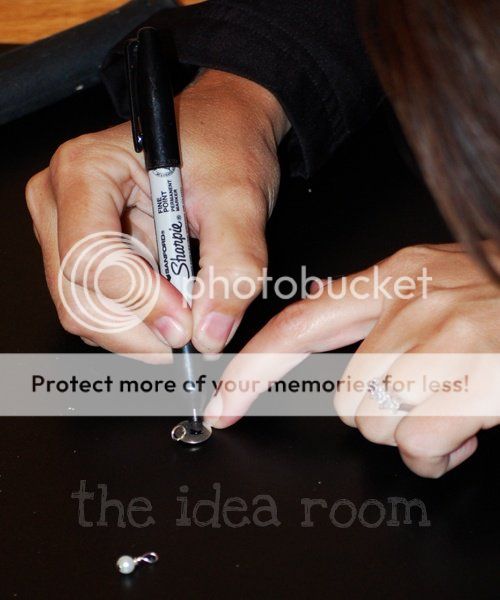
Now take a black (or colored) permanent marker and color in the initial where it has indented in the metal. Quickly and lightly wipe the surface of the disc with a wet wipe to remove any excess ink.
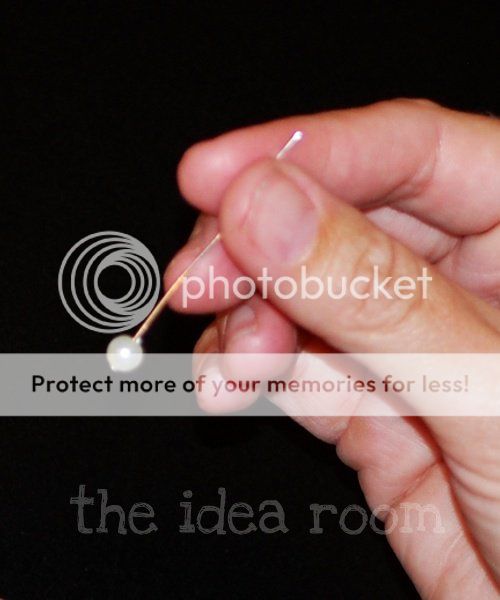
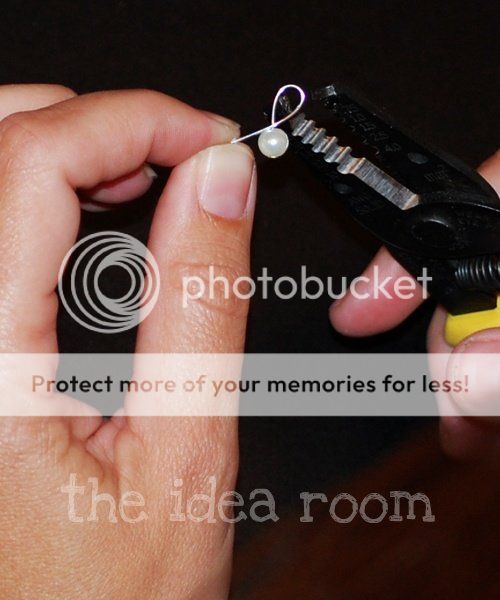
Take a head pin and place a pearl onto it. With some pliers twist the pin so that it bends back down on itself like in the picture.
Then twist the extra wire around and around the top part of the wire directly above the pearl to secure the pearl and so that you also have an opening large enough to slide the pearl over the clasp of your chain necklace.
Then simply slide a jump ring onto the initialed disc and attach it and the pearl to the chain necklace of your choice.
These necklaces are quite popular as you well know. They are so easy and make inexpensive gifts for anyone really. I have already made several of these for my sisters, sister-in-laws and a few friends for gifts already. Go ahead and try it. Let me know what you think!
**Edit** A few of you asked where I got my punch. I got it from Beaducation. They also sell the metal discs, etc if you are not near a Hobby Lobby. One of my readers, Jennifer, sent me an email with this Beaducation website several months ago after I mentioned wanting to find some better washer necklaces. Thanks again Jennifer!
JOIN OUR NEWSLETTER
Would you like more Recipes, DIY, Printables and Organization Ideas?
Subscribing to the newsletter will enable us to periodically send you creative content exclusively for Idea Room subscribers.
*View our Privacy Policy here.




I have looked every where for the charms, but I guess I missed Hobby Lobby. I am going there tomorrow! Thanks!
I got mine at Harbor Freight Tools
These are so cute!
Did you buy the stamp kit at HobLob too? I got a set at Michael's, but I'm not sure if I like it…
Thank you! I always wondered how to make these neat personalized necklaces!!
great idea!
Going to do this today! One for me, one for mom, one for…everyone I know. Thanks for the tips-so generous!
Awesome! About how much did you spend for the punch and stamp set?
That's it, I'm off to eBay to get metal stamps!!
Thanks for the tutorial! I LOVE LOVE LOVE this type of jewelry and have wanted to make some one my own. Maybe I will have time tonight to work on it so my mom has a birthday gift tomorrow….
This is awesome!! Thanks SO much for the awesome idea and great tutorial!! :)
So adorable!!!
So fun, I can't wait to try these out!
Kelsey
Tee Hee I can't believe you remembered me! It is Jennifer here, love the necklace!!!
Thanks for the tutorial. I think I am going to try to make these for my kids teachers.
I love it! Oh my goodness I need to do this it's fantastic!
Darling so cute!!! I just need your skills to do it all you make it look way to easy!
This is super cute and great tutorial! GJ!
Since i am here a lot, i wanted you to know about my give away on my blog and i don't want you to miss it. I will not Link my party to other party :)
XOXO
Frenchy
Thank you so!
This may have been my favorite post of yours! I have been wanting one of these forever. I sent my husband your link, and he made me one. I love it so much. Thank you!!!!! I blogged about it tonight and added your link. You're awesome.
Angela in Arkansas
Really sweet. :) Thanks for posting the punch info…
As if it wasn't enough that I had the washer necklaces on my "to do" list, now I've got to add these adorable initial necklaces! Sheesh-if I don't stop visiting your site I'll have projects lined up for the next couple of years!
thanks so much for a quick and easy tutorial! I have looked into making these before because I assumed they had to be somewhat easy! I have already ordered the stamps and the punch for both me and my sister!! Can't wait to start.
We are getting a HL in my area and I believe it opens in like 5 days! Yahoo I am so excited!
Those of you that live near an AC Moore…I found the disks there. They were only .99 for 9 of them and they already had the holes punched in them!!!! Thanks for the great tutorial!!!
The necklaces are darling. Do you make and sell these? If you don't sell them…I would GLADLY be your first paying customer. :0) Your awesome.
[email protected]
Do you know where I could find the chain necklaces?
Thank you for the inspiration. Your tutorial was featured in today's Blog at Bella Kate's. http://bellakates.blogspot.com/2011/03/stamped-metal-jewelry.html
You can also check your local bead shop for supplies (you can find some diff shapes and metals, etc)… it helps if you use a bench block under your disc when stamping..
Just curious how tight the head pin fits into the pearl? Love this tutorial and can’t wait to try it out!
This is AMAZING!! loved your tutorial .. I just tweeted about it on twitter @KeepinitThrifty Cannot wait toi try this out!
XOXO Andrea
Great tutorial. Thank you for sharing. I think i might make this for my mom for mother’s day.
I wish you had done the pictures in a way that would allow pinterest to bookmark this page. The way the page is coded is keeping pinterest from seeing them, so I can’t pin it.
ignore what I said in the first comment about the photo formatting. I realized after I posted it, that I was viewing the page through a frame from tip junkie that was preventing pinterest from seeing the pictures. All fixed (don’t mind me….)
Nice post! I have a question. Do you know the name of the tool you used to punch a whole in your Blank? And does Harbor Fright have it?
Thanks
Gina.
[email protected]
I just wanted to let you know that your post inspired me to make a nice little necklace with my 7 year old for her Mom this year. Granted, she didn’t get to work much with the tools, but she did get to pick out the charm and offer plenty of suggestions!
Anyway, we picked up some 2mm letters so that we could stamp our little one’s name into a metal heart. I wanted to get a consistent look, so I taped the heart down to a thick metal block and drew my guide lines right on the tape with a sharp pencil. That way, I had something to help me keep the letters (mostly) strait and in line. Without drawing the lines first, I found it very tricky to get the spacing right (as I learned practicing on a little paper heart).
Thank you again for the great post!
There is a Hobby Lobby in Visalia, CA and you can get them at JoAnns and online at Rings-things.com or something similar.
Hi, I love this idea! I got all of the supplies and tried it all out today. Is there a trick to making sure the whole letter prints? I firmly hammered each letter several times, but many of the letters had parts of them missing. Also, I used a sharpie when I was done, but hours later it all wiped off. Any help or suggestions would be great! Thanks!
You have to make sure that you are hitting the stamp as level as possible and that the disk is not bent for the letter to come out more even. Sometimes it still will not stamp perfectly and that is part of the charm of them. The sharpie should stay on longer than that. It does eventually wear off over time and you can touch it up again with the sharpie. Maybe if you are still having problems you could try cleaning it off with rubbing alcohol so that the surface is completely clean and the marker will stick better to the metal disk. Hope that helps.