
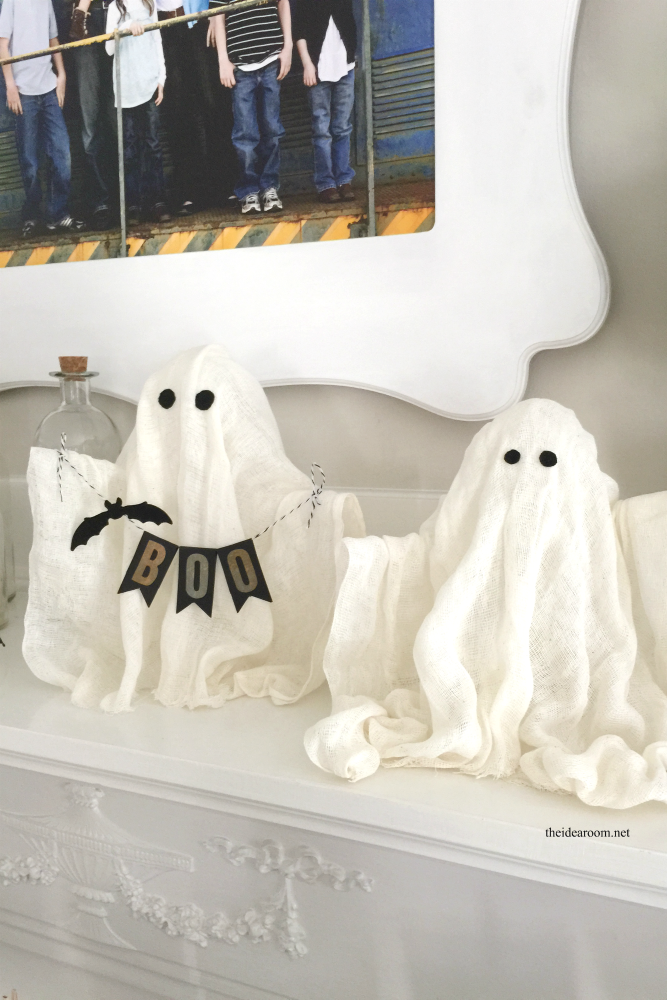
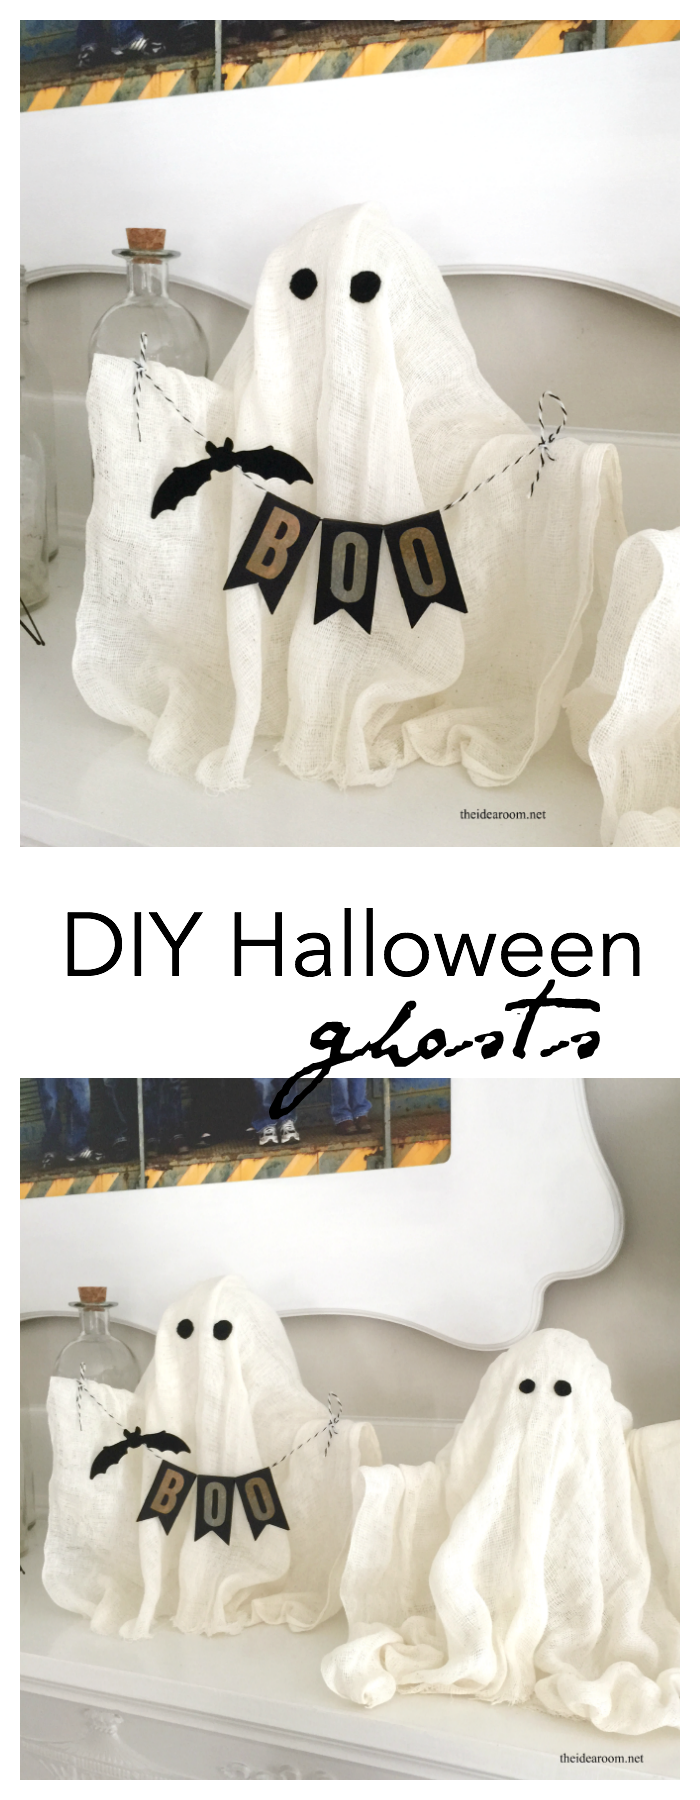
Create some fun DIY Halloween Cheesecloth Ghosts for your Halloween Decor or Halloween Party this year. Easy Halloween craft tutorial made out of cheesecloth.
CHEESECLOTH GHOSTS
Halloween is right around the corner. My kids love to help me decorate the house. I have always wanted to make some Halloween Ghost decorations out of some cheese cloth. So, I purchased the cheesecloth 3…yes…THREE years ago…haha! I just barely got around to actually making them with my girls.
These Starched Cheesecloth Ghosts have been around FOREVER! My mom had some that she made in our home for years while we were growing up. So it was fun to put some in our home and let the kids help me make them.
HOW TO MAKE CHEESECLOTH GHOSTS
For this project you will need the following:
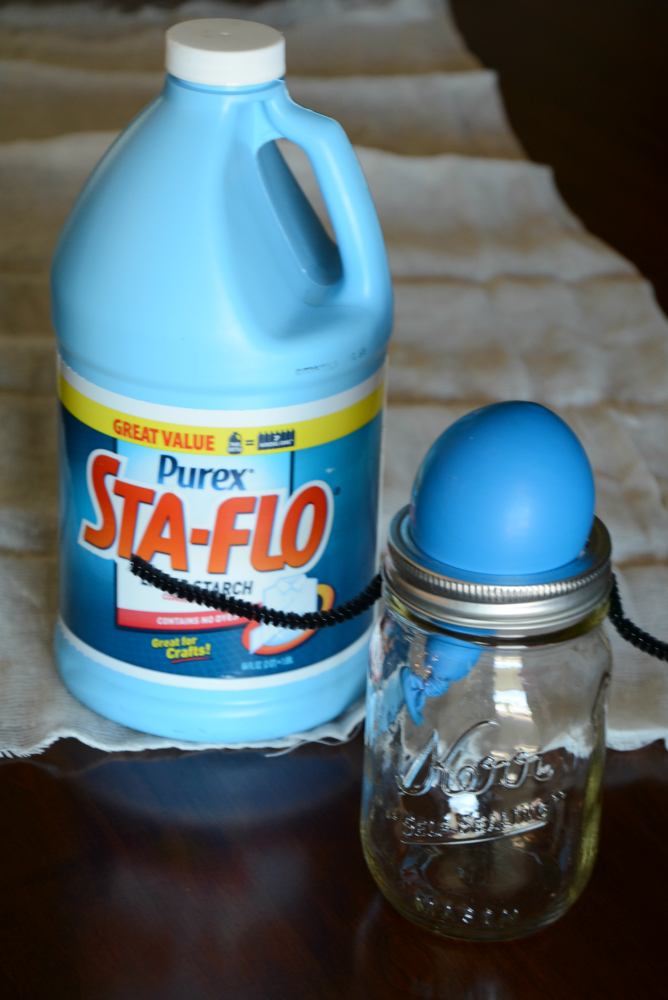
- Liquid Starch
- Cheesecloth
- small balloon (may also use styrofoam ball if desired)
- mason jar (size depends on the size of ghost you want – I used a medium size)
- 2 pipe cleaners
- craft google eyes
- black cardstock paper
- black and white bakers twine
Tips for the Best Cheesecloth Ghosts
-
Use multiple layers of cheesecloth for a fuller ghost.
-
Add fishing line to hang them from your porch or trees.
-
Spray with fabric stiffener if your ghost starts to droop.
Why You’ll Love This DIY
These Halloween cheesecloth ghosts are cheap, quick, and fun for kids and adults to make together. They bring a classic haunted-house vibe and can be reused year after year if stored carefully.
Directions:
- Blow up the balloon so that it fits into the jar and pokes up a bit to create the head of the ghost.
- Attach the pipe cleaners to the top of the jar. I screwed the lid over the end of each pipe cleaner to hold it in place. Then I bent the pipe cleaners so that they looked like the ghosts arms. Be sure to dip them in the middle a little and have them pulled forward a bit. They look more realistic this way.
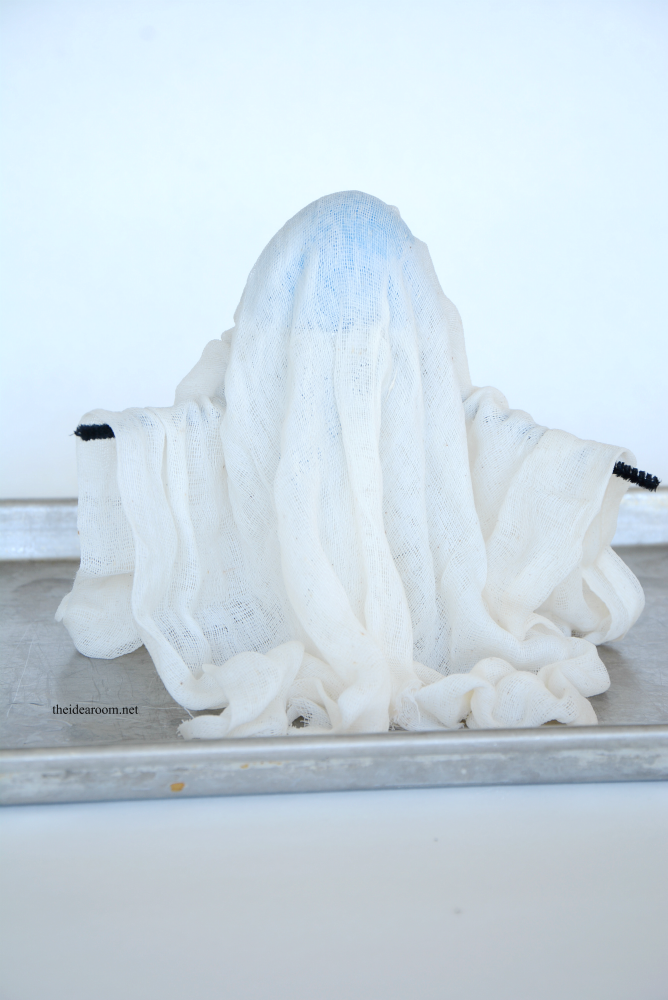
- Place the ghost form on a cookie sheet.
- Take your cheesecloth and drape it over the form. Be sure to leave enough cheesecloth on the sides and pooled down in front and back until you like the length of the material.
- With scissors, cut the cheesecloth after you have determined how you want it to lay.
- Fill a bowl with your liquid starch and soak the entire piece of cheesecloth in it.
- Squeeze out the excess liquid starch from the cheesecloth.
- Drape the cheesecloth over the form again. Be sure to place the material exactly where you want it to lay and in the position you want your ghost to be when finished.
- Let dry.
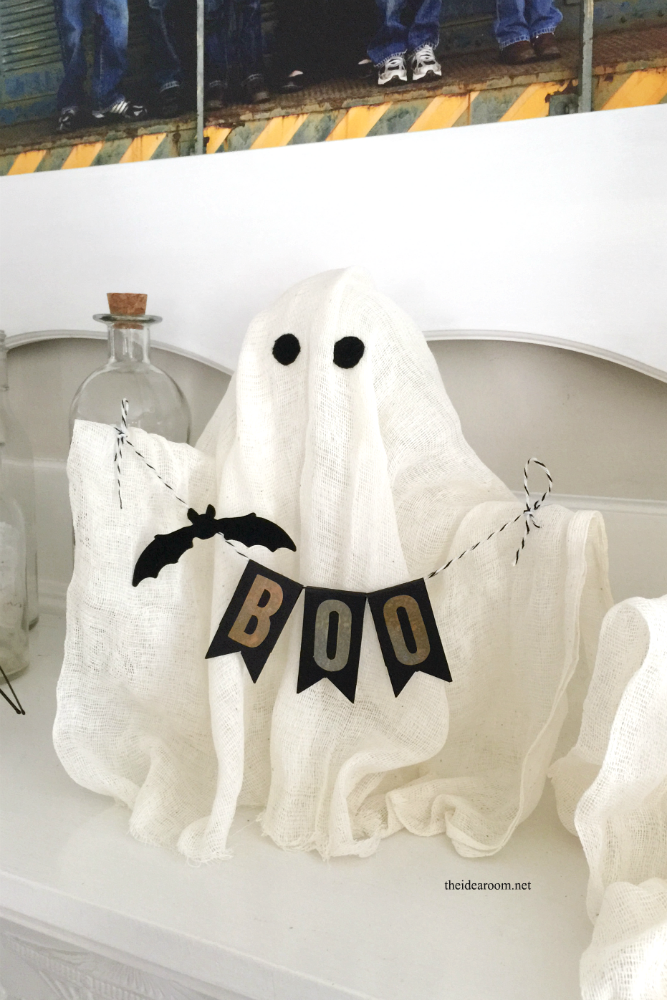
- When completely dry, cut out some eyes for your ghost out of some black felt and create a little halloween bunting for the ghost to hold if you want to.
- To attach the bunting, I simply threaded a needle with some baker’s twine and poked a hole through the cheesecloth where the hands would be and then tied the end into a looped knot to tie it off on each arm of the ghost.
HALLOWEEN
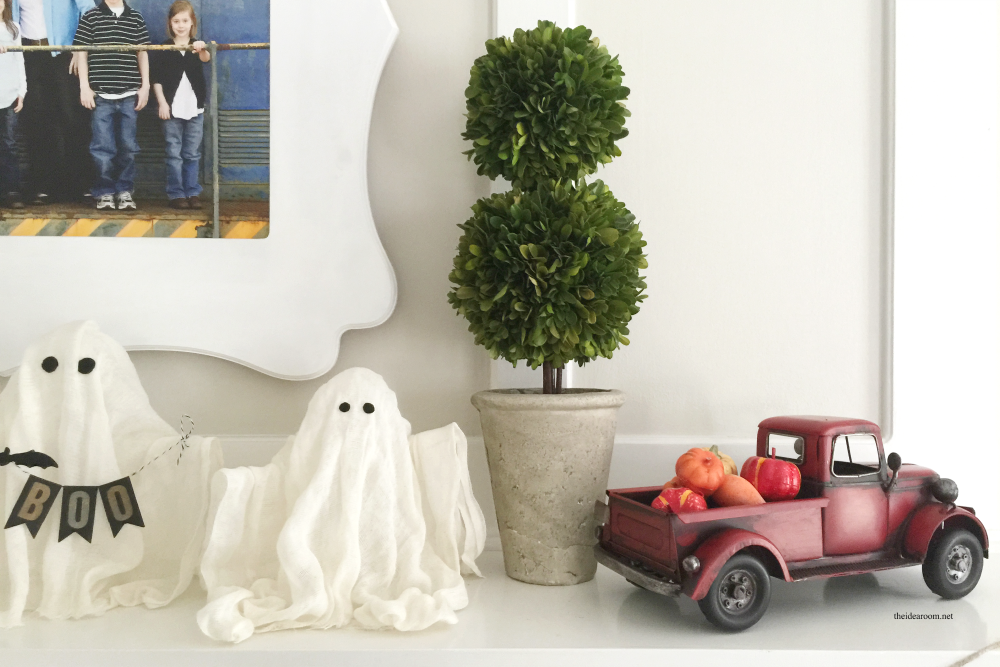
This is such and easy project and can be done so quickly with the kids! It makes a fun little addition to your Halloween decor or your Halloween Mantel.
What do you think? I am sure there are some of you that have made these before or had them in your home when you were growing up!

There are so many ways to style your new DIY ghost decor! You can add a halloween bunting or string lights to the cheesecloth ghosts!
MORE HALLOWEEN DECOR IDEAS
Like this idea?! Here are some of our other DIY halloween decor and recipes which would be the perfect addition to your Halloween this year!
DIY HALLOWEEN DECOR
- Poisons and Potions Printable Cover
- Salem Broom Co Sign
- Halloween Printable
- Halloween Drink Labels
- Potion Ingredient Tabs


So cute :) pretty idea !
Thank you! xo
Love these adorable ghost! My boys and I are going to make some today! Thank you :) love the truck w/ pumpkins too!
Glad to hear that! Hope you guys have fun!
i have been wanting to make these again. Problem was I made them in 5th grade and couldn’t remember what we dipped them in! Thanks for sharing!
No problem. Send pictures of the finished project. I would love to see them!
Super cute! Is there a link to the “boo’s” printable?
No. I just quickly whipped it up. I didn’t create a download for it!
Where do you find liquid starch? Can you saturate the cheesecloth with aerosol or use white glue?
It’s in the detergent isle, usually on the top shelf at the grocery store.
Thank you!
They are very cute and it looks easy to make. Thank you for sharing
Thank you for sharing this amazing ghosts. We made them yesterday for my friend’s Cafe, they’ll be placed the on the chimney. They came out so cute…!
I am vacationing in my country of origen, in La Paz, Bolivia. Halloween is a new thing here, so we were happy to have found these ghosts. We are sure her clientele will love them! Thanks again.
Glad they turned out. Happy Halloween!
This ghost DIY is so adorable! I might try it for my Halloween party next weekend. Anyway, I wanted to let you know that I came across this on Pinterest and featured it as one of my “Pins of the Week” this week. Thanks so much for sharing the great idea!
Shannon
http://somethingshannon.com/?p=723#prettyPhoto
Thank you so much! That is so exciting!
How long is the drying time?
It can take awhile to dry. I would let it dry overnight.
About how long does it take to dry??
About 24 hours to be safe!
Darling! I am curious about the balloon. Will it eventually lose air, and, if so, will the ghost still keep its form? I can’t wait to try this cute craft. Thanks!
Shelly- Yes the ghost will keep its form. Hope you enjoy making this craft. I love how they turn out!
I love these ghosts….my grandchildren are going to make them today. I noticed you started with a blue balloon but you can’t see the blue colour through the cheesecloth when the ghost is finished. Do you pop the balloon when the cheesecloth has dried? Did you double up the cheesecloth when you made them?
Laureen- Yes on both of those questions. What a fun grandma you are!
Love these! How did you make the bunting please?
Bren- I used my cricut machine to make the bunting. Thank you.
Such cute ghosts! What kind of cheesecloth did you use to make these? The squares in the fabric look smaller than the cheesecloth I’ve seen. Or do they just look smaller because it’s doubled up?
Tracee- Probably because it is doubled up. Great question.
I made these little guys today and am starting to get curious about storing them for future Halloween’s.. do you have any suggestions?
Chloe- Great question. I like to stuff them with plastic bags to keep the shape in tact. I also try to keep them upright and don’t pile other decor on top of them. This seems to help. Thanks for following along!
About how many yards of cheesecloth did you use for each ghost? They are super cute and I can’t wait to make them!
Brooke- I would say 3 yards would be plenty, but it really depends on how big you want your ghost and how much you want draping down. Hope that helps.
Hi,
Do you remove the jar and pipe cleaners after the ghost is all done drying? I’m a little confused, any help would be appreciated! :)
Sara- Yes remove the jar and pipe cleaners after it has dried. It will hold its shape when dried. Hope this helps!
This is such a great idea and really easy to make! Thanks a bunch for sharing!
Allyssa- Thank you!
My Halloween decor wouldn’t be complete without these cute ghosts!! Love them!!
Natalie- We love them too!
How cute are these?! This will be a fun craft to do with my girls!
Thank you.