
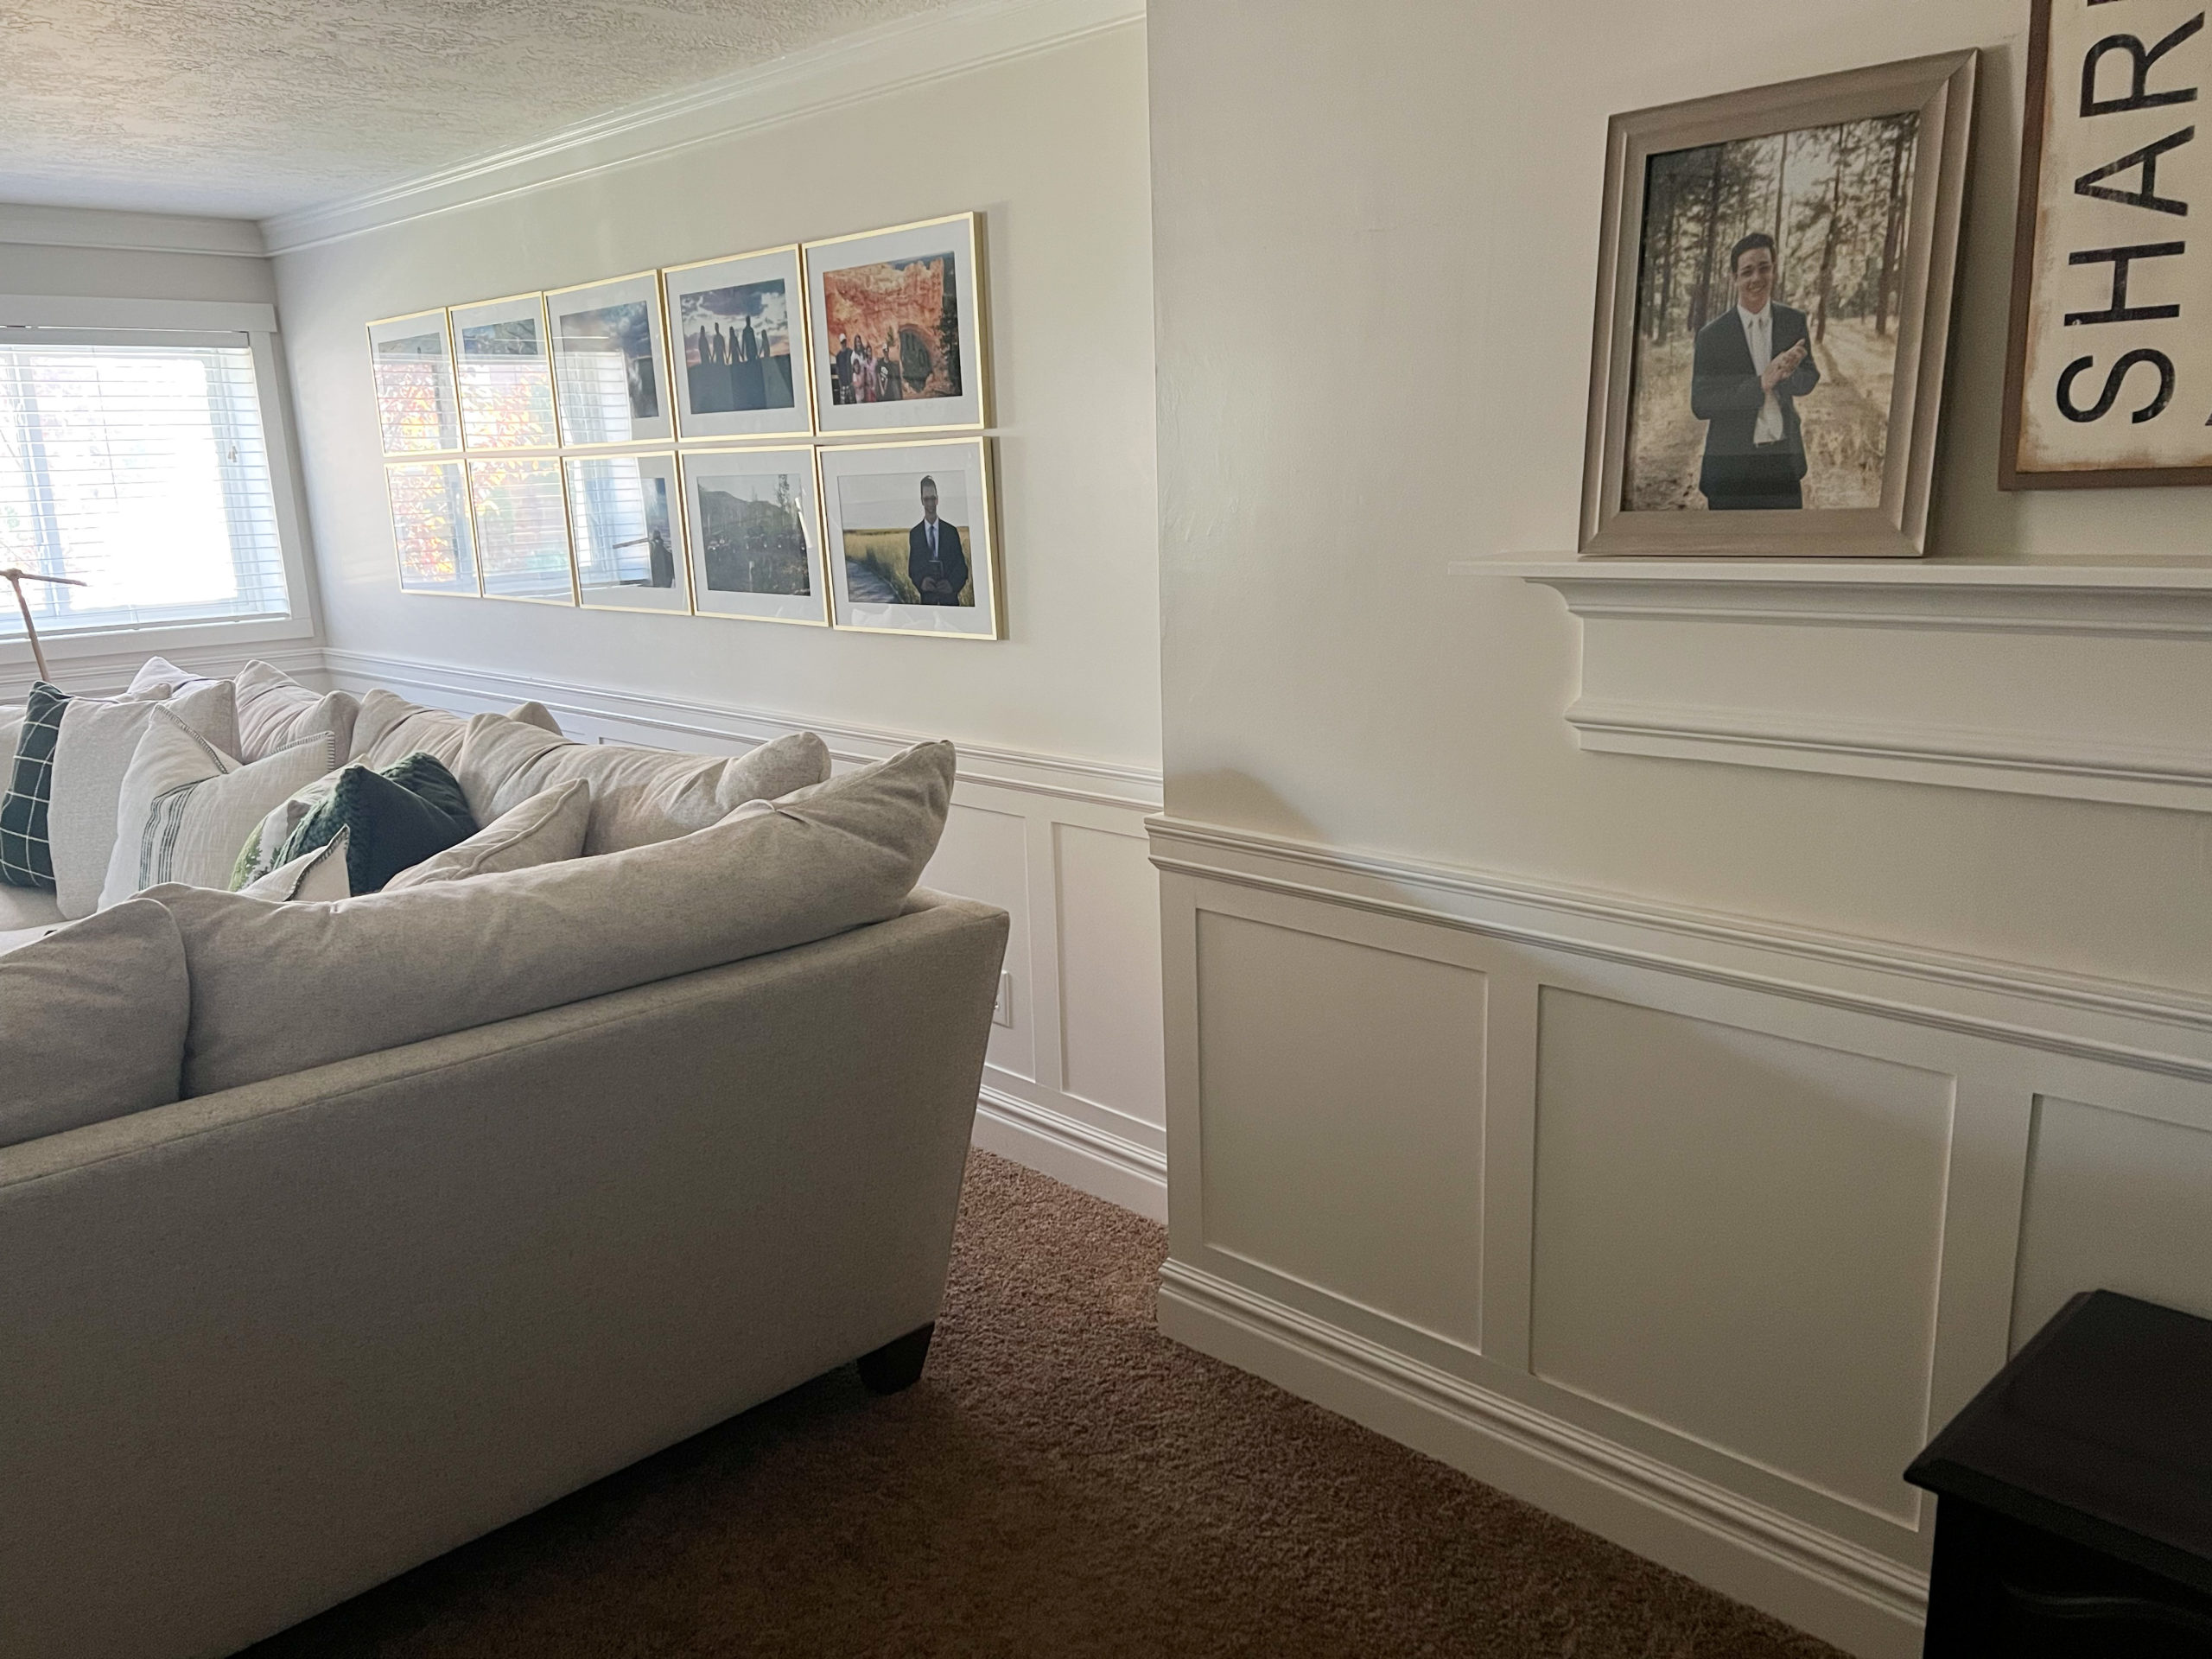
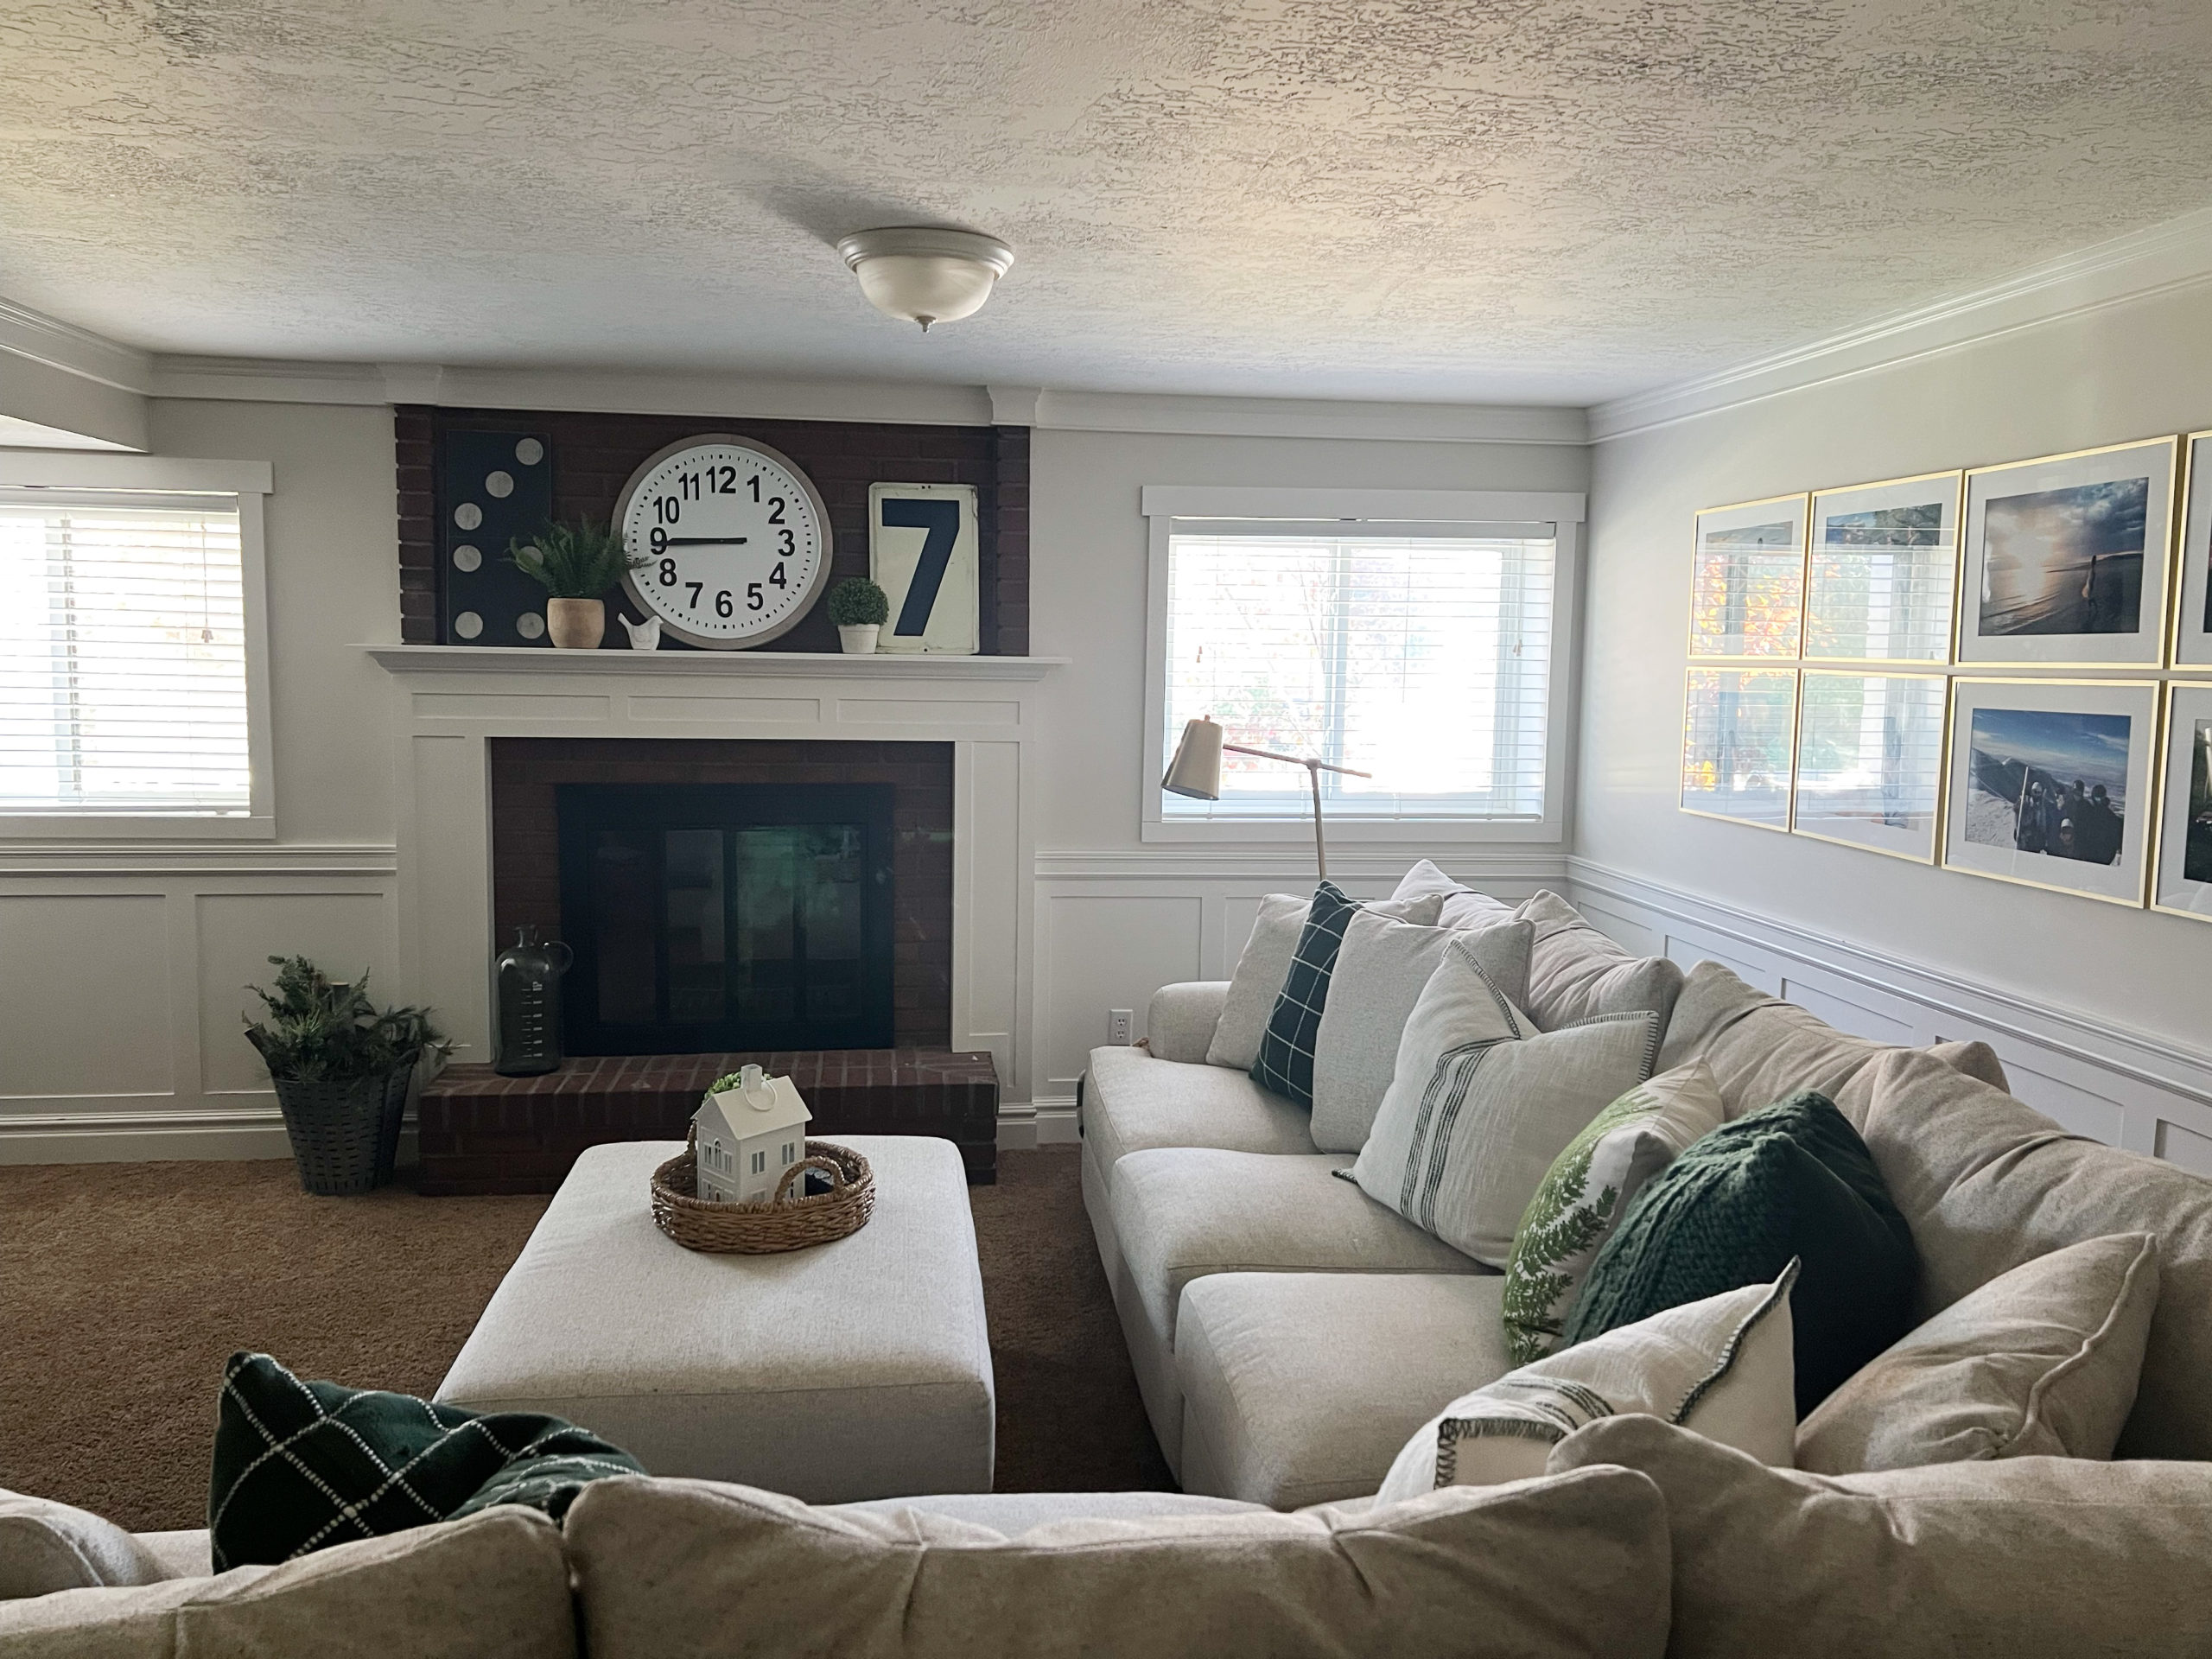
We recently added some more faux wainscoting to the walls in our basement. This room definitely needed a little something extra down there to brighten it up and to add some more interesting details! Adding some DIY faux wainscoting is actually really easy to do. Today I want to share with you the step by step process so you can update a room in your home too!
The room is fairly big and there was quite a bit of wall space to cover so we decided to go with the easiest route. The chair rail and base board were already in place and we we happy with what was there but just wanted to spice it up a bit!
WHAT IS THE PURPOSE OF WAINSCOTING?
Wainscot paneling still serves multiple purposes: wall protection and added home décor. Today, wainscot paneling is a classic design choice that can add richness to your home and create depth and visual interest. I also love how it can instantly dress up a room. You can use wainscot paneling to add a subtle texture or go bold with a pop of color or intricate design.
I, for one, am a huge fan of the look of wainscoting! I have always been a big fan. For me the addition of wainscoting immediately improves the overall feeling and look of the room. It gives it a more expensive high-end look and an instant mood lift!
WHAT IS FAUX WAINSCOTING
To explain what exactly is meant by the term “faux wainscoting” it is helpful to understand the opposite or what authentic wainscot is.
AUTHENTIC WAINSCOTING VS FAUX WAINSCOTING
With the popularity of DIY or do it yourself home shows, blogs and Pinterest, the realities of creating your own DIY wainscoting is becoming more and more apparent to homeowners. Many have begun to realize how easy and inexpensive it can be to do it yourself for less money and create a faux wainscoting for your own unique style.
But what exactly is the difference between authentic and faux wainscoting?
AUTHENTIC WAINSCOTING
Authentic Wainscoting, sometimes referred to as “real wainscoting” is usually manufactured by a company just like a cabinet would. Then the wainscoting panel would be professionally installed in the home by a company. Authentic wainscoting can also be purchased as pre-made panels and then shipped to the customer in a wainscot kit for them to install themselves. It doesn’t matter what installation method you use, a professional or DIY installation, the pre-made wall panel is the main difference between the two kinds of wainscoting.
FAUX WAINSCOTING
Faux Wainscoting, on the other hand, is usually created by combining different pieces of pre-made moldings and strips or panels of wood that are placed together in various combinations to create a final “panel” on the wall. The pieces are nailed on the wall, caulk is used to fill in any unwanted cracks to appear seamless and then painted over to create a one piece look.

5 MAIN TYPES OF WAINSCOTING
- Board & Batten Wainscoting (aka Batten style): Board and batten wainscoting is a flat panel type of wainscoting with vertical boards that are used to cover the seams or styles
- Raised Panel Wainscoting (aka Picture Frame or Box Trim Wainscoting): Raised panel wainscoting is distinguished by the panels being placed in the front of the stiles and rails. The finished look results in panels that look raised off of the wall.
- Flat Panel Wainscoting: Flat panel wainscoting features panels that are placed behind the stiles and rails.
- Overlay Wainscoting: Overlay wainscoting is a combination of both flat and raised-panel wainscoting. It consists of not one, but two interior panels—the first a flat panel that’s bound with a slightly smaller second panel to create an ornate, layered appearance.
- Beadboard Wainscoting: Beadboard is wood paneling with vertical grooves and small ridges between each plank.
WHERE TO USE WAINSCOTING
There are many areas in your home that can be improved with the addition of wainscoting. One of the fun things about wainscoting is that you can panel the entire room, the entire wall, half of the wall, or just an accent wall! I love that it is so versatile.
The most common areas that people add wainscoting to their homes are the following:
- main floor entryway or hallway
- kitchen walls
- dining room walls
- living room
- powder room
- bathrooms (especially main floor bathroom)
- stairs
- mudroom or laundry room with hooks

CAN WAINSCOTING BE PAINTED?
Yes! We always end up painting our wainscoting. I most often paint mine white because I love the contrast of the white wainscot and a painted wall above it. Be sure to caulk and fill in any nail holes with wood filler before priming the wood. When it has dried and been sanded you can paint it the color you desire.
CAN I ADD WAINSCOTING TO A TEXTURED WALL?
Yes you can. Just make sure to add it to the wall as flush as possible. You will need to finish with a good amount of caulking along the seams to give you a seamless look.

MAKE A PLAN FOR YOUR WAINSCOTING
Before you get started you will need to spend some time making a plan for how you will create your wainscoting trim work. We spent a lot of time in the beginning figuring out the exact dimensions of the walls so that we could place the boards so that the squares measured out equally around the entire room but also took into account the small corners, etc.
You can draw a light pencil line on your walls if it helps you to visualize where you will be placing the trim and faux board strips etc. This is very helpful if you are a visual person like I am.
We wanted to work with the size of our existing chair rail and had a 1/4 inch overlap to match up. We wanted the edge of the chair rail to fit flush with the boards we were adding. This way we had very little caulking, puttying, and sanding to do.

SUPPLIES NEEDED FOR DIY WAINSCOTING
- nail gun
- nails
- miter saw
- mdf board for vertical pieces
- mdf board for horizontal pieces
- baseboard (if needed–we used pre-existing)
- chair rail (if needed-we used pre-existing)
- wood glue
- level
- sanding block or hand sander
- painters caulk
- paint primer
- paint
- paint brush
- painter’s tape
- drop cloth
- paint tray
- paint roller
- roller cover
- spacers if your design calls for it (ours did not)

HOW TO DIY FAUX WAINSCOTING
- We bought a couple of sheets of 1/4 inch MDF board that measured 4 feet by 8 feet from our local Lumber Store. They cut them for us for a small fee, into 2 and 3 inch strips. This saved us a lot of money and we didn’t have to make the cuts ourselves.
- The 2 inch strips we placed directly below the chair rail and directly above and on top of the baseboard all around the entire room.
- After setting all of your horizontal pieces, measure the length from the top piece under the chair rail to the base board. On our walls the space measured almost 26 inches. Cut the strips of the 3 inch MDF into lengths to match each specific vertical position. Place the 3 inch strips vertically on the wall or from the top of the chair rail to the base board around the entire room.
- In the corners where two walls met, we placed two strips of 3 inch boards on each end of the wall so that the spacing was uniform.
MAKE ADJUSTMENTS AS NEEDED
- To attach them, we glued them on with painter’s caulk to hold them in place so we could make slight adjustments if needed. When you are certain they are in the right position, put a few nails in the top and bottom of the strip to securely hold them permanently in place. Be sure to wipe up any excess caulk with a damp cloth.
- Now, since the walls are not exactly the same measurements around the entire room, we had to make slight adjustments in the size of the squares. So the squares on the opposite side of the room are slightly smaller than the others. But when it is all painted, you will not be able to notice the difference as long as they aren’t drastically different in size.
FINISHING WORK
- We went around the entire lower section with painter’s caulk to fill/blend the chair rail and baseboard to the horizontal strips.
- Use wall putty to seal the seams where the vertical strips meet up with the horizontal strips. Lightly sand it and vacuum away any dust that forms as you go. You will also want to fill any holes in the lower half of your wall.
- Be sure to prime the all of the new wood and any areas you filled with caulk and/or putty and let it dry completely.
- Paint your walls! Ours took two coats. The paint is a white Behr paint in a semi-gloss finish.

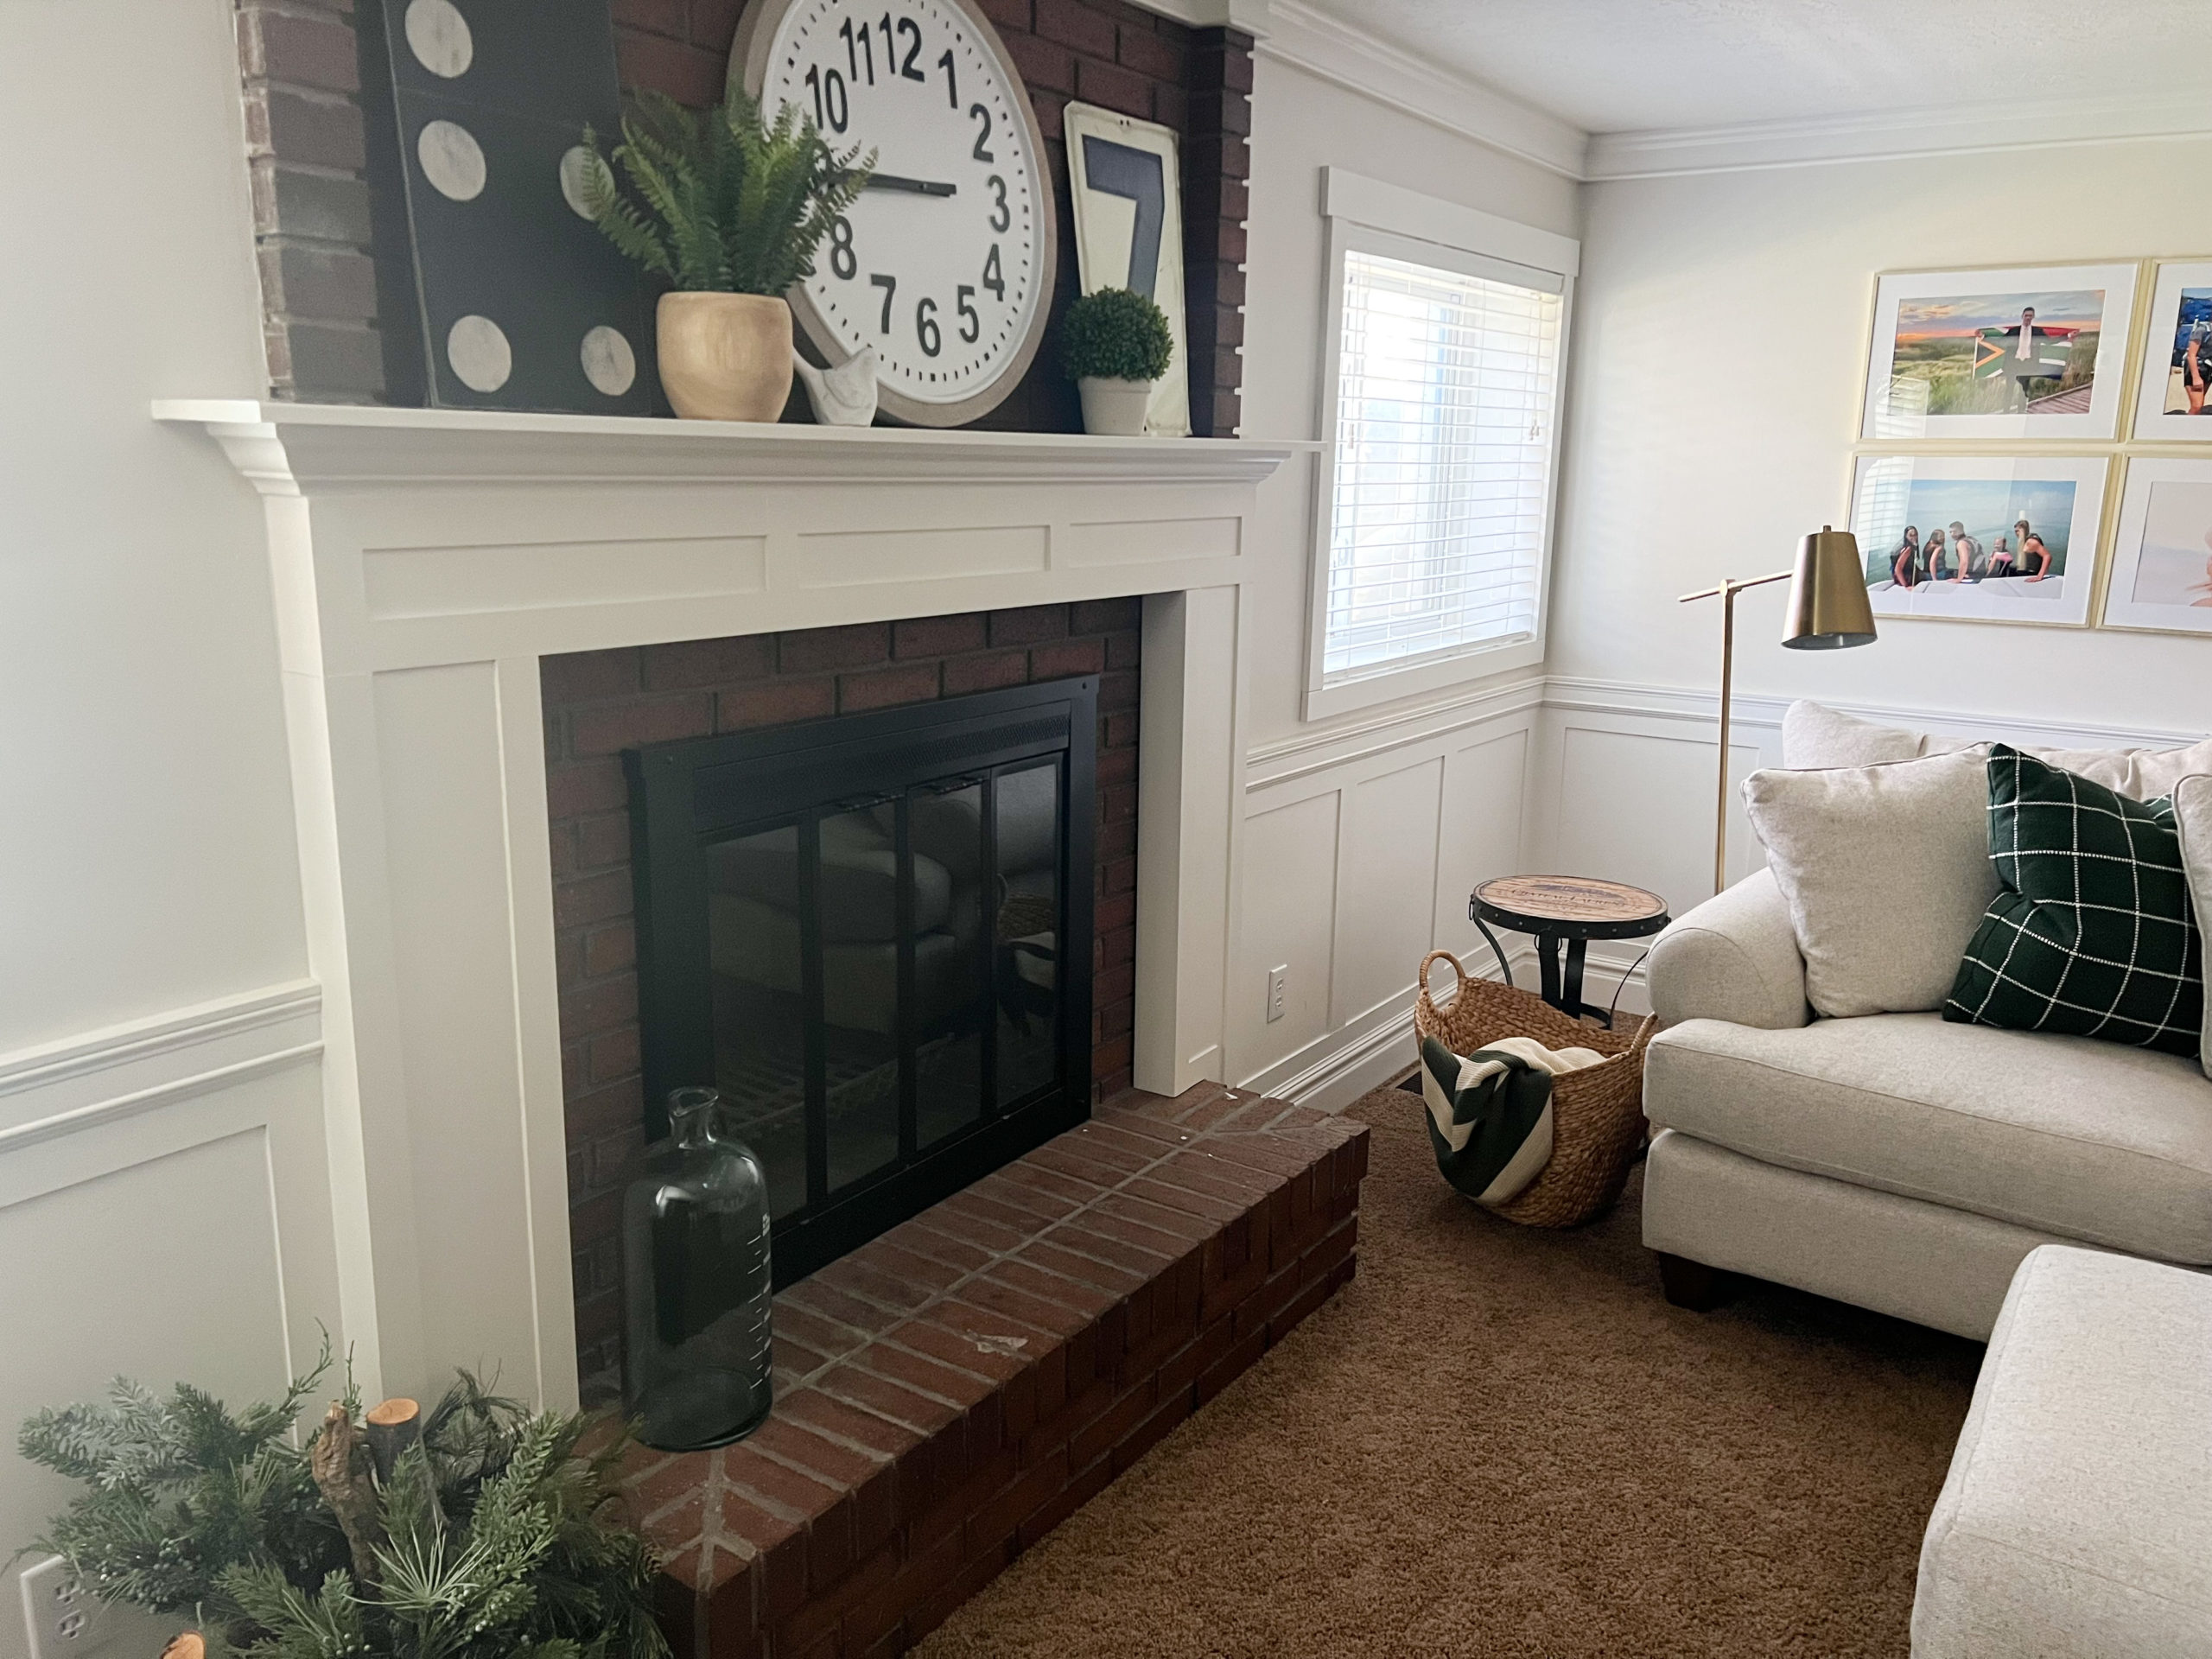
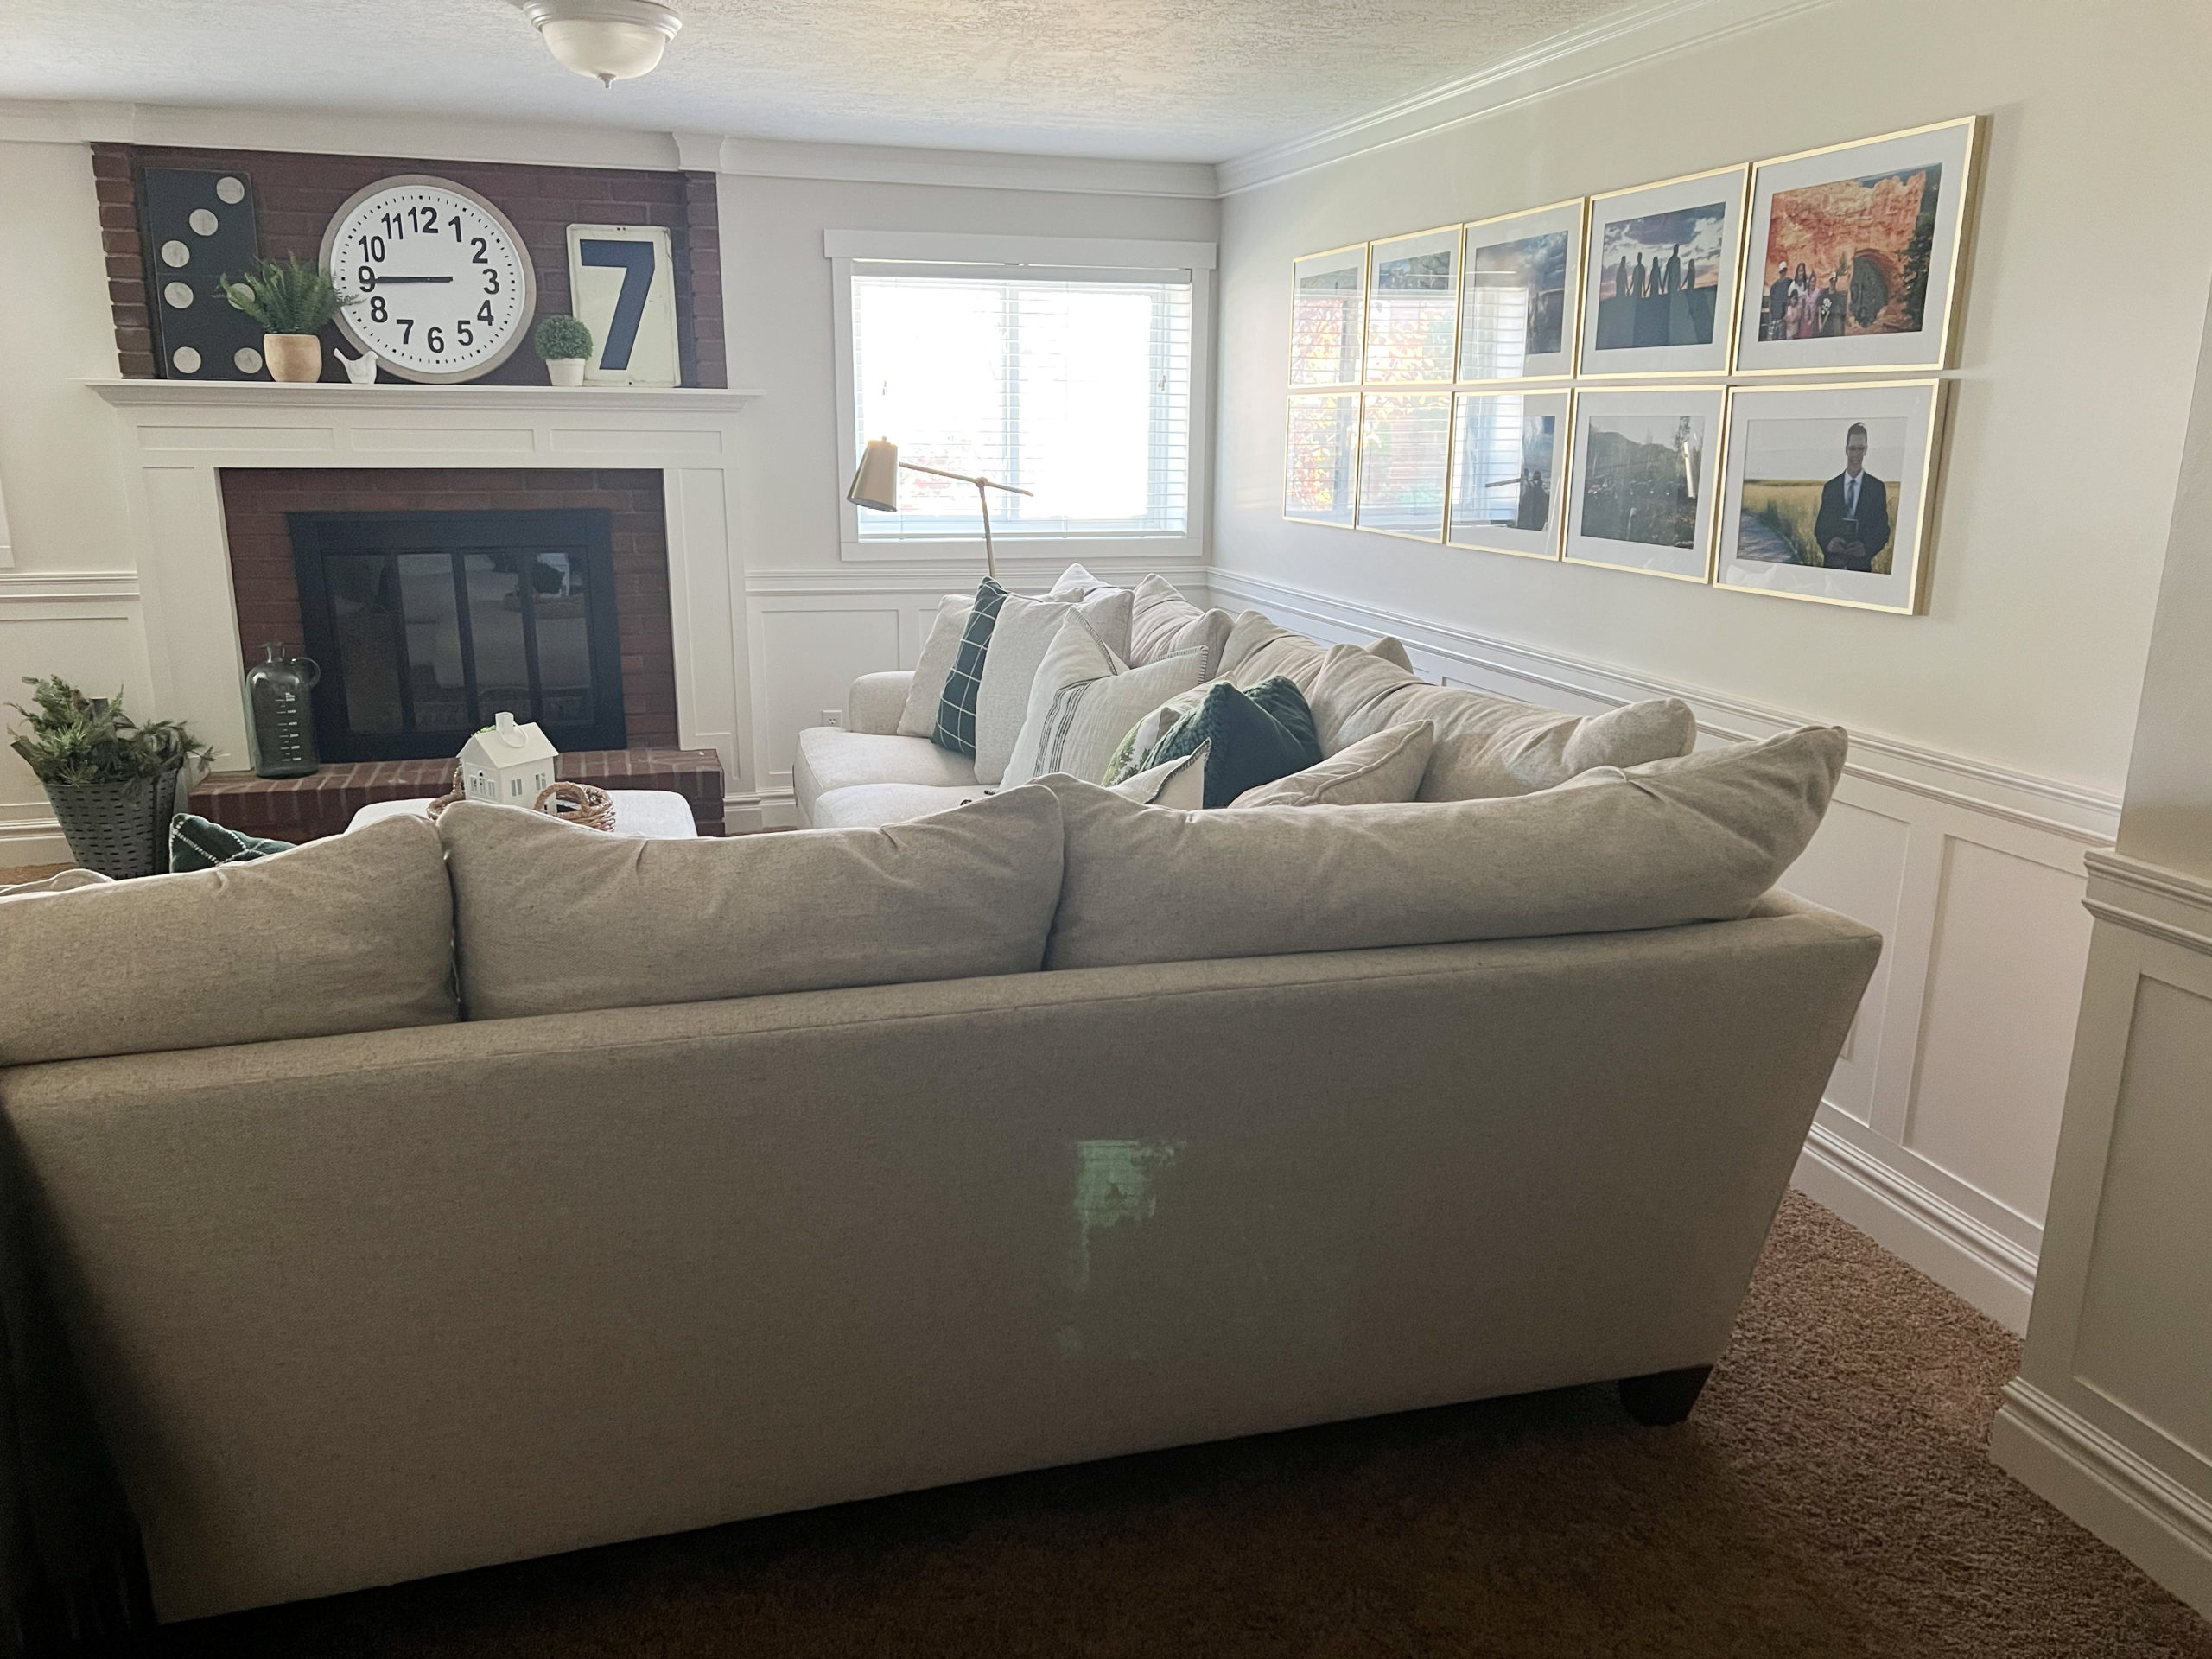
I am loving this beautiful wainscot look! Aren’t you? It looks so nice downstairs now and I actually want to spend time down there. This is where hang out and gather together to play games and watch movies. We want to frame in these windows on either side of the fireplace and put a nice window sills for both. We also plan to add some decorative moulding around the bricks on the fireplace and frame it in as well.
*Update– we have posted about this finished project here: DIY Fireplace Mantel.

The total cost for this project was around $65 dollars. Our room measures approximately 28 feet by 26 feet. We bought two sheets of the MDF which was $20 a sheet. They charged us $10 to cut both sheets into strips. If you want you can change and replace old electrical wall plugs that don’t match the new white walls. We also bought a couple tubes of Painter’s Caulk. We used paint and primer that we all ready had. If we had bought individual boards and not cut our own…the price would have been significantly higher!
 0
0
SHIPLAP WALL COVERING
We recently refinished our family room and covered over some bad walls with some beautiful ship lap! I love how it turned out! You can check that room reveal out here: Shiplap Walls.
JOIN OUR NEWSLETTER
Would you like more Recipes, DIY, Printables and Organization Ideas?
Subscribing to the newsletter will enable us to periodically send you creative content exclusively for Idea Room subscribers.
*View our Privacy Policy here.


This is wonderful. We've been thinking about how to go about adding some decorative detail in our dining room–and your tutorial here has convinced me that we can do it!
Gorgeous! I wish I could convince my hubs to do it!!
rymistri.blogspot.com
We have a wall the wraps into a hallway and will be doing about a three ft area in the hallway. How did you wrap around corners? Did you put a 3 in board on arc side of wall? Hope that makes sense.
Jenay- Yes, that would work or any piece of trim would work. Hope that helps. I bet it’s going to look amazing!
You guys did an awesome job! It looks fantastic! Love the picture of your son eagerly helping. I love that age! Young enough to be excited about helping, but old enough not to make a mess of it. Thanks for sharing.
It looks great!
WOW, that's inspiring! And it looks fantastic! Makes we want to head out to pick up supplies and get to work! Will definitely show this to my husband. Thanks for sharing!
What a great job you guys did! Thanks for the step by step instructions, I would love to do this project in my sitting room one day!
Jennifer
How beautiful! I've seen this a few times now and it's definitely on my to-do list. Finding the time is the hardest part! ;)
Have a great weekend!
Roeshel
That looks fantastic! I can't wait to give this a try.
This looks wonderful! Thanks for sharing!
Looks really nice. Doesn't look like a basement at all. Really dresses the walls up. Great job!
This is exactly what I have been wanting to do, but had no idea how to do it! I have already emailed the link to my husband, and I see a trip to the lumber store in the very near future. You are awesome!
That looks really good! And it looked really easy to accomplish. Thank you for sharing!
Wowza! This project turned out beautifully! I love it lots and am totally jealous that you have a basement! Living in southeast Texas does not allow for basements, so I enjoy living vicariously in your "new" basement family room!
Way to go!
Blessings, — Jill
blessingsofalifetime.blogspot.com
This looks great! You did a fantastic job! Maybe one day I will do that!
Jill of oursevendwarfs.com
Wow, looks great! I wish I could do that in our house.
Just curious what the top paint color was.
Thanks!
That is AMAZING!
This turned out fabulous!
There wasn't a mantel on our fireplace either but bought one at Home Depot. My husband used a masonry drill bit and basically anchored a long 2×4 on the wall with masonry screws into the brick and then the mantel sort of sat on that and got screwed in from the top. It really changed the look of the fireplace. You can do it! :)
This looks fantastic!! I love how bright it looks with the molding! I would love to add some details to our house like that, it just looks so rich and finished!
xoxo,
Amy
I love this blog post! You gave great directions and pics, to the point that I am confident this is something I could even do! And I can't do much, lemme tell ya! ;)
I'm going to try this out. I am determined.
Thanks you!
Great job! I looks so nice!
Only $65!! That looks great!
It looks good! It really adds a lot of coziness to the room too.
You always have great ideas and tips to share with us. Thanks for sharing all of them. We are big fans of your blog so we awarded you the "Stylish Blogger Award." Please follow the link to get the details.
Shannon & Jill of Our Seven Dwarfs
http://www.oursevendwarfs.com/2011/02/we-won-award-stylish-blogger-award.html
I. Love. It. Seriously I've been wanting to do this for a while and just need to do it. It looks amazing!!!
You did an amazing job! I love "faux" ideas. Thanks for the look into your room.
looks great! We actually created the mantle on our fire place by taking pics of my brothers (we really liked his) and also took some measurements and built it all out of mdf, crown and a few wood accent pieces. Painted it all a semi-gloss white and LOVE it. It has made the biggest difference in our room. Our old mantle was a thick piece of cedar just held up by a few nails. Very 1980's.
We are going to put up some faux wainscoting in our dining room this spring, so I loved looking at your project! Good luck and have fun!
@Alisha-Thank you so much for your information on your mantle. I am really thinking that is something I really want to do!
WOW this was such an awesome DIY. Thankyou for sharing. I will soon be purchasing a home and I wanted to do this down stairs in the basement. It has a red brick fireplace just like yours. My space isn't nearly as large as yours. I was wondering what you thought about doing that to a smaller space and what you think it would do to the room. If you think it would make the room visually smaller bigger taller etc. ????
In my opinion, I think it actually helps the room to look larger. Especially if you have a darker paint on the upper walls. I also love the finished look it gives to the room. I have several smaller rooms done with this too. My daughter's room is particulary small (fits a twin bed and dresser and not much else) and it looks really good in her room. Hope that helps!
Ok, this turned out GREAT. I keep telling DH that I want to do fake Board and Batten or wainscotting in our kitchen but he always thinks it won’t turn out nicely. I’m going to forward him this link!
I LOVE this. I’m definitely going to do it in my dining room. Will the “big box” stores like Lowe’s and Home Depot cut the MDF for you, or did you need to go to a lumber yard? Is 1/4″ MDF hard to find? Thanks for posting your wonderful project!
We went to a local lumber yard and they cut it for us for a small fee ($20 if I remember right). You could try Lowe’s or Home Depot though. They have cut stuff for me before but never so much at once. Not hard to find at all. Should be at most big box and local stores.
Hello Amy, I am doing something g similar to your project right now. Did you paint the wainscot area with a semi gloss paint?
James- I like semi-gloss or satin best. It’s just what you prefer. Satin is great because it is easy to clean but if not as shiny as the semi-gloss. Hope this helps.
I know of this and we chose wainscoting instead. I like this but not the White they painted with the light Beige wall. There are sooooo many colors out there WHY do people choose white? Sorry just my opinion
You said you had te MDF cut into 2 and 3 inch strips. Do you mean 2 and 3 inch strips wide? Or is that supposed to be 2-3 feet long strips?
Thanks for posting instructions on the shelf you made for the bathroom. It is beautiful, and just what I need!!
Actually, I think you could use the same idea to make a mantle. Then you would have to buy a special drillbit to go through the bricks and screw it into the bricks. I had the same fireplace you have in my old house and I bought the drill bit many years ago, just asked the guy at Home Depot what to use. It cost $3.50 10 years ago and worked like a charm.
i love the wainscoting, as far as the mantle goes i did one for my father-in-law by simply installing a floating shelf …..it turned out GREAT! if u want to see i have pics i can send you!
p.s.- i LOVE your site, i just fell upon it as i am a new home owner!
How far apart were the vertical pieces roughly? I know they were not all exactly the same I am just looking for a starting point.
Amy- I’m just getting together my game plan to do this in my Master and this is a great tutorial!!! Very detailed thanks! This is such a great update.
Adding a mantel is no harder then what you have already done, you make up a back hanger, and it spanes the mantel on back, and it is made at a 45% degree angle, and you put one on the back of the mantel, with an upside down 45% degree angle hanger made of a 1 by 1 or 1 by 2 and it hangs on the other piece of wood you hug on the wall that has the 45% up, and they lock into each other, good luck, I am doing this for my fake fireplace, even went to the extent, to by a basket for wood, and the fireplace tools, and a cover to go infront of the fireplace, to catch any fake sparks coming out of the fireplace, I am also buying the faux rock brick, and will do the whole wall. Thanks for the info. HC
I am interesser in the wainscoting project for one wall in my small dining room. Am interested in your comments area.
Wow!! Great job. I have seen this and want to try it. Are your walls smooth or do they just appear that way in the pic? My walls have a light texture and I am wondering if it would be okay to do this without adding plywood to the wall first. I do not have many tools and am not sure how I would cut plywood. Sorry for all of the questions but I am new at this. I love, love your ideas!!
They have a little bit of texture to them due to the paint roller brush…but overall are not textured walls.
Beautiful! the cuts that you made at home, would a hand saw work? Or would I need a circular saw? Thank you! Can’t wait to start this project.
You could use a hand saw since they are simple straight cuts. Better yet…go to your hardware store and see if they will make the cuts for you. They may charge you a small fee but it might be worth the time it saves you!
This is an awesome idea and looks great! Thanks very much for sharing. The existing base trim I have is similar to yours but the smaller piece at the top of it only has a 1/8 inch lip, meaning the top only sticks out 1/8 inch from the wall though the rest of the base trim is deeper. Is your base trim 1/4 inch or is it smaller? Just wondering if it would look really weird if the MDF strips stick out 1/8 inch farther than the top of base trim. I was thinking maybe I could make it appear more flush by filling in with caulk. Thanks!
Amy, what kind of putty did you use on the seams? Did you use it where the horizontal boards met up as well as where the vertical met the horizontal? Since your sheets were only 8′ long, I’m guessing you had to piece the together along the long spans of wall? Thanks!
Ally- We used DAP Painters Caulk. Yes, we caulked the seams where the boards met up. Hope this makes sense. Thank you.