
*This is a sponsored post with Cricut. I am so honored to be working with a company I adore and use in my own home.
Sharing some fun iron on designs from Cricut. These Cricut Iron-On Designs are so easy to adhere to multiple surfaces with the cricut easypress and easypress mat. Cricut Iron On is a great way to personalize items in a fun and unique way!
CRICUT IRON ON
Hey guys! I have another fun Iron On Project with Cricut to share with you today! I am super excited about this one because of some fun new Cricut Iron On Product that is going to make creating fun and unique, personalized, home decor items, accessories and clothing SO MUCH EASIER!
CRICUT IRON-ON DESIGNS
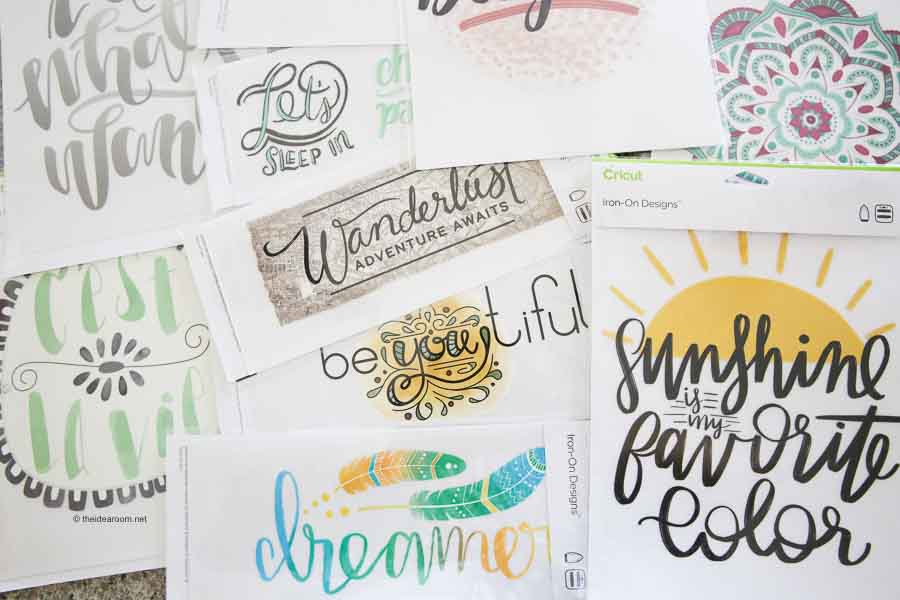
Cricut has recently come out with some new Cricut Iron-On Designs that can help you save time and allow you to personalize the world around you. Cricut predesigned Iron-Ons are available in two sizes: large and small which makes them perfect for adding some fun to your shirts, tote bags, kitchen hand towels, blankets and so much more!
PREDESIGNED IRON ONS
It’s never been easier to create some fun and unique accessories in just a few minutes! Apply these ready-to-apply designs just like they are, or add your own creativity when you personalize the predesigned iron-ons with additional designs cut from your Cricut machine.
Care Instructions:
-
Allow 24 hours after application before washing.
-
Wash and tumble dry inside out.
-
Do not bleach.
-
If you need to iron, only iron on the backside of the garment.

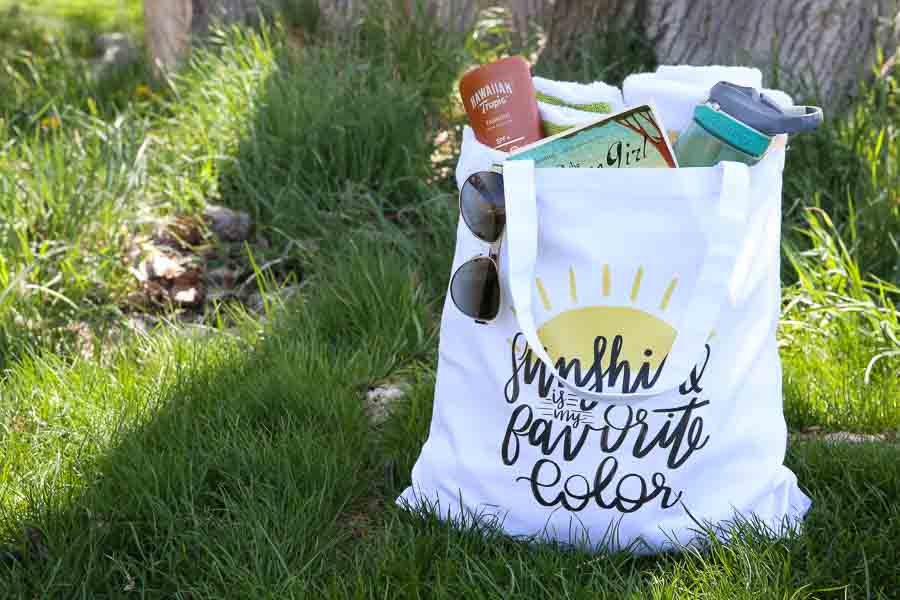
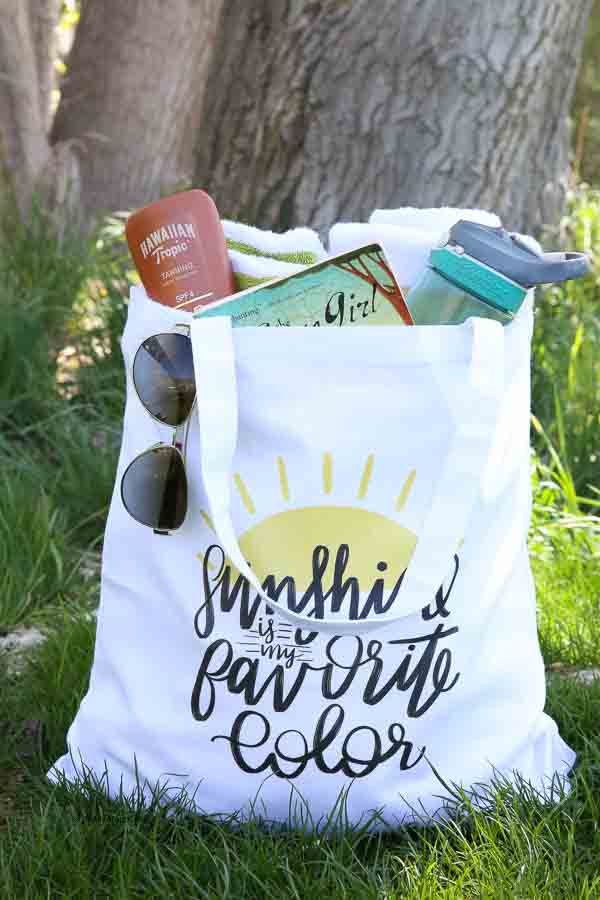
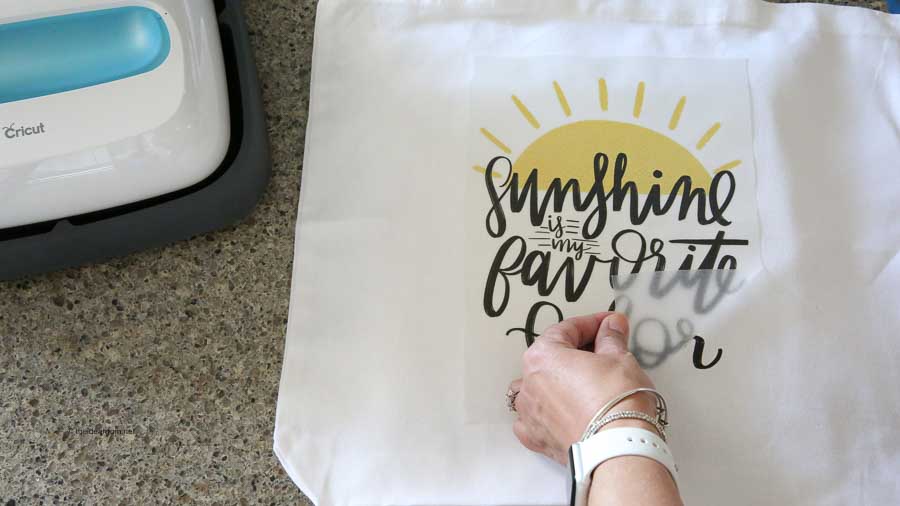
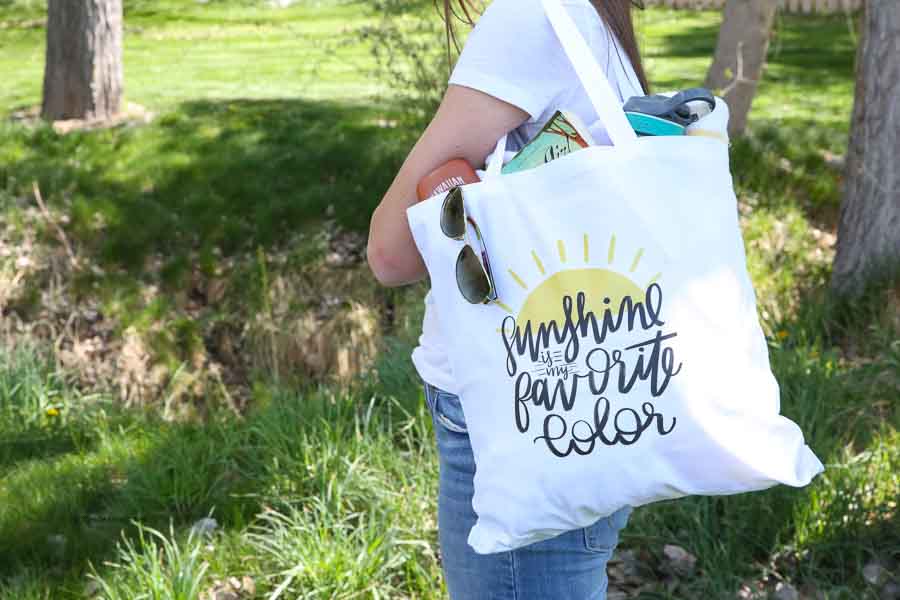
Currently there are over 50 designs available, with more coming soon! I created this Summer Tote Bag using this iron on from the Wanderlust Collection which will be available to purchase online soon! See the other Cricut Iron On Options online.
Today I am sharing how to make your own Iron On projects using Cricut Iron On Designs and the Cricut Easypress and Easypress Mat. Before sharing exactly how easy it can be to create your projects, I wanted to share a little bit about the Easypress and the Easypress Mat so you are a little more familiar with them!
CRICUT EASYPRESS
The Cricut Easypress combines the speed of a heat press with the convenience of an iron. You get professional iron-on results in 60 seconds or less. The Cricut Easypress has an evenly heated plate, unlike your household iron, and simple controls that make iron ons easy! The high and even heat creates beautiful Iron On projects that last without the iron on material pulling away from the surface material.
● Easy to learn, simple to use
● No press cloth needed for most base materials
● Adjustable heat up to 350℉
● Intricate transfers stick after repeated washes
● 9″x9″ Base is great for large or layered iron-on projects
● Lightweight, portable, easy to store
● Compatible with major brand of heat-transfer material
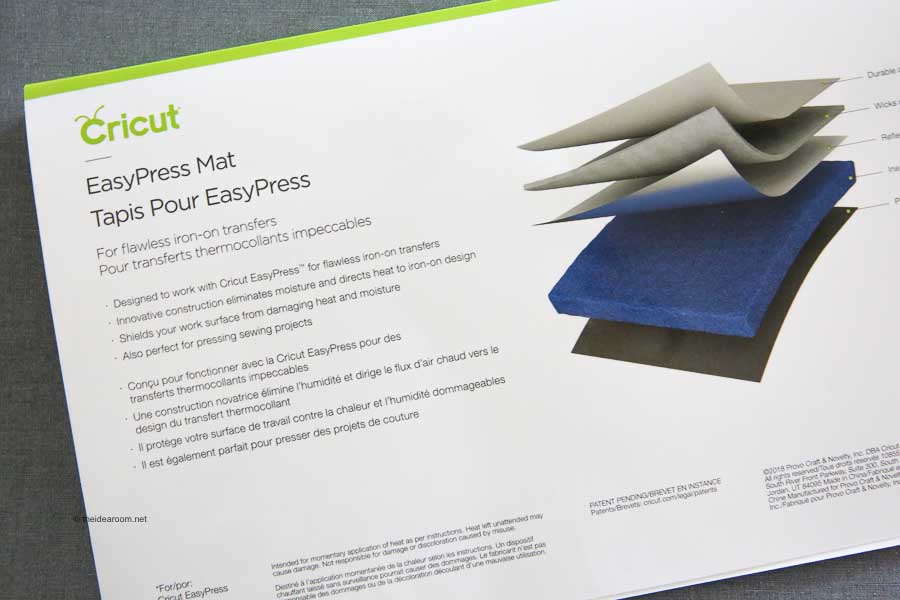
CRICUT EASYPRESS MAT
The Cricut EasyPress Mat is ideal for creating flawless iron-on transfers onto a variety of materials and is to be used with your Cricut EasyPress for best results.
- Innovative construction eliminates moisture and directs heat to the iron-on design
- Shields your work surface from damaging heat and moisture
- Also perfect for pressing sewing projects
- one-sided

HOW TO USE CRICUT EASYPRESS
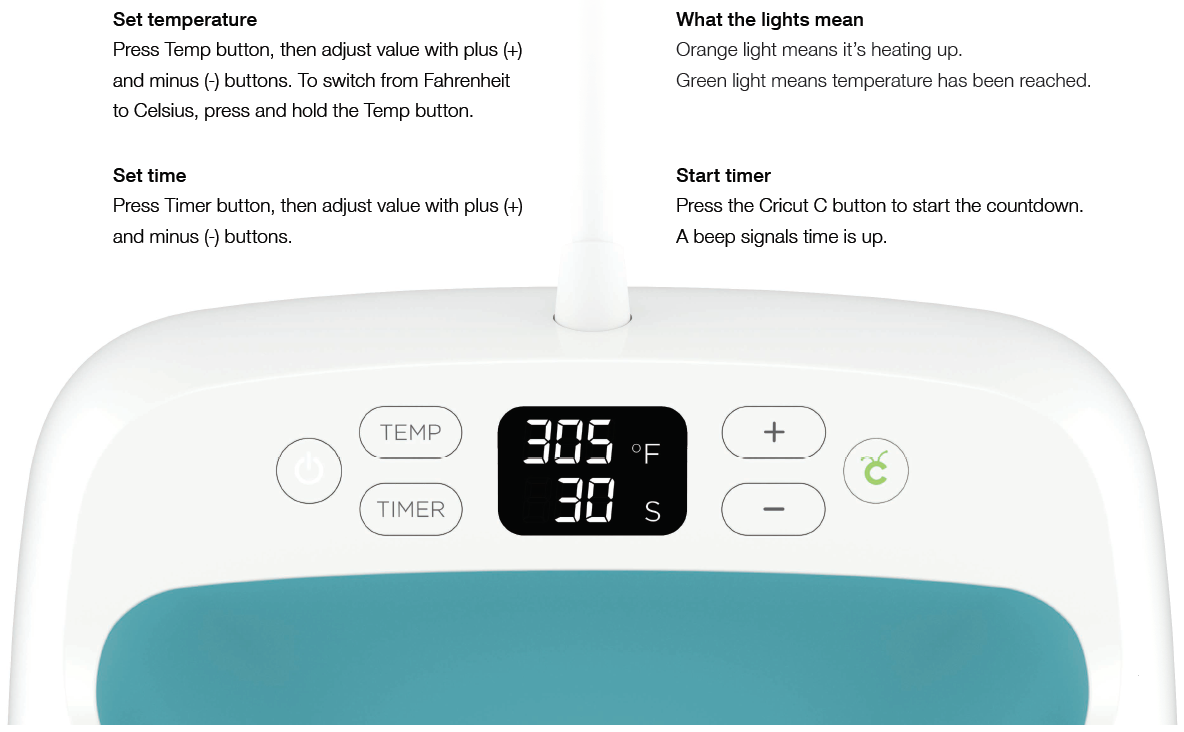
- Plug in the EasyPress and set the temperature to the specific heat setting, which is determined by the type of material you are using (see the charts below), and let it heat up. Since we were using a cotton tote bag our heat setting was 340 degrees F.
- Preheat the material where you will be applying the vinyl for the amount of time determined with the EasyPress. Our Pre-Press time was 5 seconds. Remove the Easypress.
- Set the timer to 30 seconds. This is the amount of time you will be pressing on the iron on material to your fabric.
- Place the vinyl on your material where you want it.
- Hold the EasyPress with a medium pressure on the vinyl for 30 seconds on the front of the material.
- Turn the material over and hold the EasyPress on the back of the material for 15 seconds with a medium pressure.
- Remove the EasyPress and let the vinyl cool if you have a “cool peel” recommendation. If you have a warm peel, then you can peel the vinyl backing off the project when the vinyl is still warm.
- Carefully peel away the plastic backing.
HOW TO USE CRICUT IRON ON DESIGNS
CRICUT EASYPRESS RECOMMENDED SETTINGS
You will need to check the Easypress Recommended Settings before using the Easypress on your Iron On Projects so that you get the best results possible. These settings have been tested and tested to determine the best possible heat times and temperatures so your projects can last a long time! If you are using an Cricut EasyPress Mat the settings will also be different than using a towel or your ironing board.
Click on the links below to find the Cricut EasyPress Recommended Settings!

I am so excited about these Cricut Iron On Designs! I love how simple and fun they are to use! Sometimes you want to throw together a project that doesn’t take a lot of time and effort and these iron on designs are perfect for kids projects too!
I can’t wait to see all the new designs they come out with! I already have my eyes on another design to make a t-shirt for my daughter to wear on the last day of school! The possibilities are endless!
What iron on design would you use…and what would you put it on?
CRICUT SUPPLIES
CRICUT PROJECTS
- Kitchen Hand Towel
- Pumpkin Wood Sign
- Thankful Wood Sign
- Kitchen Wood Sign
- Toothfairy Monster Pillow
- Constellation Lacing Cards
- Summer Tote Bag
- We’ve Moved Cards
- Animal Bookmarks
This is a sponsored conversation written by me on behalf of Cricut. The opinions and text are all mine.
JOIN OUR NEWSLETTER
Would you like more Recipes, DIY, Printables and Organization Ideas?
Subscribing to the newsletter will enable us to periodically send you creative content exclusively for Idea Room subscribers.
*View our Privacy Policy here.


Wow looks like a lot of FUN!!
I hadn’t seen these products yet but will have try them out. And I absolutely love the EasyPress ❤️