
Learn how to make this DIY Wood Flag Sign for your red, white and blue Fourth of July decor with this simple step-by-step tutorial!

FOURTH OF JULY
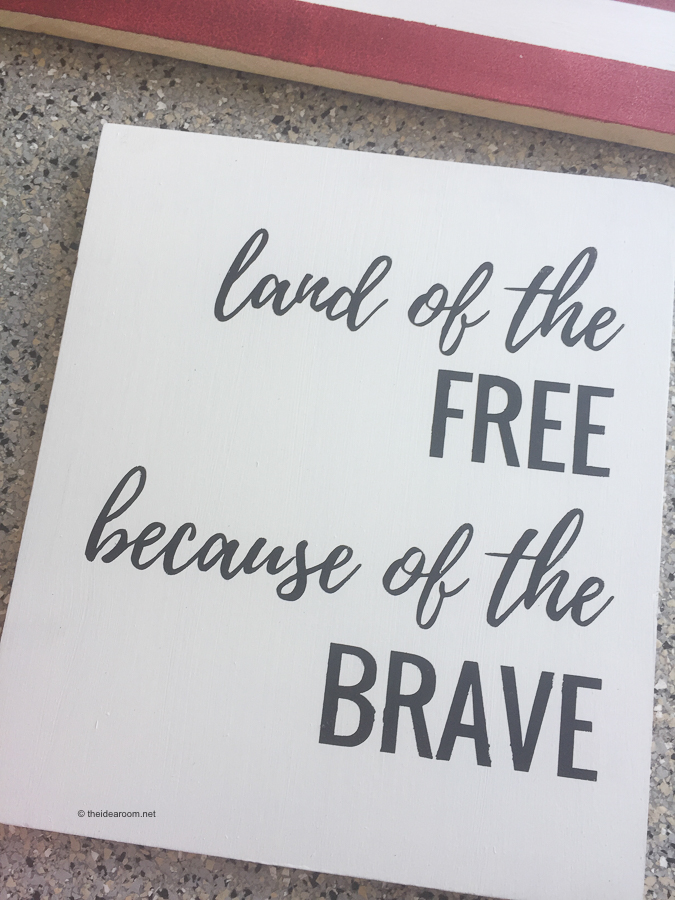
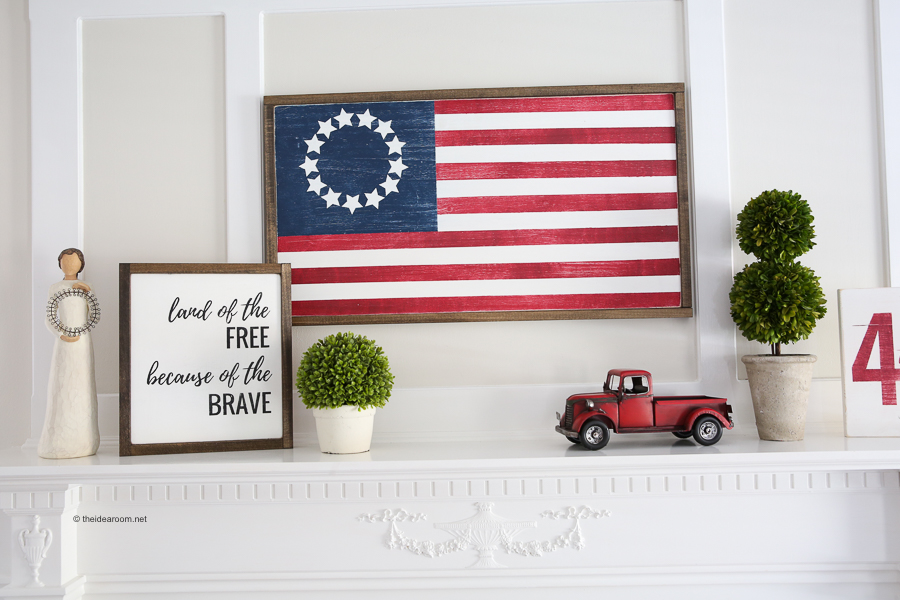
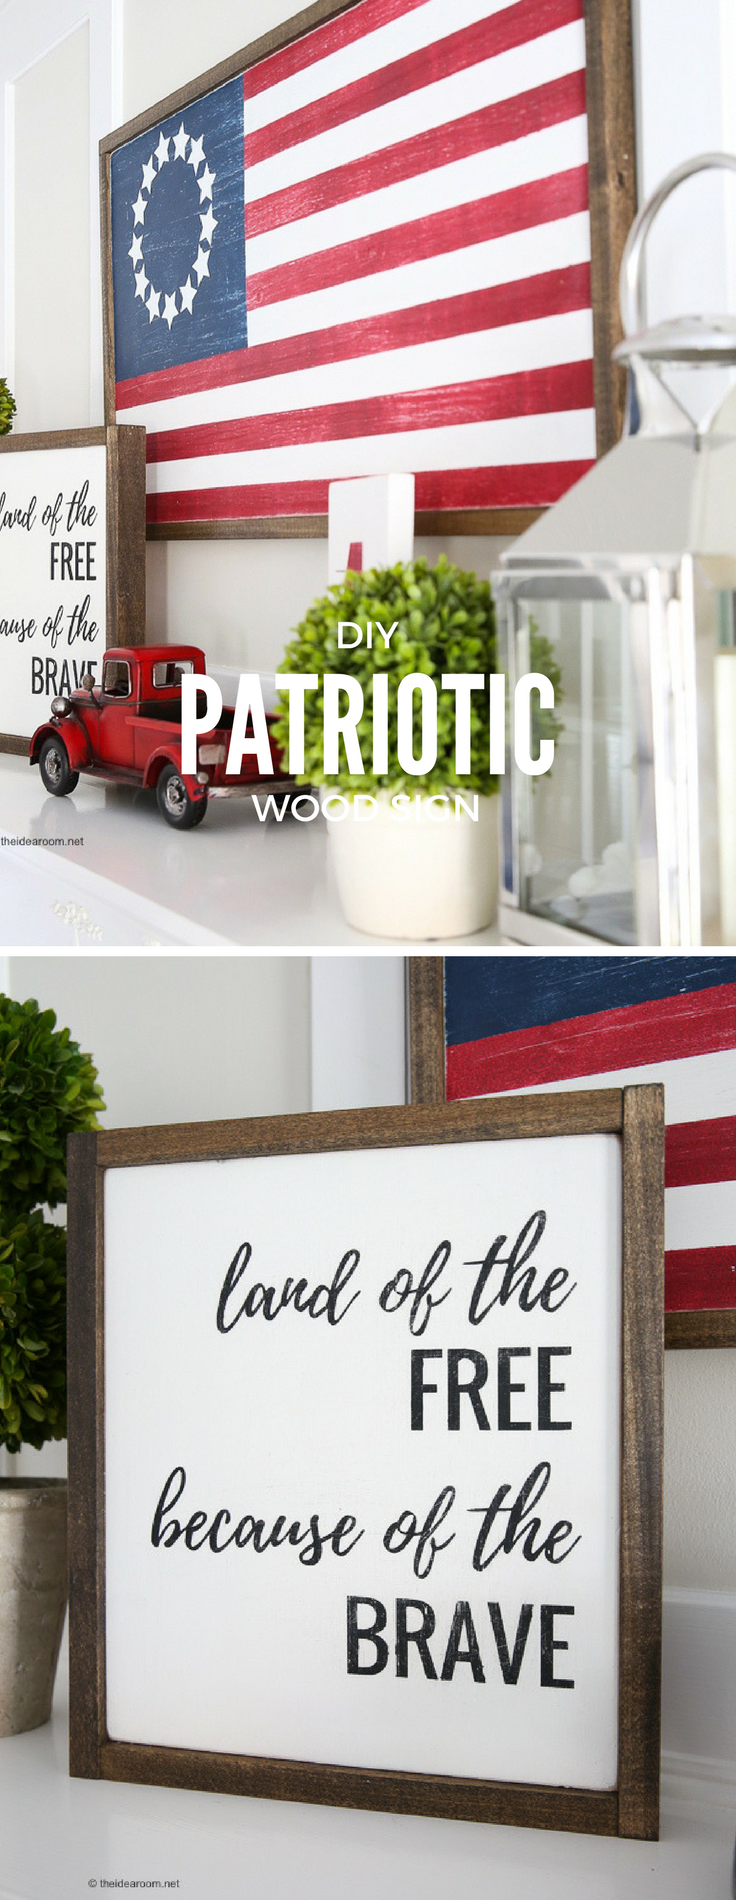
Just a month before the Fourth of July Festivities begin! Make this DIY Land of the Free Fourth of July Wood Sign for your Independence Day decor! It is so easy to make and is a fun addition to your patriotic decor! The Fourth of July is one of my VERY favorite holidays so I LOVE to decorate for it.

HOW TO MAKE A WOODEN SIGNS
I shared with you how I made our Wood Flag Sign here if you are interested in learning how to make that for your own home! Today I am sharing how to make the Land of the FREE, because of the BRAVE!
SUPPLIES:
- 1 piece of wood (mine was 17 inches x 32 inches)
- 2 side pieces (17 inches x 1.5 inches x 3/4 inches)
- 2 side pieces (33.5 inches x 1.5 inches x 3/4 inches)
- white paint
- black paint
- paint brushes/roller (I use this one)
- sand paper
- nails/staples
- Land of the FREE stencil (download the svg file I used for mine here)
- stain (I use this one)
- stain rag
- picture hanger (I used this one)
DIRECTIONS:
- Cut your wood to your desired measurements, or use the measurements I did. Lightly sand board so that it is smooth of the front and around the edges of the board. Wipe off dust with a damp cloth.
- Paint your wood white and let it dry completely.
- Take your stencil or vinyl cut out and place it onto your board so that it is centered or pushed to the right of your sign like I did.
- Stencil the words onto the board with black paint (or your favorite color) and peel up the vinyl carefully.

5. Let the sign dry completely at least a few hours so that the paint will not smear when you sand it.
6. Sand the sign down roughly on the edges as much as you want it to have a distressed look. Run the sand paper over the entire flag so that it looks a little worn and aged. Again, do this to your own personal preferences.
7. While the paint is drying, you can cut your side pieces for your sign frame. You will need to cut two different lengths of your frame using the measurements above. Two will be the top and bottom frames and two will be the sides of the frame.
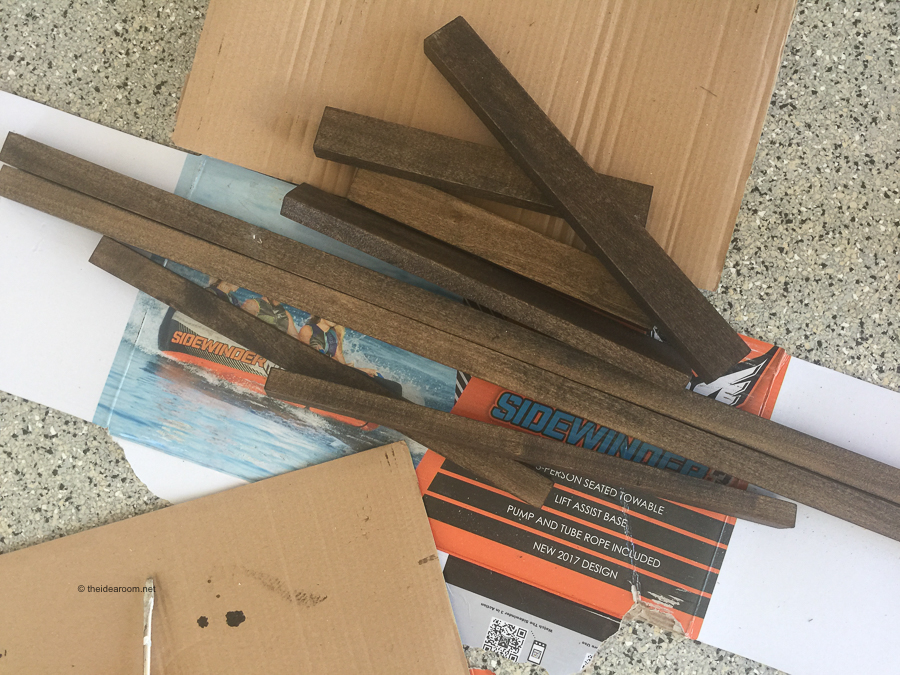
8. Stain them with your favorite color of stain and let them dry. I used this stain.
9. After the stain has dried and the sign is sanded, you can nail or staple the frame onto the flag.
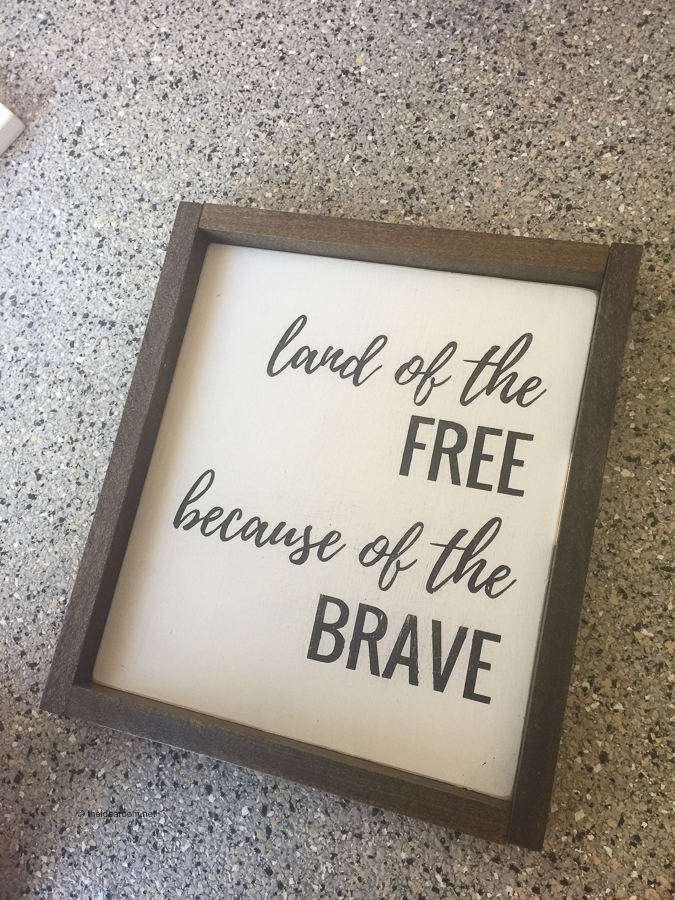
10. Add a picture hanger to the back of the sign and hang in your home!

WOODEN SIGNS
I love making these signs! I love how easy they are to make and that I can customize them to the exact colors and holiday that I want to for my home. Sometimes I tend to be pretty picky and have a hard time finding something that is exactly what I am looking for! This way I get exactly what I want!

FOURTH OF JULY DECORATIONS
Sharing some fourth of july decoration ideas and some just for fun idea.
- Wood Flag Sign
- Fourth of July Banner
- Patriotic Hot Dog Trays
- Fourth of July Bottle Labels
- 4th of July Mantle
- 4th of July “Blast” Printable
- Fourth of July Gift Idea
- Stars and Stripes Sign
- 4th of July Hostess Gift
- Red, White and Blue Italian Sodas
- Printable 4th of July Sign
What are your plans for celebrating the Fourth?
Thanks for stopping by! xo


Do you sell the Land of the FREE, because of the BRAVE sign. I love it and would love to purchase one.
Erin, I don’t sell it. I just give instructions on how to make one. Thank you.
How do I get the SVG?
Heather, I will attach the link again. Thanks for letting me know about this.
Hello. The link is not active, can you attach again? Thank you!
Deann- I will look into it and fix it. Thank you.
Hi! The SVG link is gone again it seems 😩
Sorry, Let me see if I can find it!
I need more Fourth of July decor & I love this! Simple to make too!
Natalie- Thank you.
This sign is so my style!! Love the wood frame around it!
Kristyn- Thank you!
Thanks a lot for this idea! It’s really helpful and and it’s beautiful!
Thank you
This is so stylish and adorable! What a perfect way to celebrate freedom in such a chic way. Love it!
Thank you so much!