
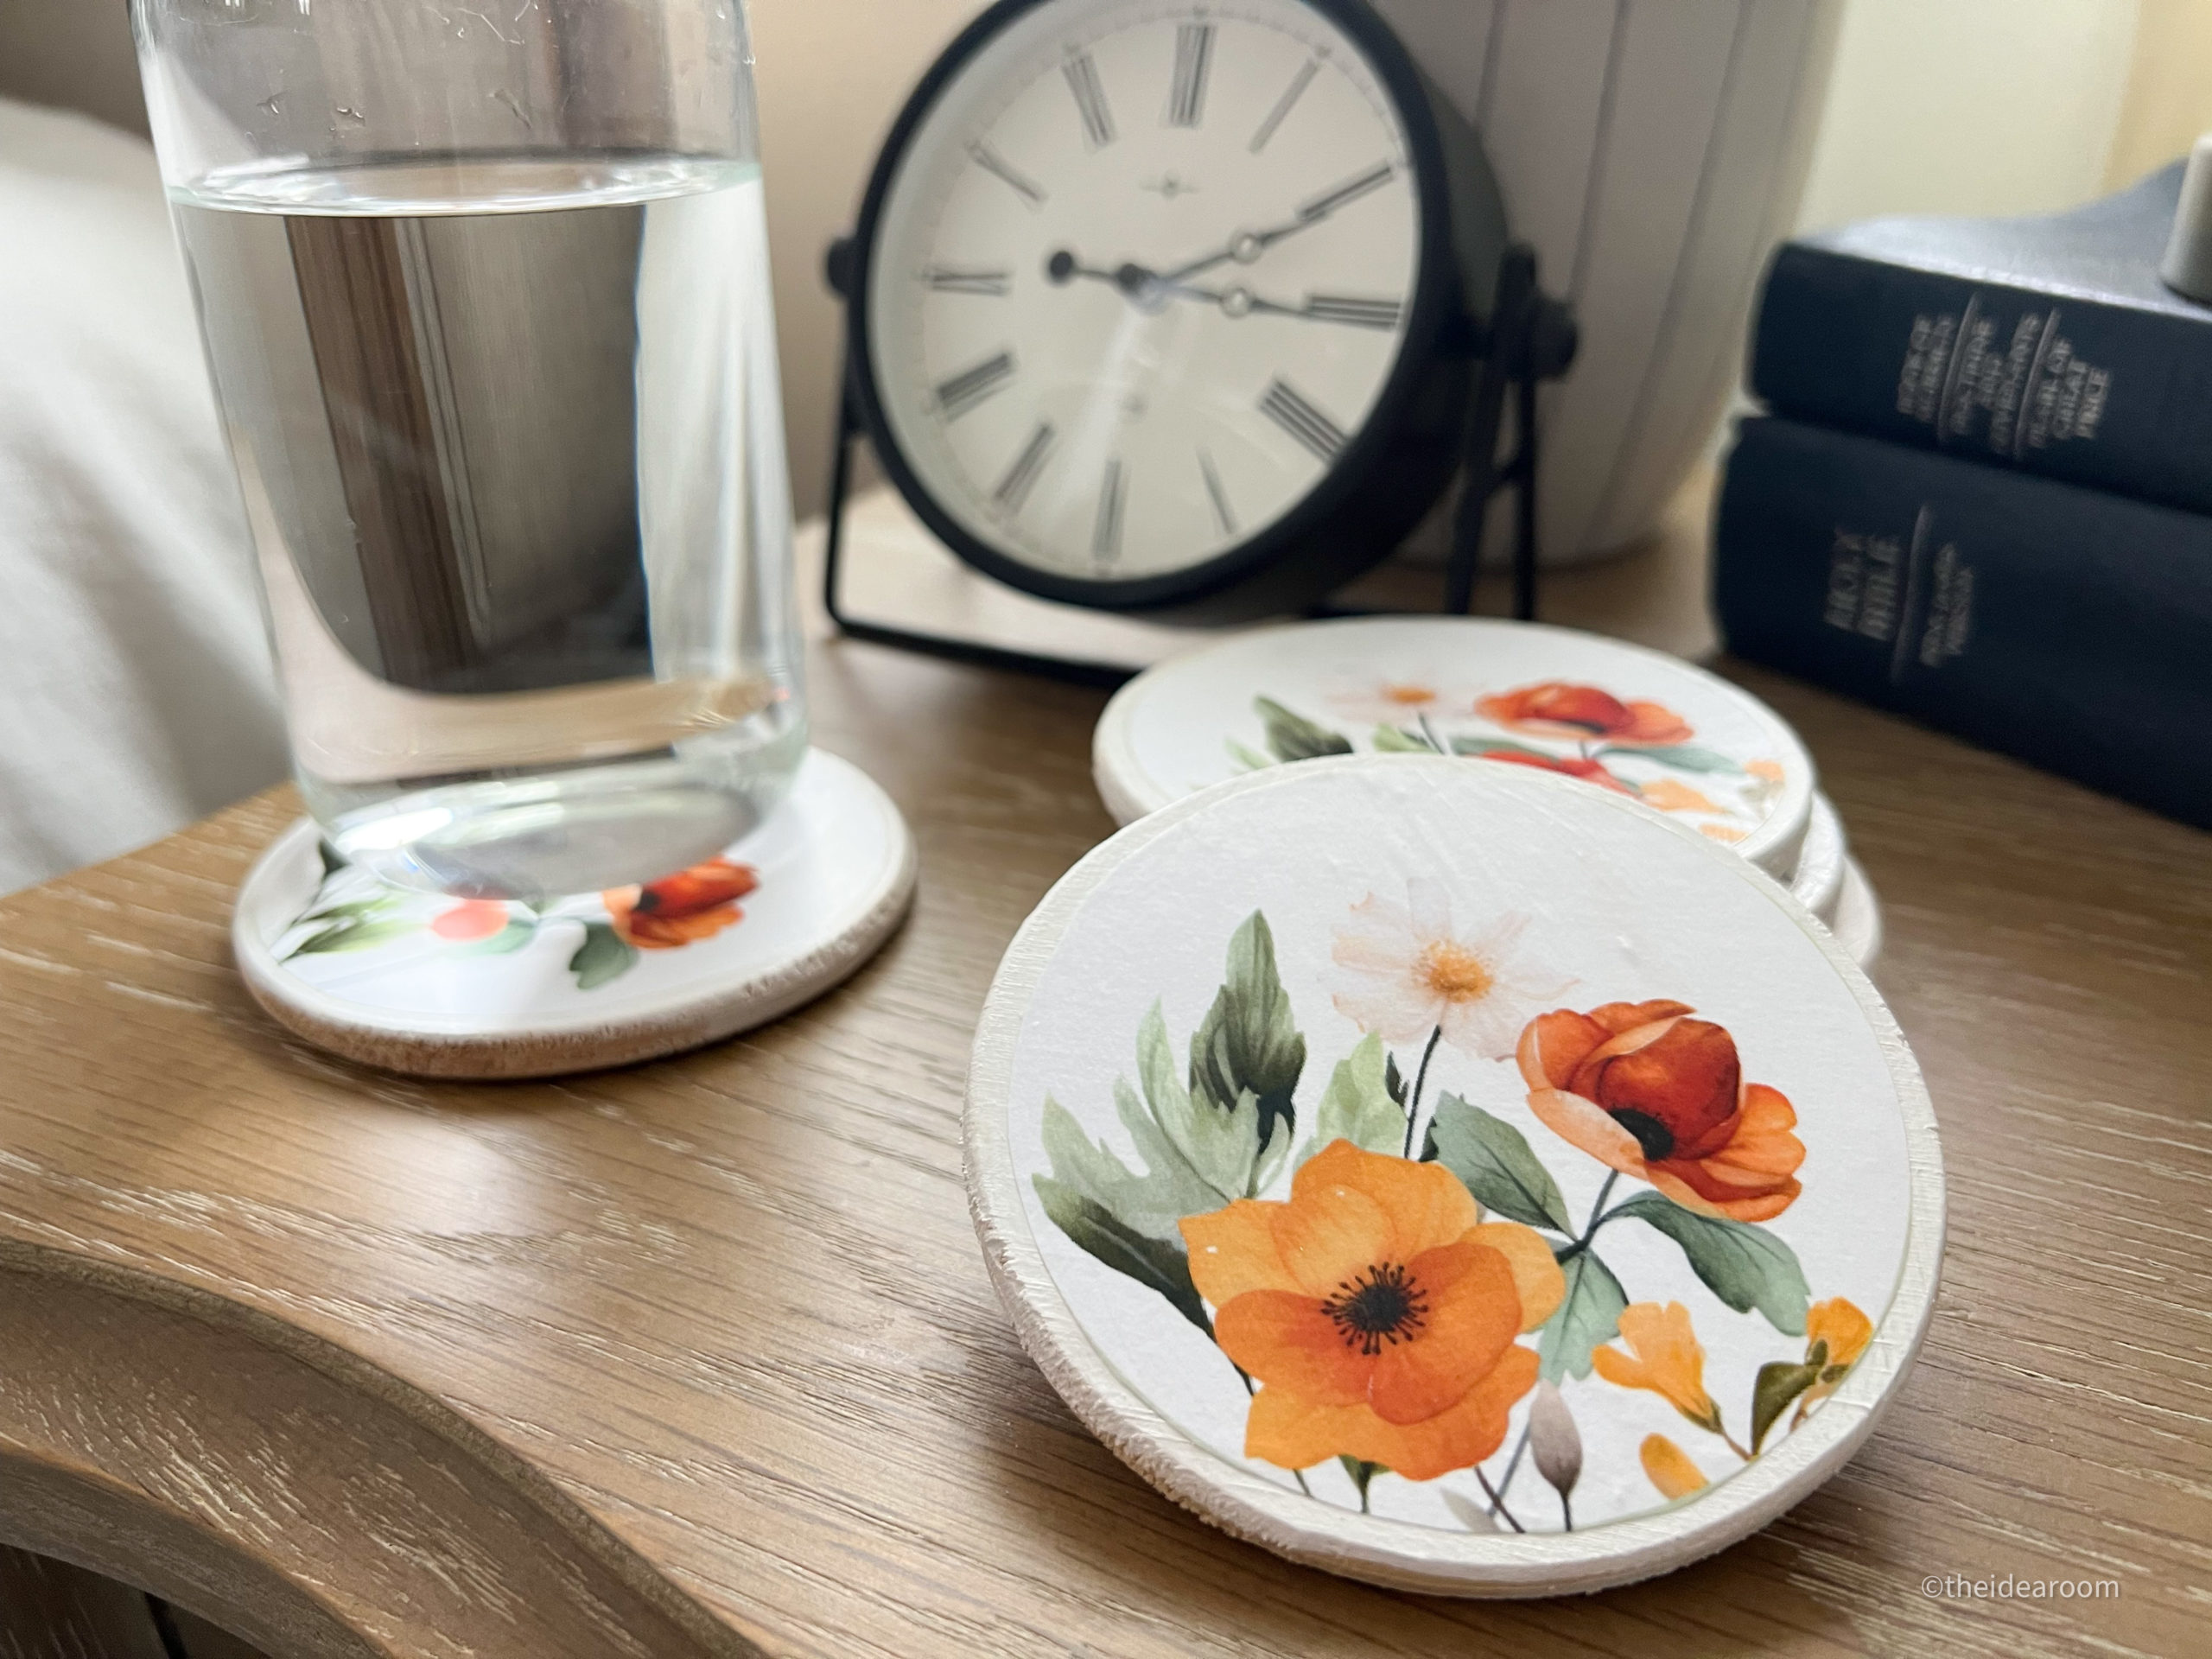
Whether you are looking to add some DIY drink coasters to your own home or gifting them to a new house owner, these cute coasters are an easy DIY craft that will also make a beautiful gift for someone. DIY Drink Coasters are pretty easy to make and can be customized in so many different and unique ways!
DIY WOOD COASTERS
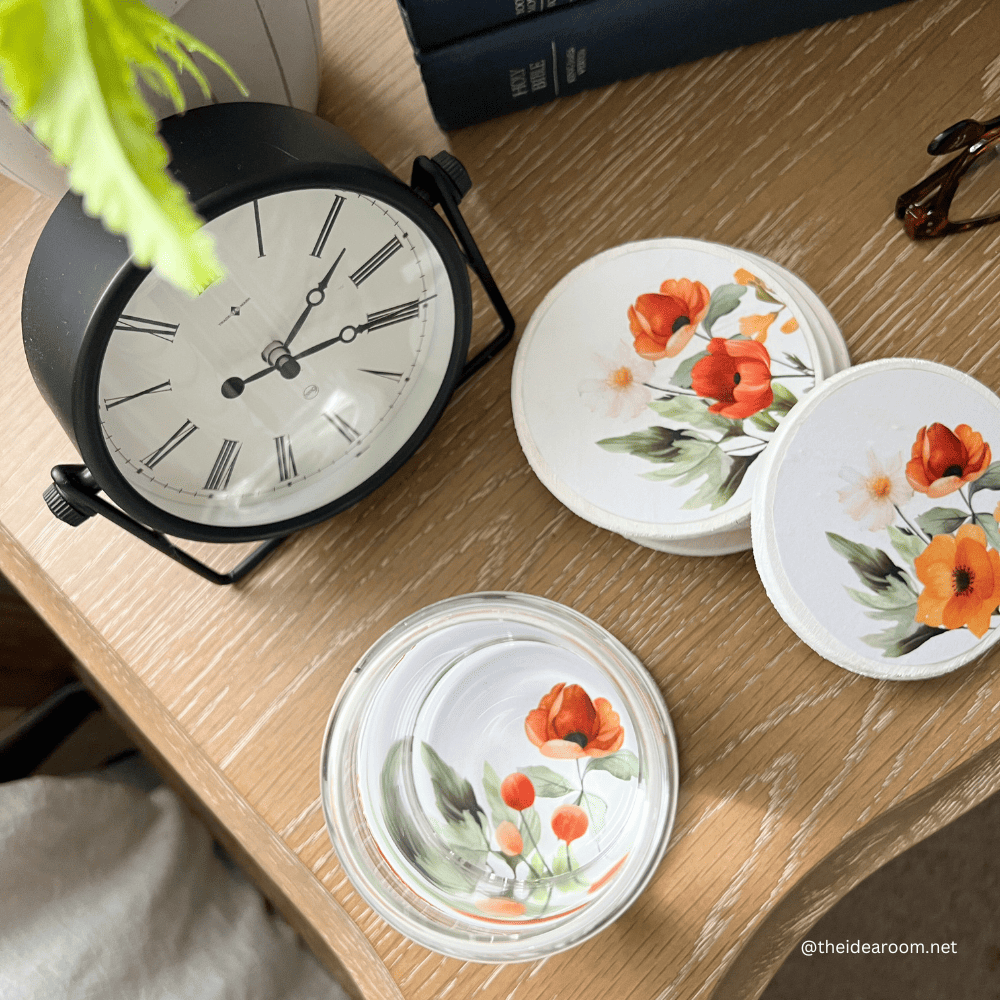
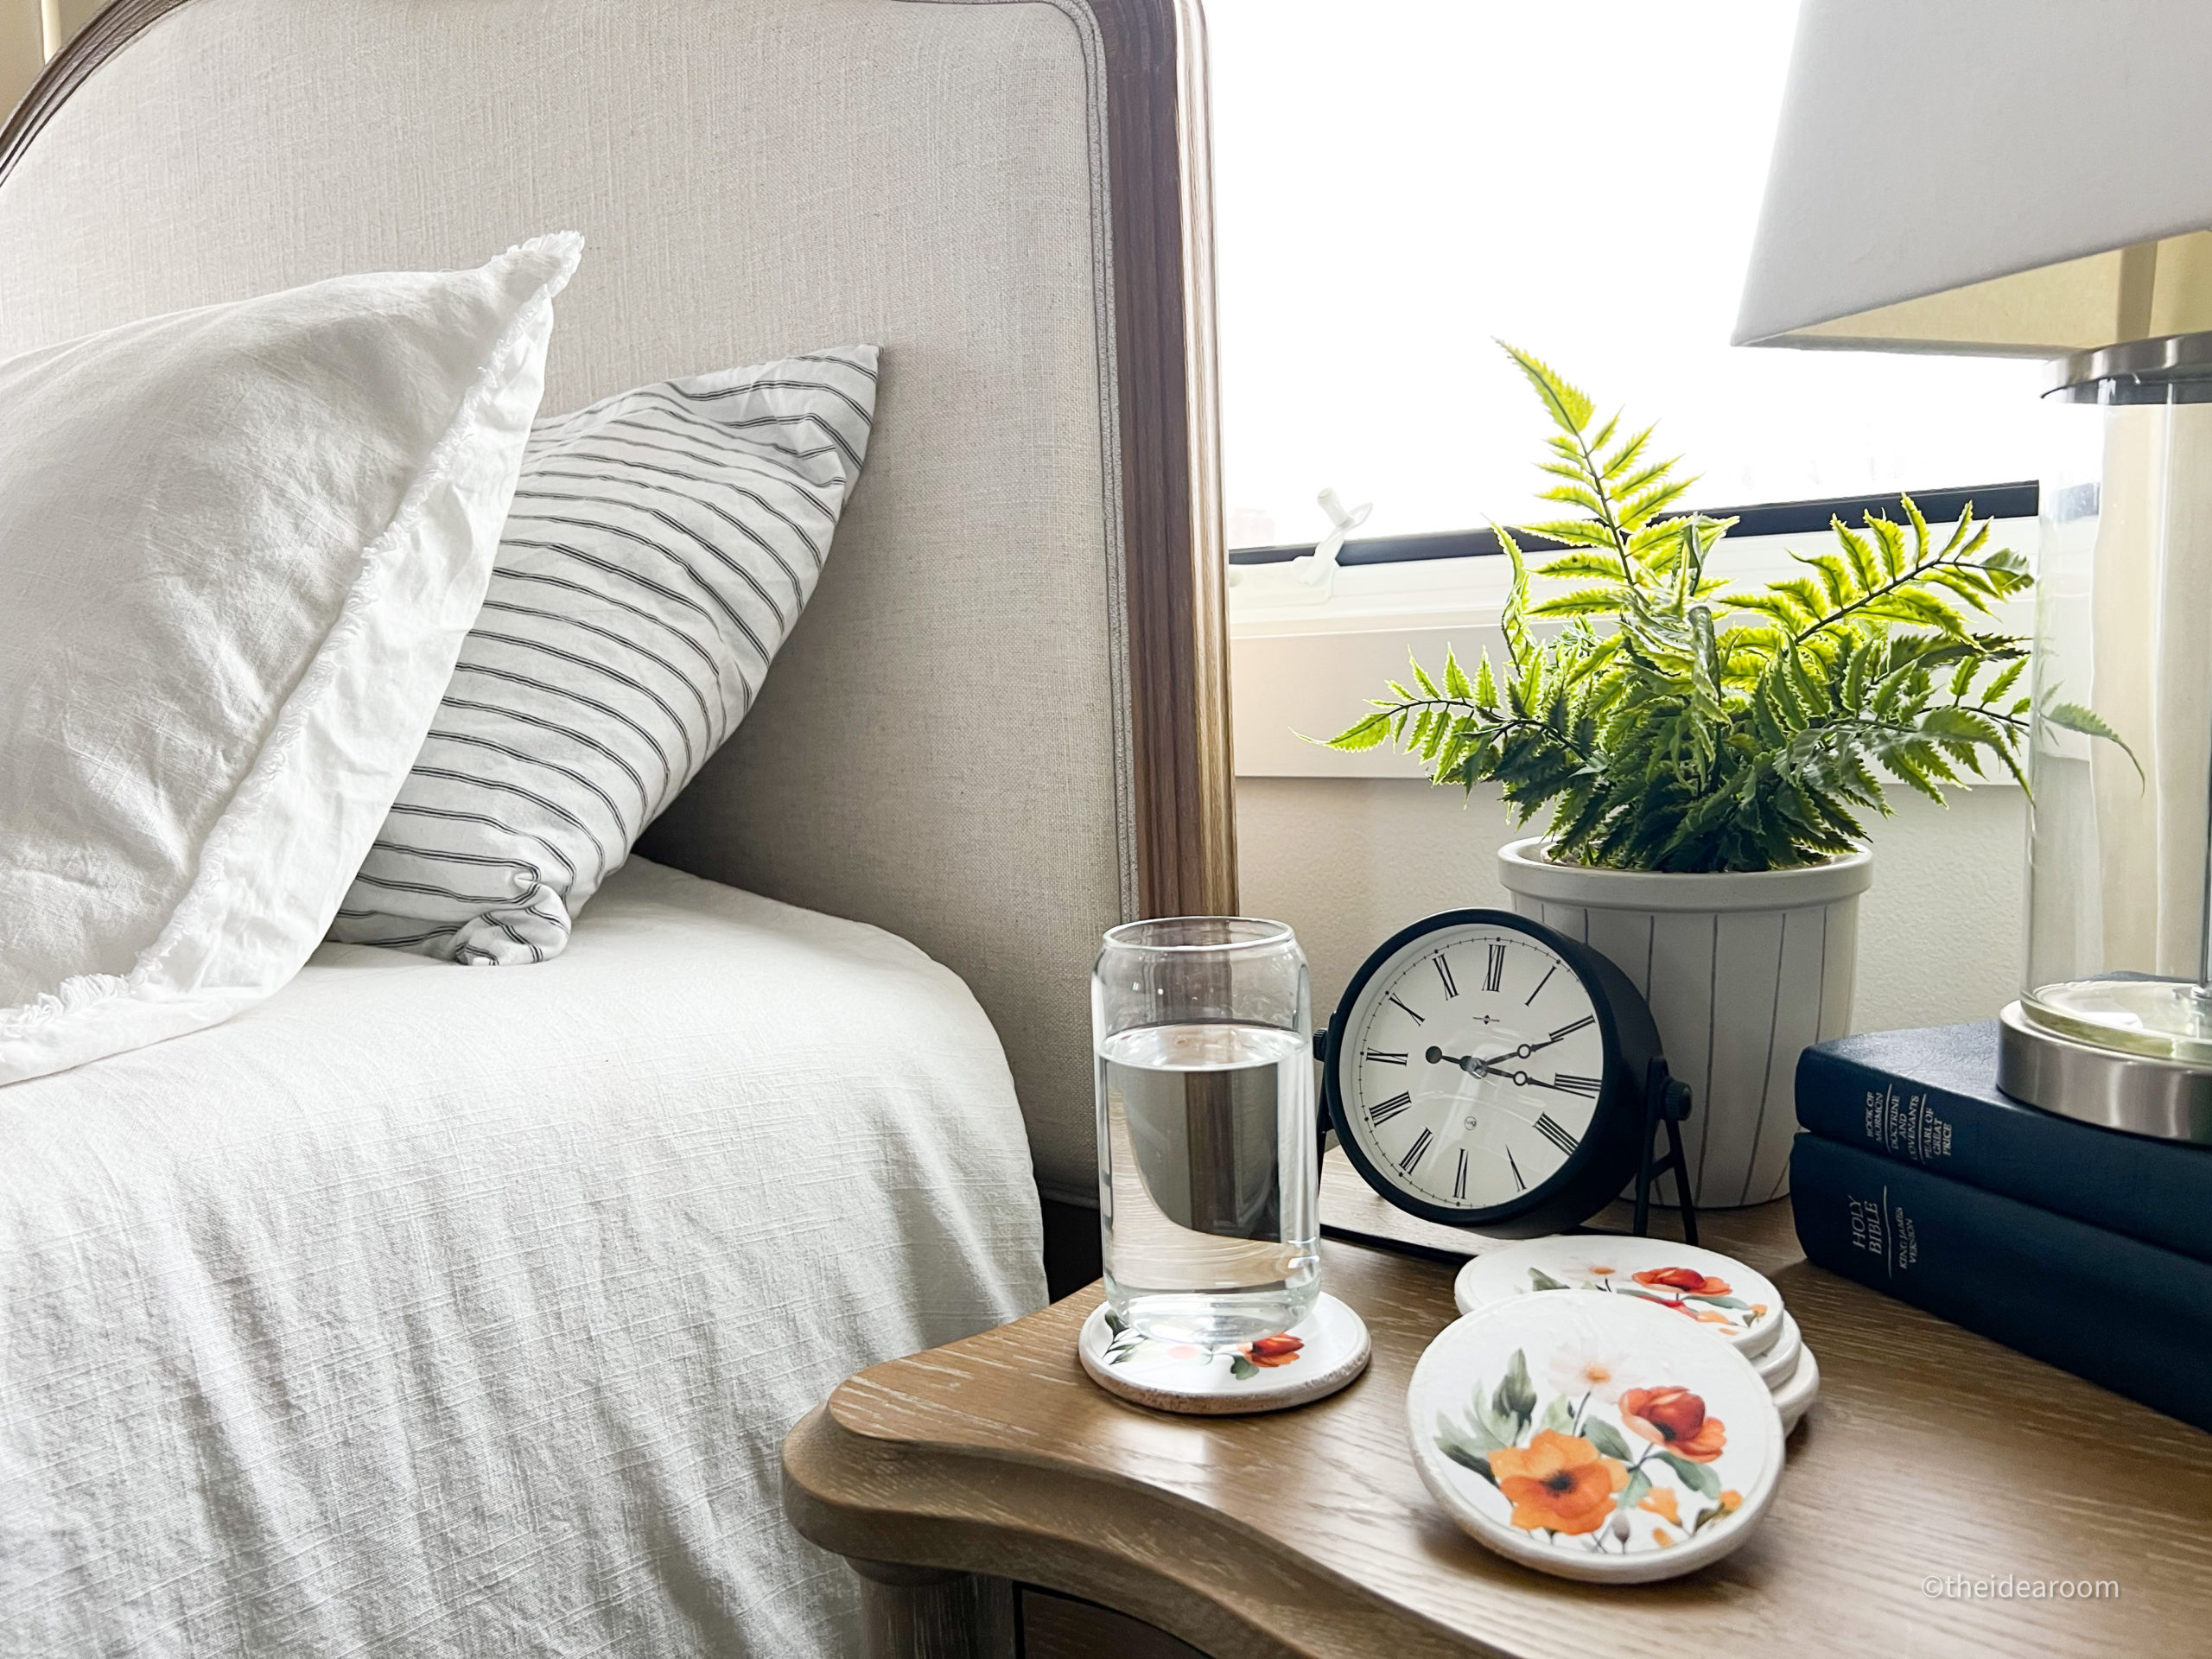
Today I am sharing how I made these wood coasters using a fun printable image to add a lovely bit of spring color to my home. Why not make a necessary item beautiful?
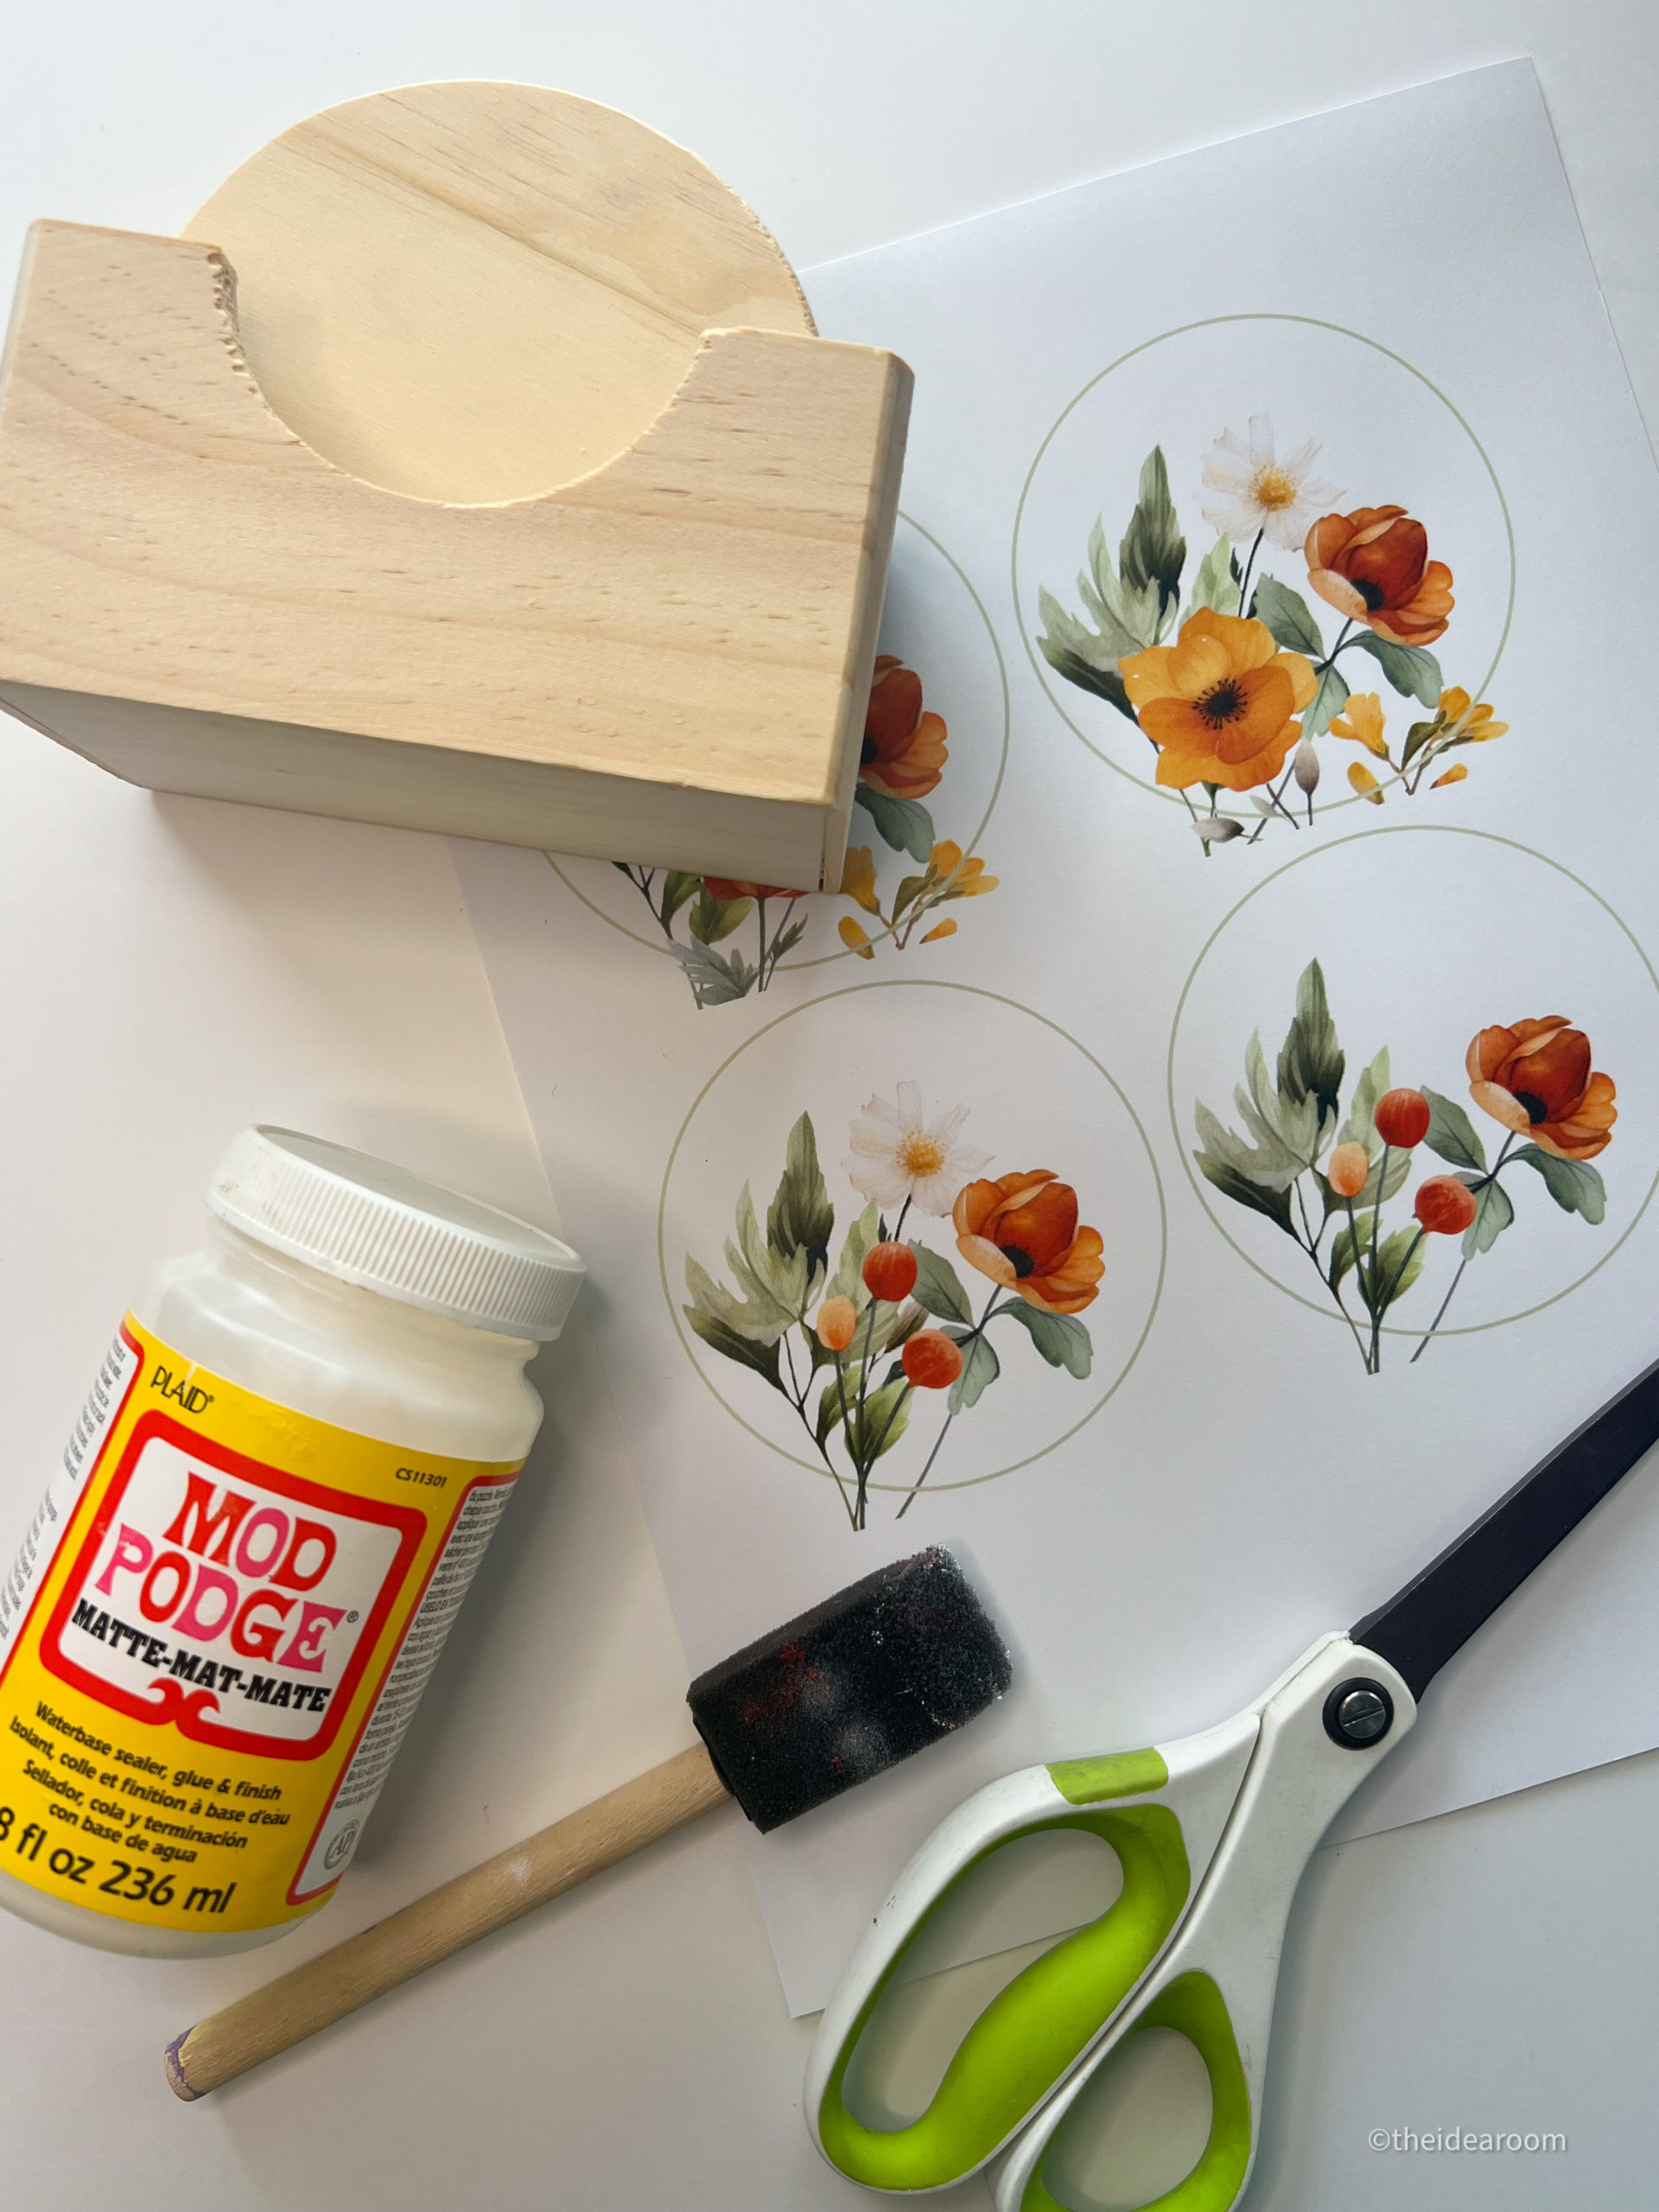
DIY COASTER SUPPLIES
To make these coasters you will need the following items. Most of these you can probably find in your craft stash or at your local craft store. I am sharing some links to the products to make it easier for you to find if needed.
This post may contain affiliate links. As an Amazon Associate, I earn from qualifying purchases. Please read our disclosure policy.
- round wood coasters
- printed image (I found mine here)
- printer paper
- printer
- craft brushes
- sand paper
- mod podge matte finish
- white paint
HOW TO MAKE DIY DRINK COASTERS
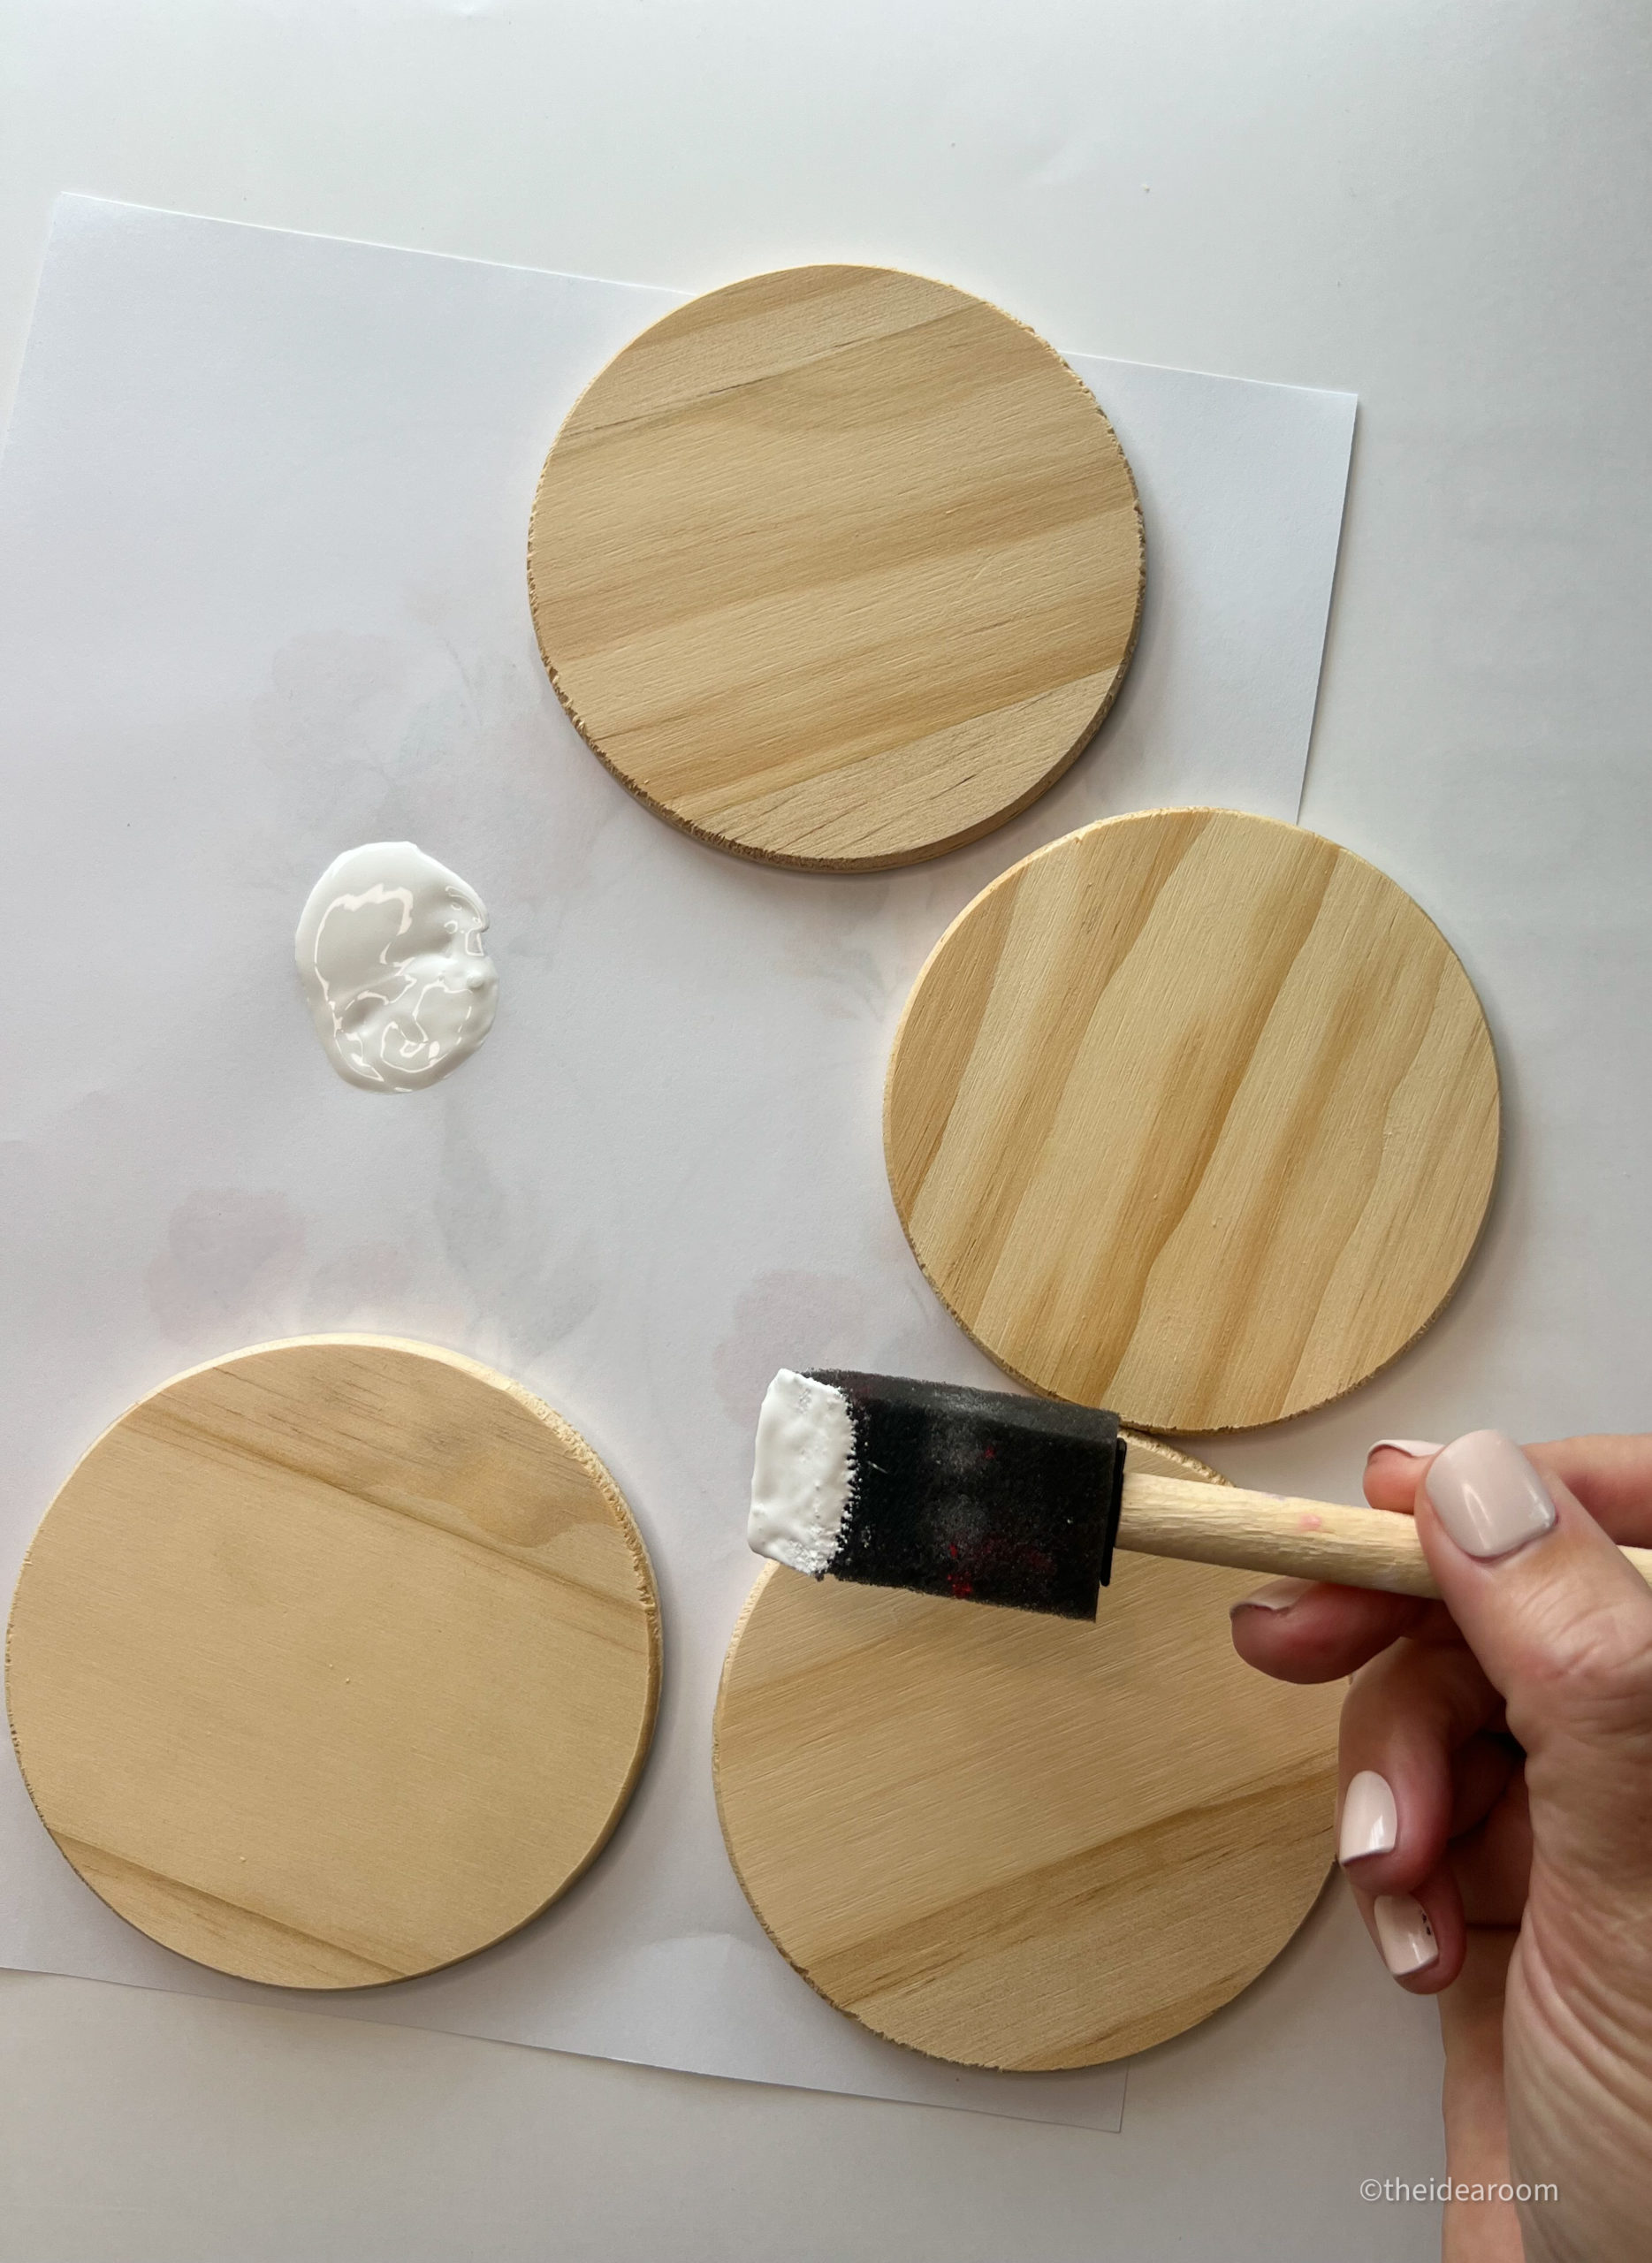
PREPARE YOUR WOOD COASTERS
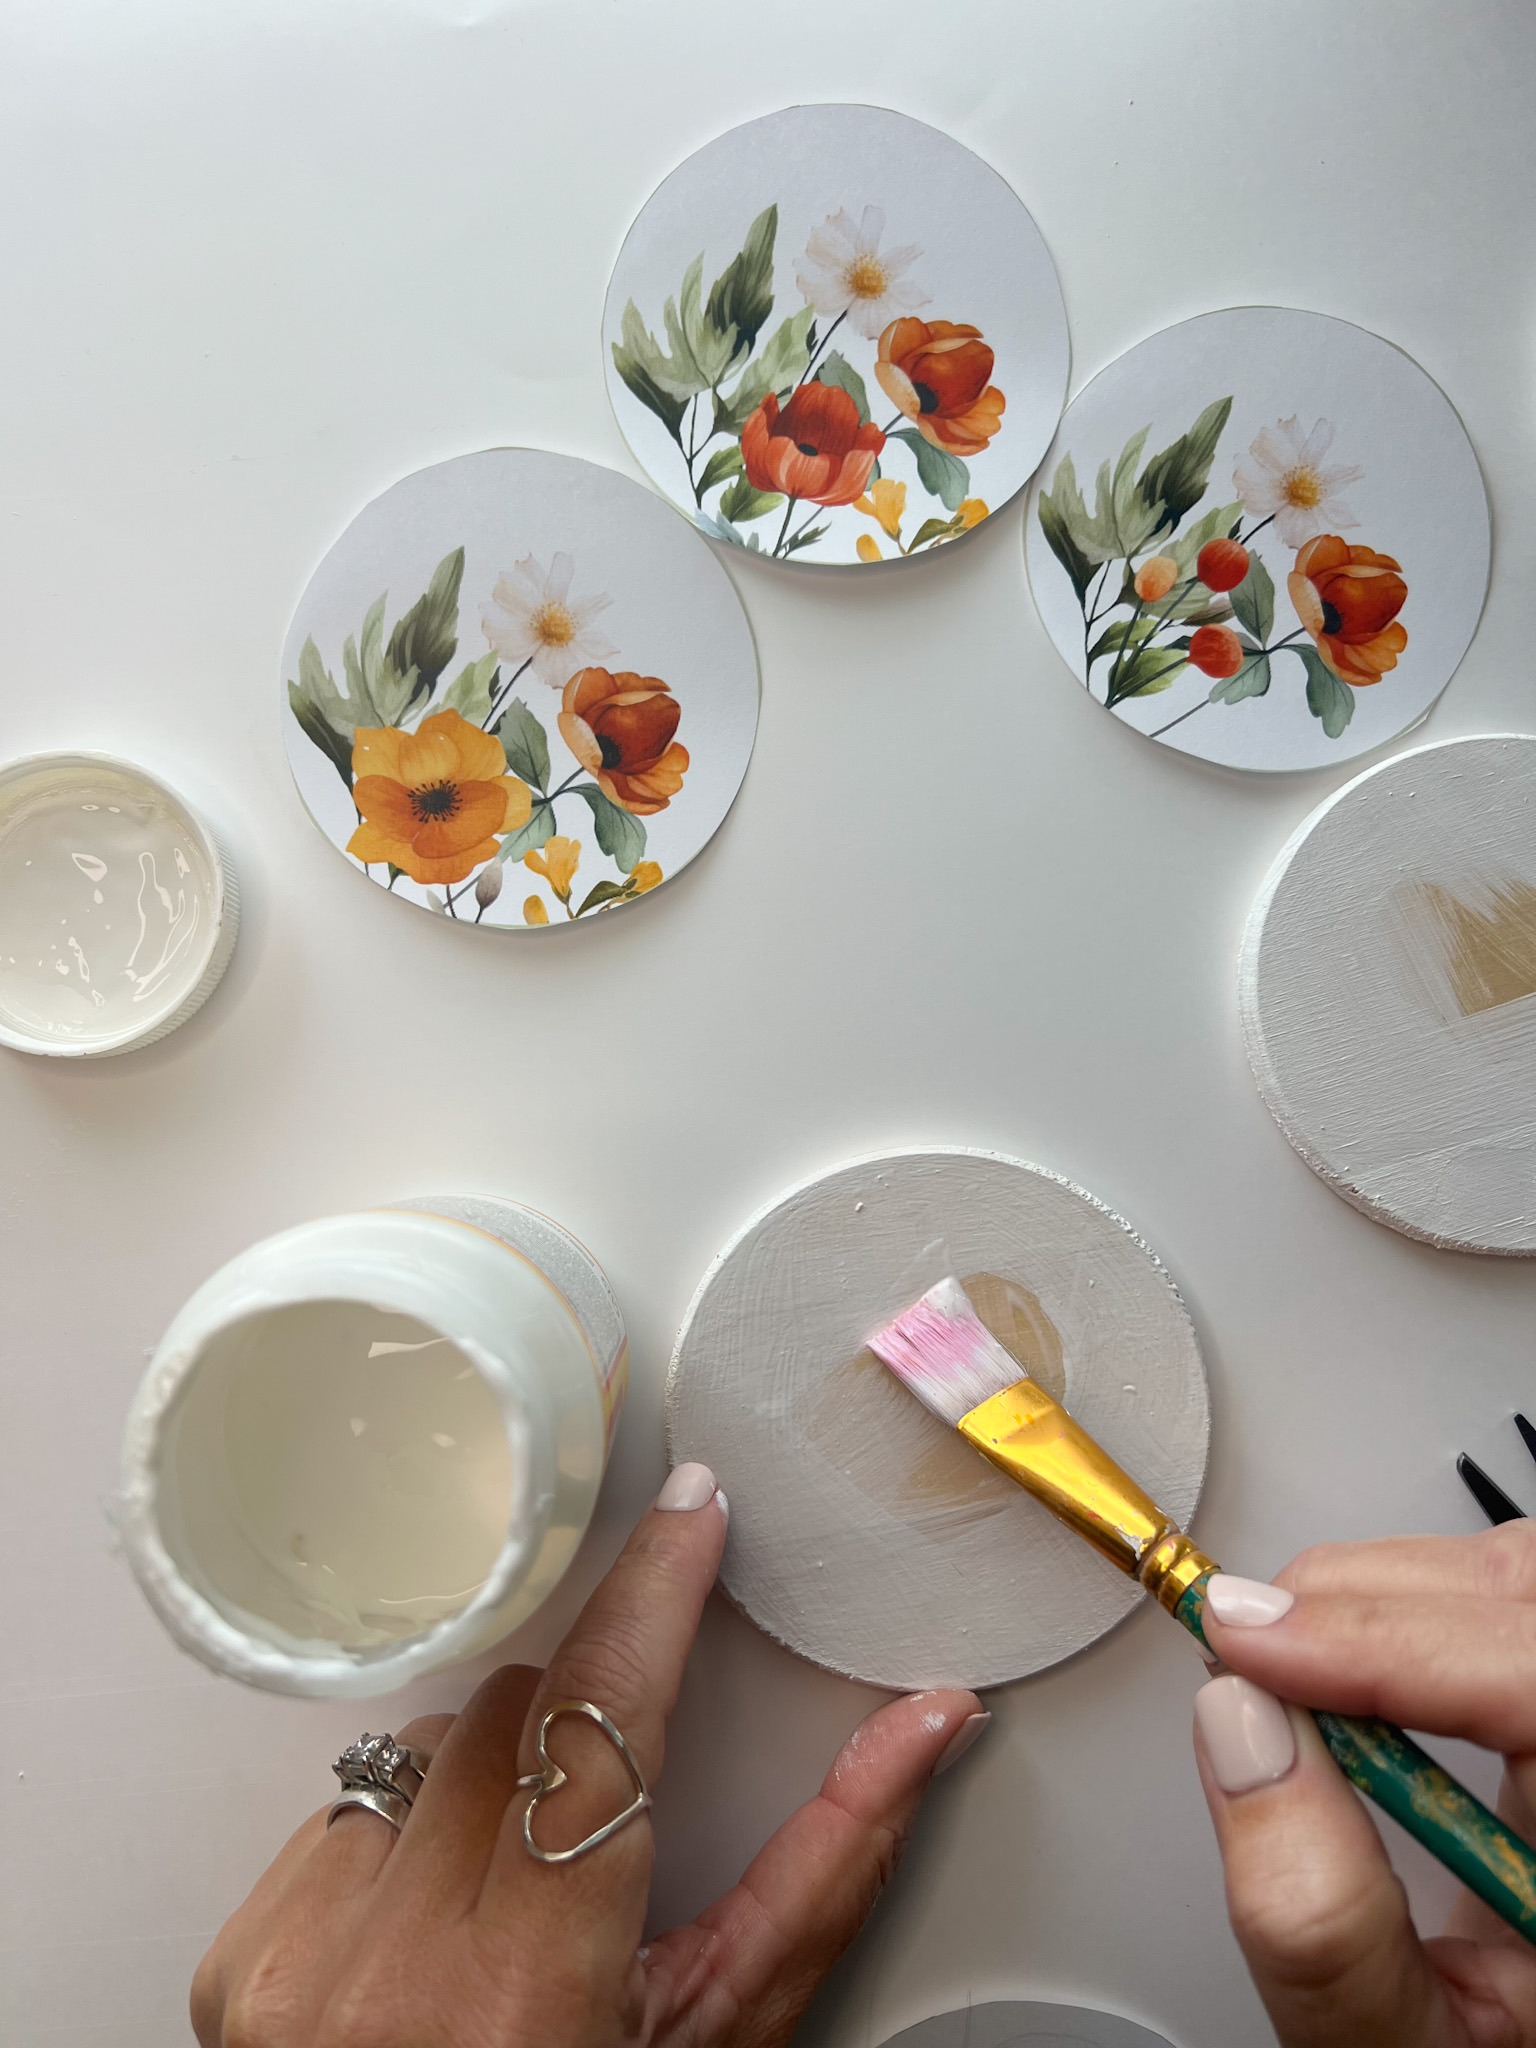
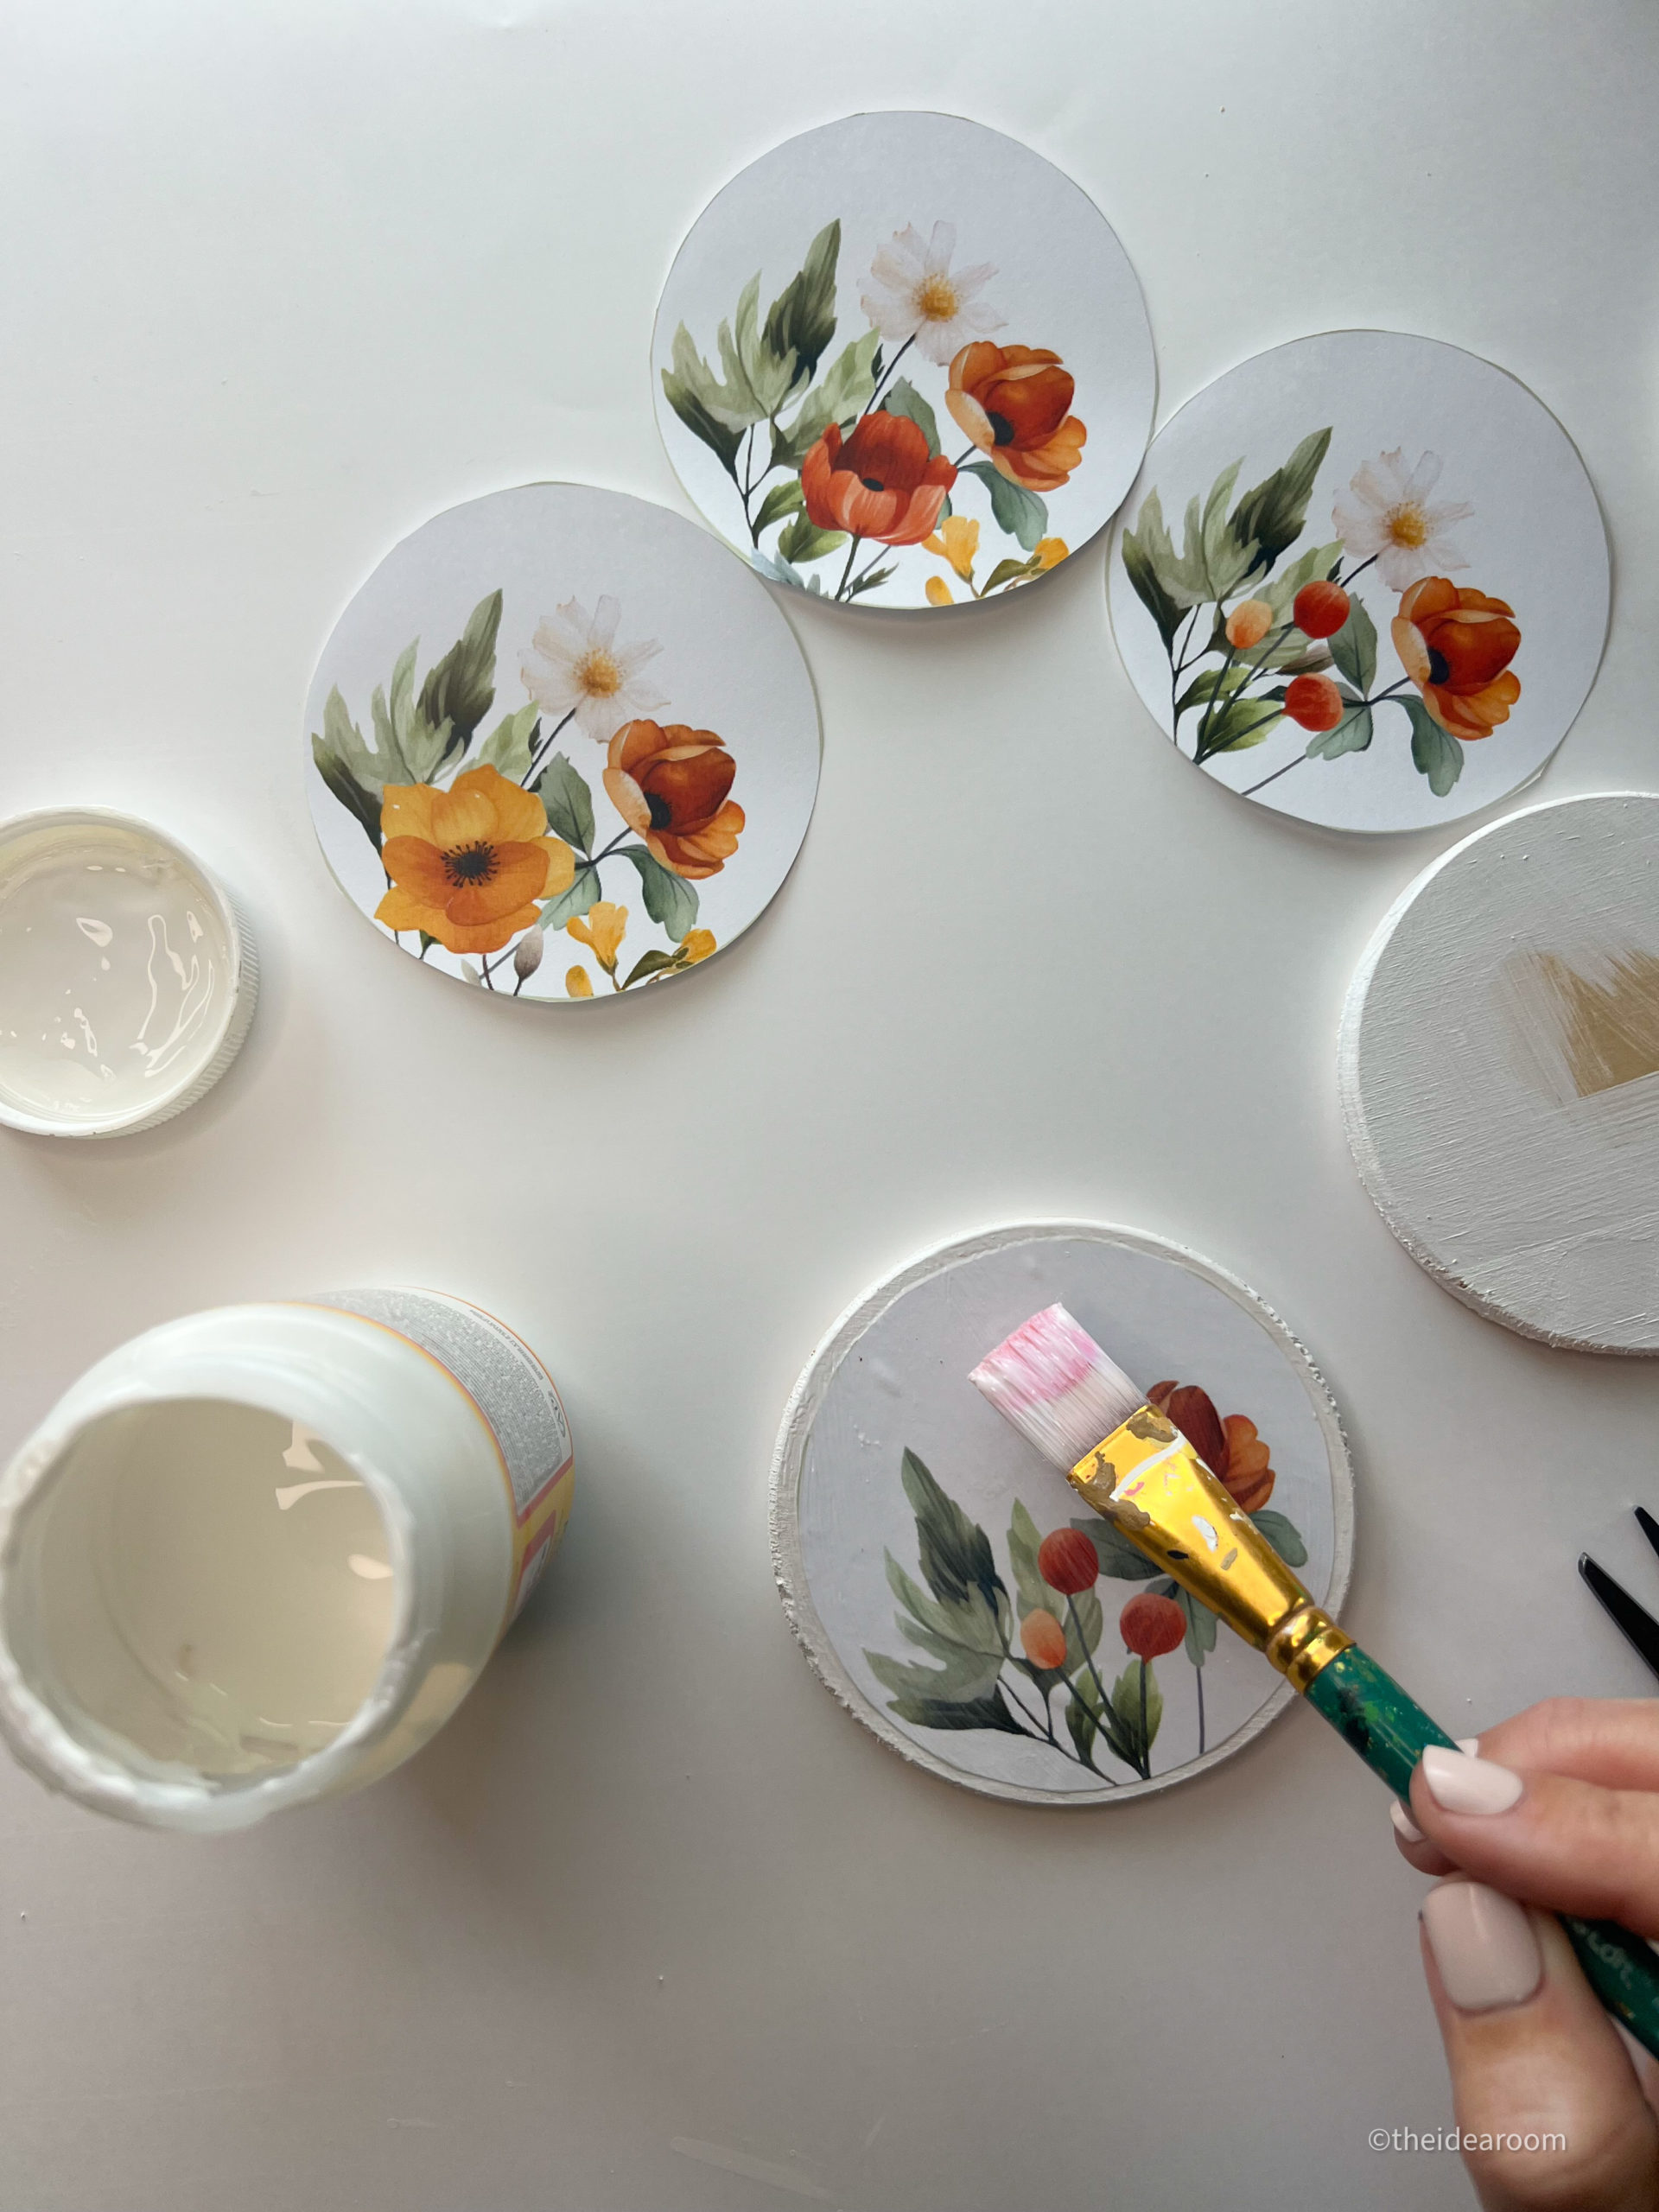
- Take your round wood coaster (to the coaster of your choice) and lightly sand around the edges and the top to make them smooth if needed. Mine were a little rough so I wanted to smooth them out a little bit.
- Wipe off any excess dust with a damp cloth.
- Paint or stain your wood coasters and let dry.
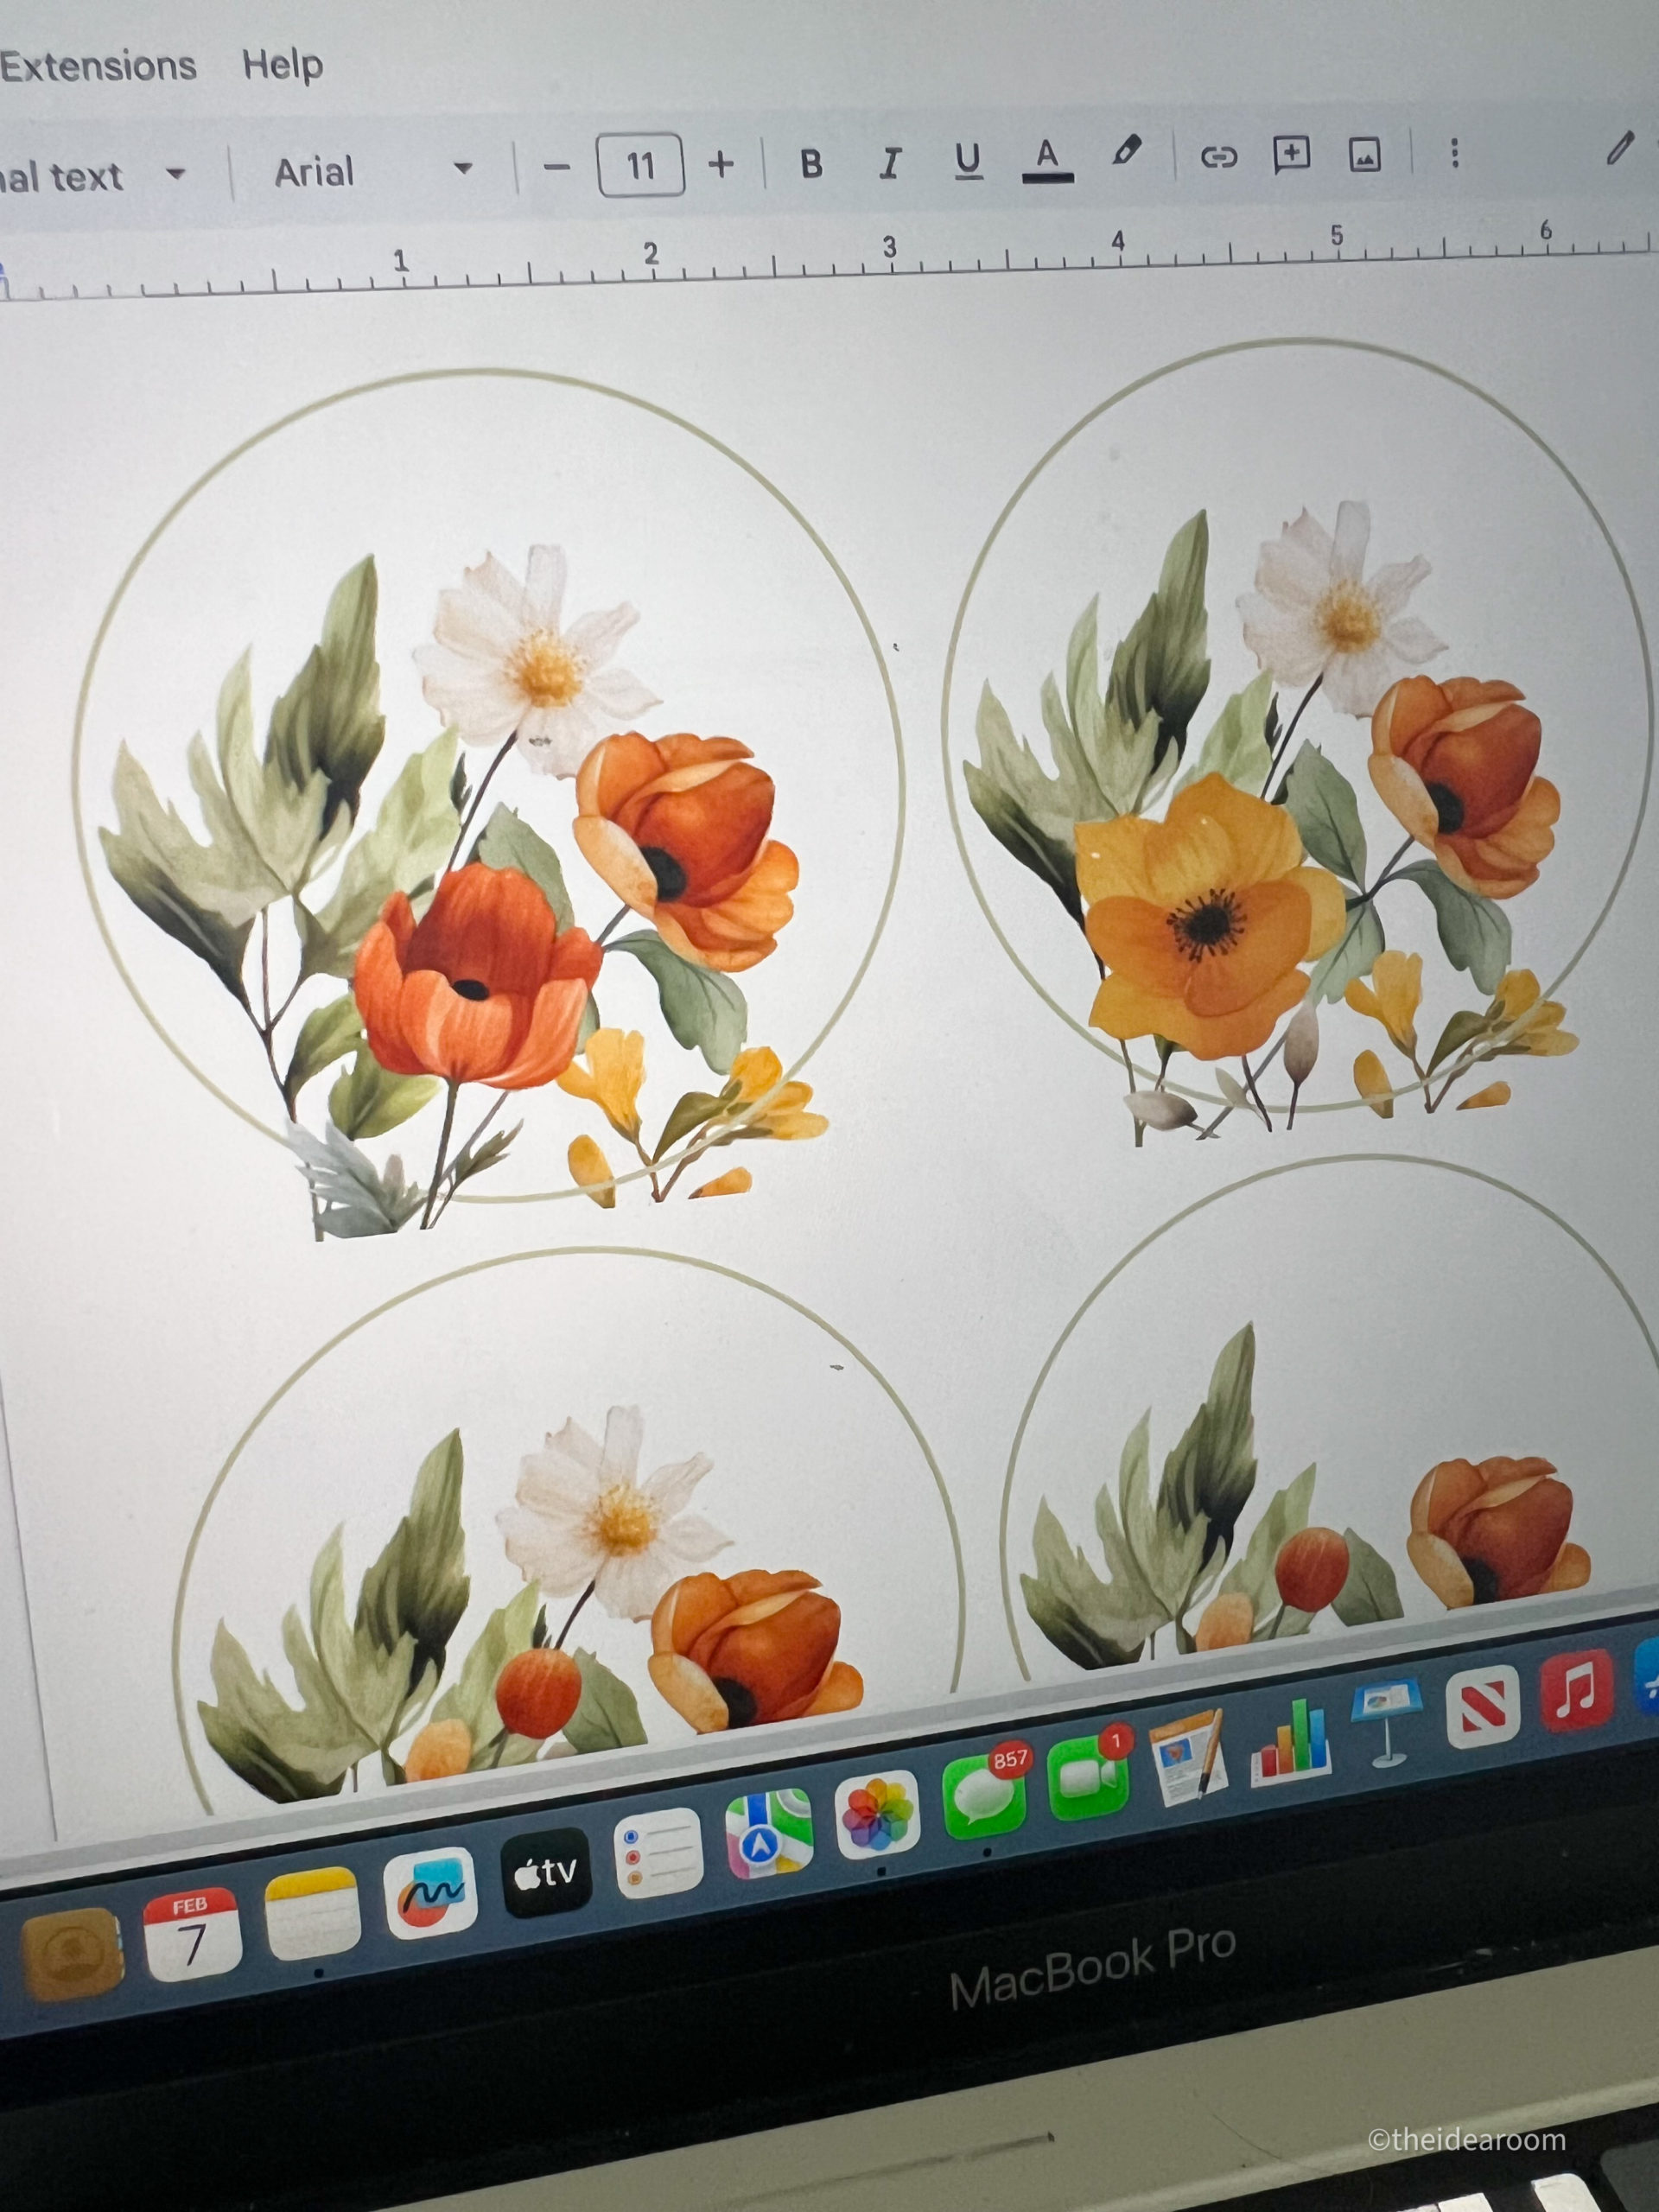
DESIGN YOUR IMAGE
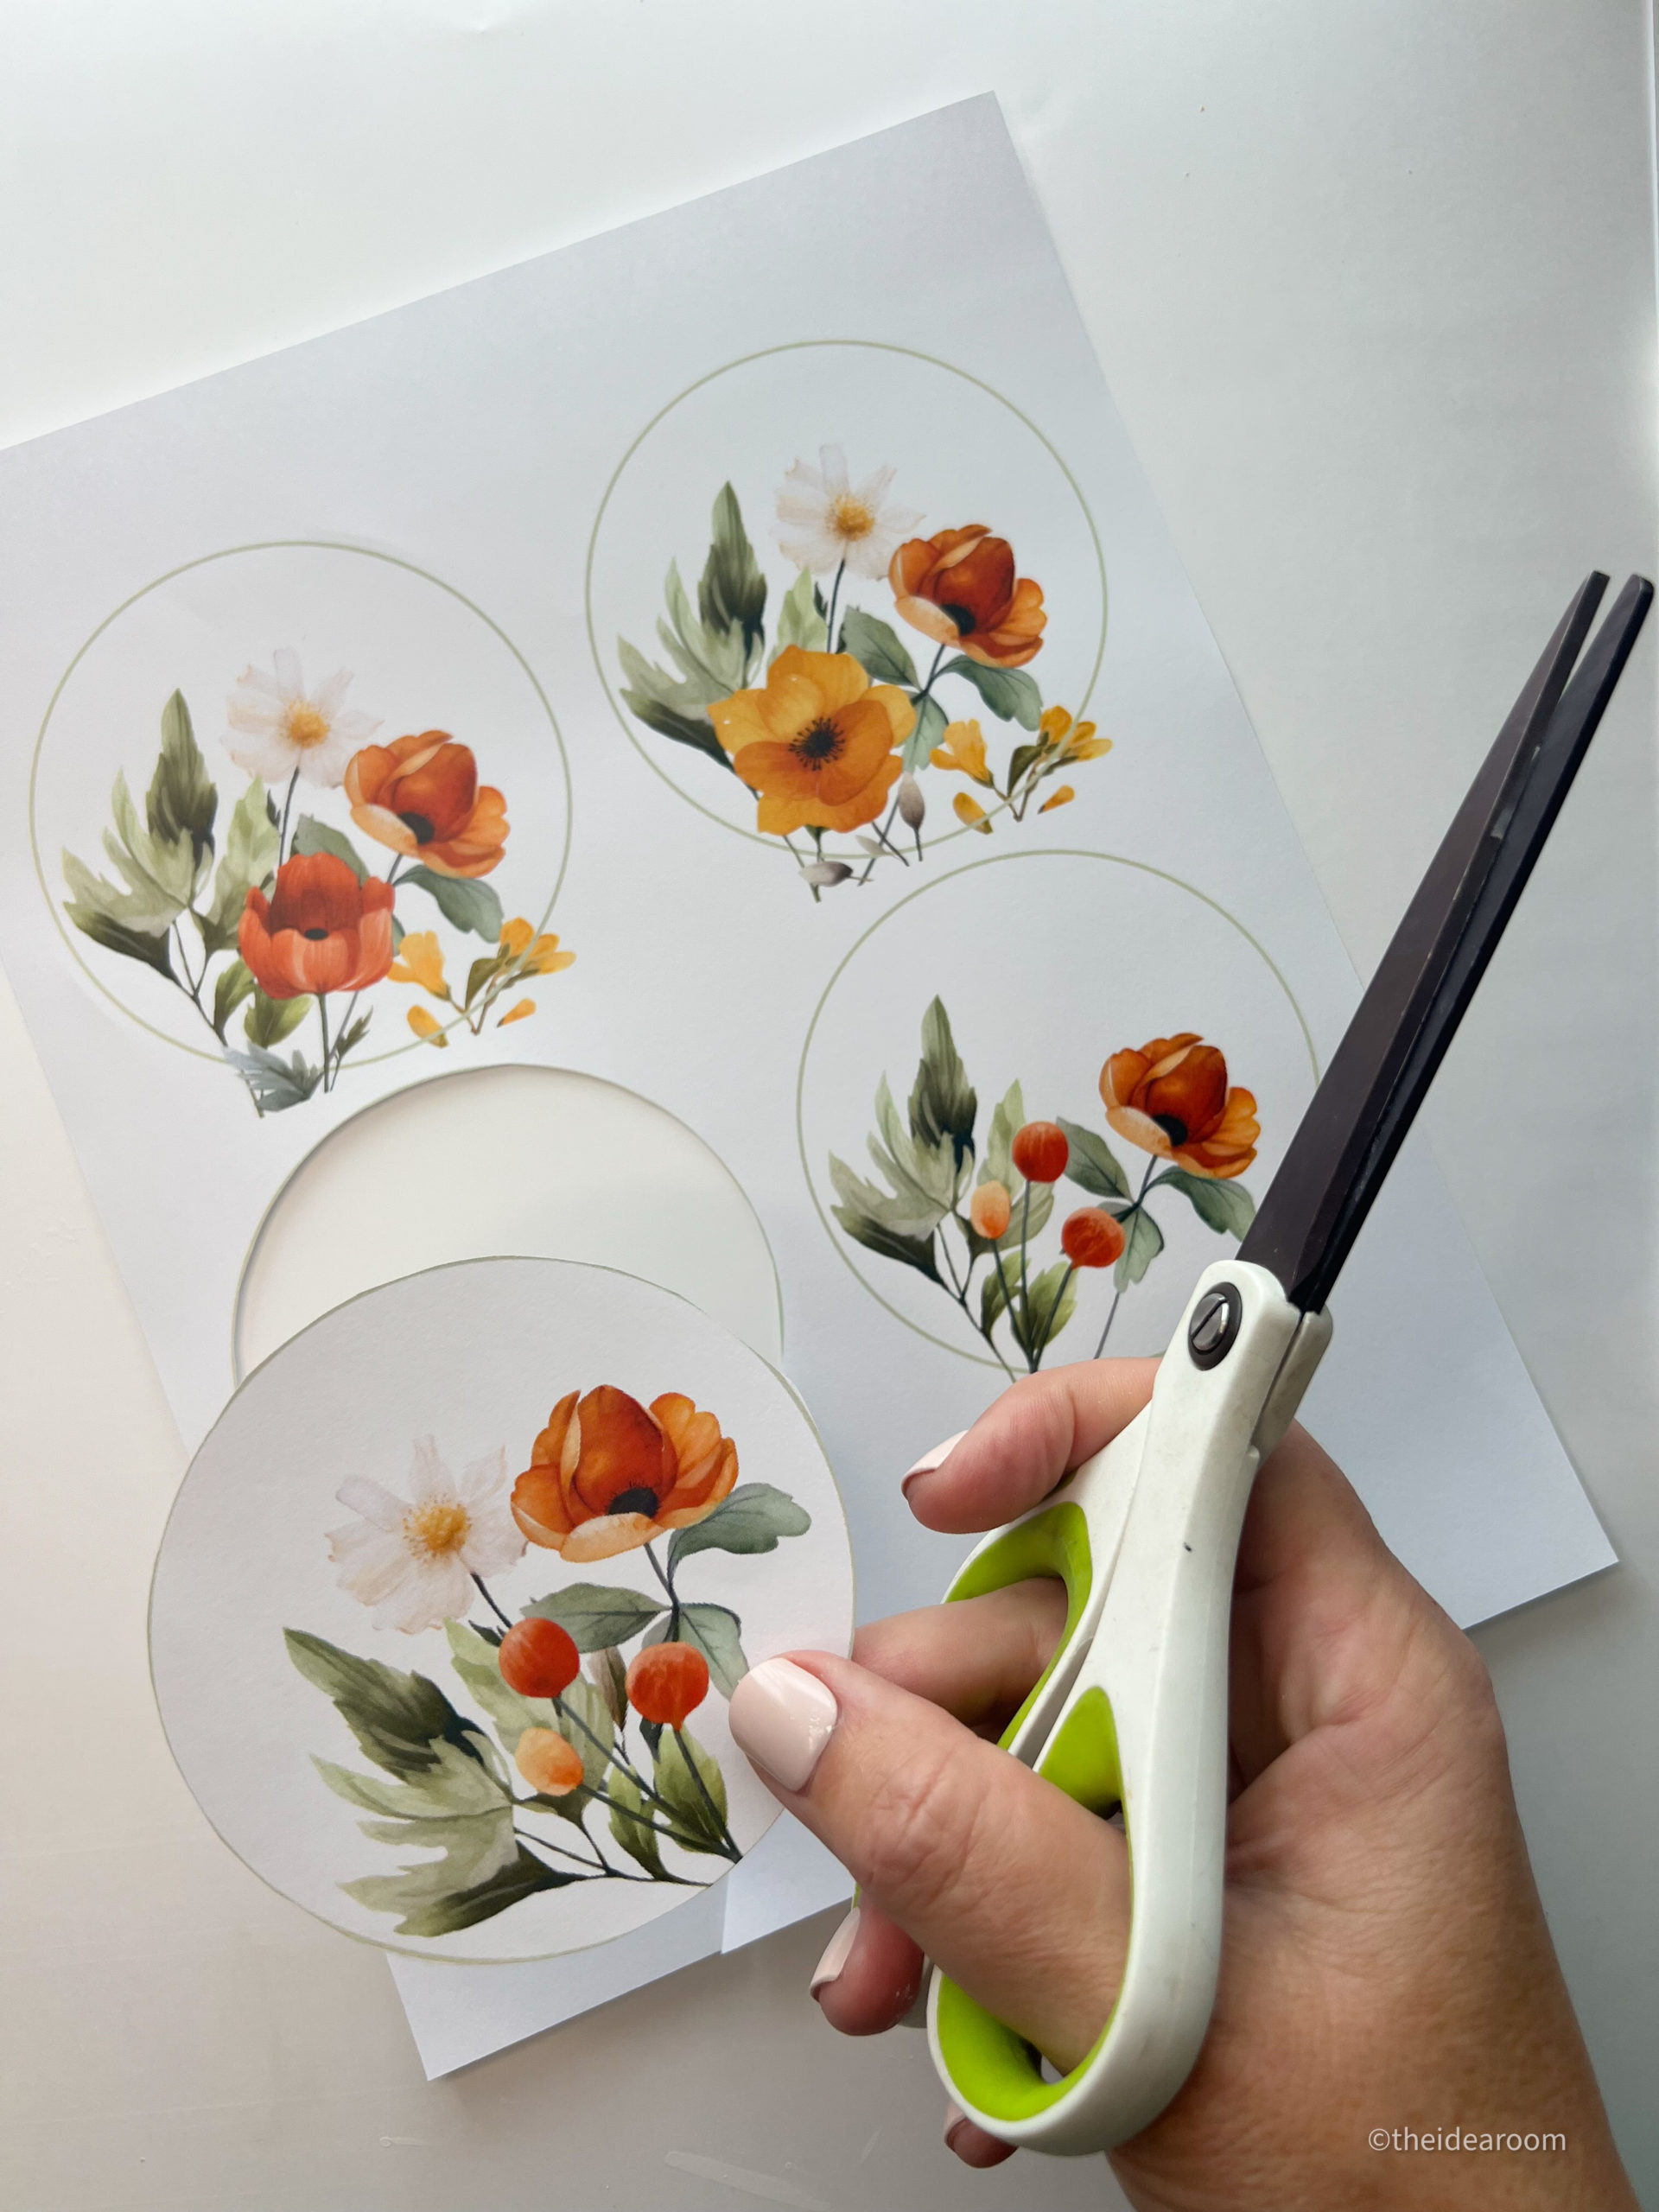
- Find your image and print it out if needed. I printed mine on regular printer paper. Cardstock works too if you want it a little thicker.
- Since I purchased some images I used a digital program to move the images and overlay them together to create a little different design for each coaster.
- I used a circle to put my images in to see how they would sit on the coaster once printed.
PRINT YOUR IMAGES
- You will need to print yours to a size that will fit onto your coaster. I created mine so they were 3.75 inches and would fit onto my wood coaster.
- Print on computer paper. You will need to use a laser printer so the ink does not run when it gets wet or damp. If you don’t have a laser printer you can get it printed at your local print shop.
ADD IMAGE TO COASTER
- Once you get your image printed make sure they are going to fit on your coaster and then cut them out with scissors. I like mine to be a little smaller than the actual coaster. But you can always use some sand paper to rub off the excess paper around the edges.
- Add a layer of mod podge to the top of the coaster where the image will sit.
- Lay image on the coaster and press all around the image with your fingers to rub it into place and to work out any air bubbles under the paper.
- Add a couple of layers of mod podge to the top of the paper to seal it and protect it from water and moisture from your glasses and drinks. Let dry.
That’s it! So simple right? I love how versatile this project is!
MORE DIY COASTER IDEAS
If you don’t want to use these round wood coasters, there are so many other options you can use to make your own drink coasters.
- wood squares
- square tiles
- marble coasters
- cork coasters
- sliced wood
- plastic coasters
Handcrafted Blog Hop
I teamed up on this fun Spring DIY project with a few other bloggers who are also sharing their fun ideas and projects for spring! Be sure to check out what they are sharing today! There are a lot of fun ideas here!


MORE DIY PROJECTS FROM THEIDEAROOM


So excited to see this post, Amy! I always forget how many coasters we need until we have people over and quickly run out. I was going to order some online but these are so much better. Plus I love that you can customize them too and make as many as you want. They’re fabulous! Hugs, CoCo
Thank you so much! Yes! You can never have too many…especially if they are cute!
I really need to upgrade my coasters, and this is such a cute project! Love the pop of spring color and pattern your coasters provide! Pinning of course!
Thanks so much Michelle! They were a lot of fun to make!
I really like these coasters and never thought of making my own with paper. Love the floral design you used, so pretty.
I have also made them with photos! Both are fun! Thank you so much!
I can never seem to find a coaster when I need one. Now I don’t have an excuse! These are so pretty! Thank you for a great post and for being part of the Handcrafted Society! Pinned!
Thank you! You can never have too many! So excited to be a part of this group!
I love the simplicity of this project. It doesn’t require a long list of supplies and it can be created in a relatively short amount of time. The floral design you selected is perfect for spring. Thanks for the inspiration!
Yes! they are so simple but satisfying to create! Thank you!
Darling coasters! Love the pattern and colors you chose and the idea of giving these as a gift if wonderful.
Wouldn’t they be so fun to gift and receive? Thank you so much!
Amy, your coasters are beautiful. I love the colors.
Thank you! It’s fun to use such fun colors this time of year!
So cute Amy! Love how you mixed the flowers so each is its own arrangement!
THank you! It was fun to change them up just a little bit!
What a great idea! Love this, Amy. Pinning.
Thank you so much! I always appreciate it!
These are so cute and perfect for Spring! Thanks for the inspiration! I have never made coasters, but now I want to! Pinning now!
I hope you make them! Thank you!
Your coasters are so pretty, Amy! What a beautiful addition to a coffee table or nightstand for spring!
thank you so much!
LOVE the custom touch of these coasters and that they can be personalized to each space in yiur home!
I’d love for you to join us over at the Creatively Crafty Linky Party every Wednesday through Sunday
https://creativelybeth.com/creative-crafts-linky-party/
Followed and Pinned!
Creatively, Beth