




Learn how you can get your home organized with my easy step-by-step organization course. My course is full of organization ideas as well as home organization tips and tricks to get your life and home organized and keep it that way.

ONLINE DECLUTTERING COURSE
For the past several months I have been putting together my Online Organization Course, The Balanced Home. I am excited to teach you my decluttering and cleaning process. These processes also teach you how to create simple routines and cleaning schedules which allow you to naturally maintain your clean and organized home.
No need to hire a professional organizer, or live with the clutter because you will have the skills and learn how to overcome any mental barriers or fears you might have to get started!
Stop Drowning in Household Clutter
Transform your space without the overwhelm. Join The Balanced Home Course for a step-by-step system to get your home organized and keep it that way for good.
Learn More & Join Today →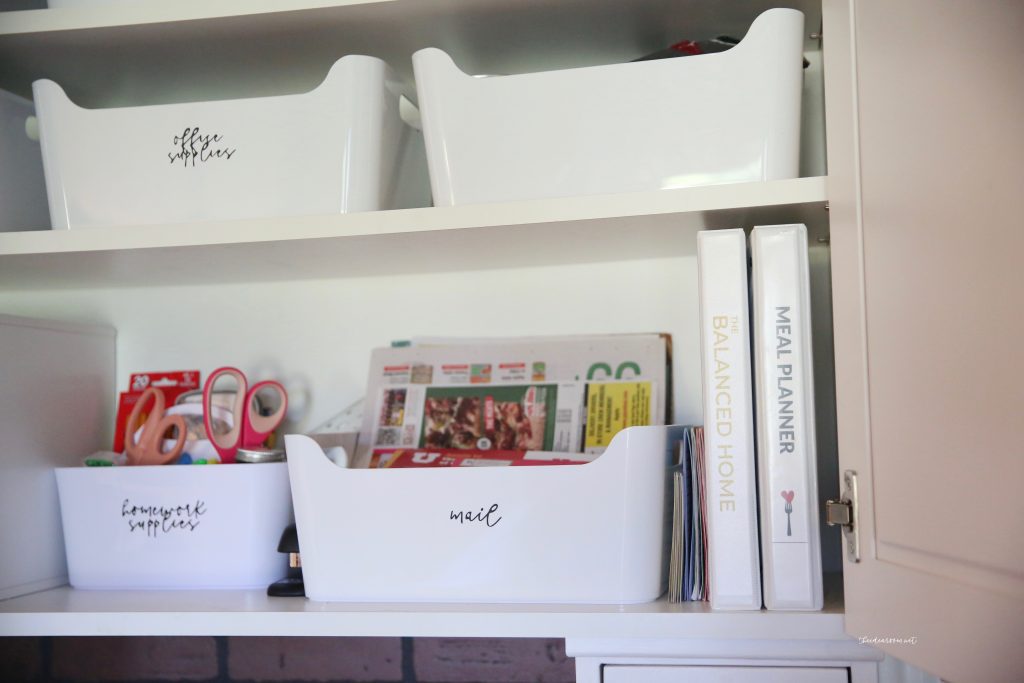

WHAT DOES THE ORGANIZATION COURSE COVER?
The Balanced Home Organization Core
($1,000 Value)Contains my core Decluttering and Organization Processes, which shows you how to:
- Learn how to declutter and organize your home–by learning processes and techniques that really work!
- Deal with stuff you don't know how to get rid of
- Understand what qualifies as hoarding
- Understand how to overcome hoarding tendencies
- Deal with your junk room or junk drawer
The Tools
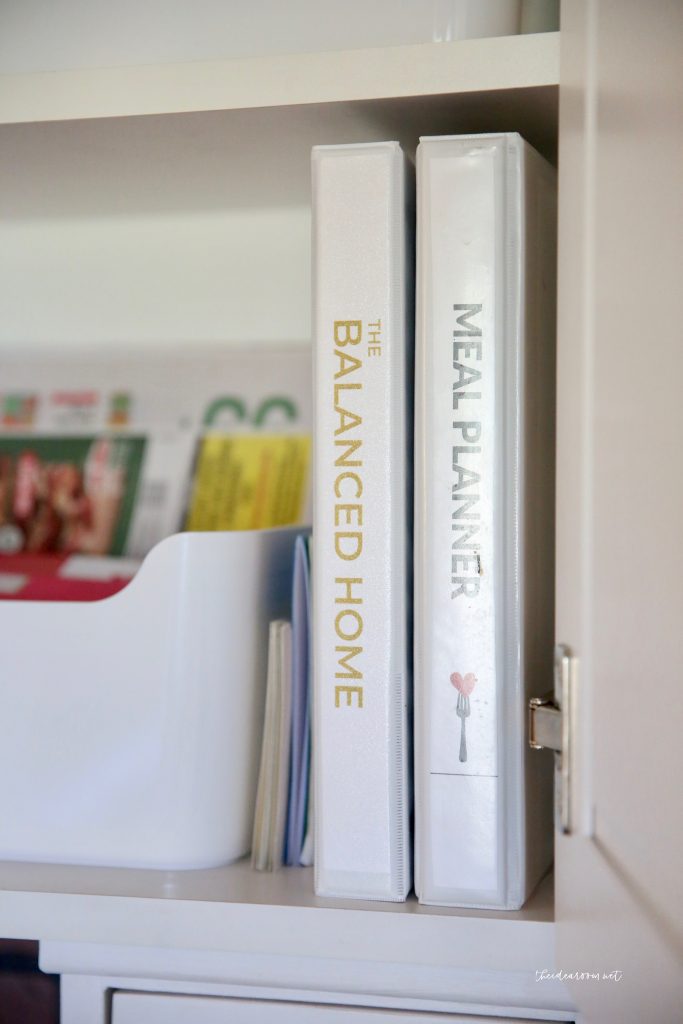
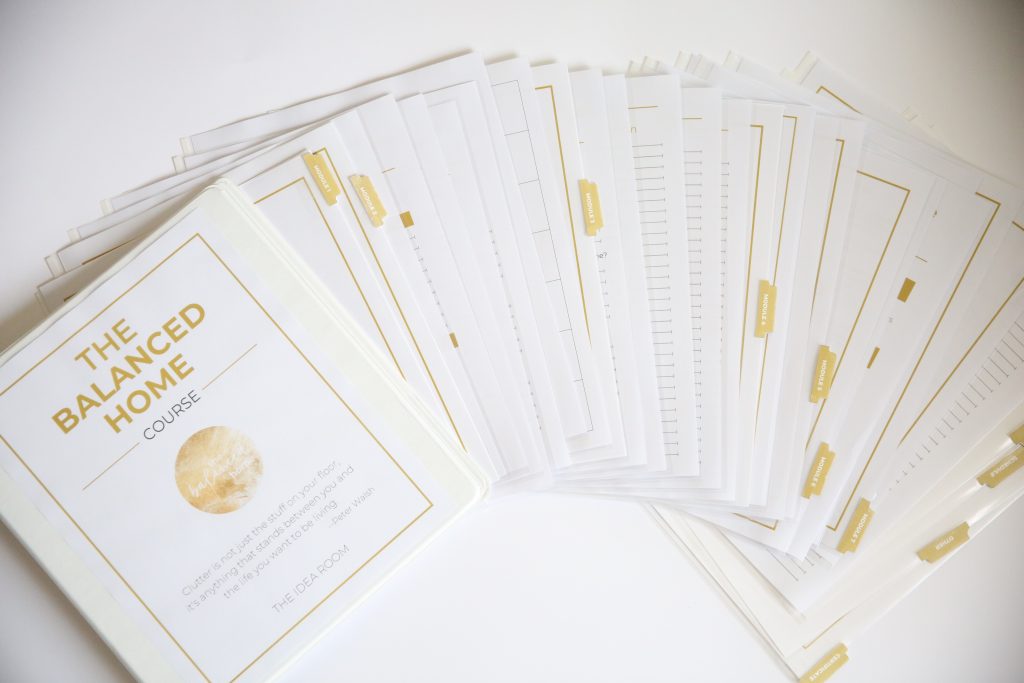
- Workbook, Resources, Labels, and More ($250 Value). Contains everything you need to help guide you through each lesson, including:
- An easy-to-follow workbook to guide you step-by-step through the lessons
- Printable Labels
- A vision sheet for your home
- A working checklist of tasks you can accomplish in 30 minutes or less
- Shopping and To-Do Lists
- Monthly Calendar and Weekly Schedule
The Mental Foundation
The best processes to overcome mental barriers from Tony Robbins and Dean Graziosi's Mastermind Course ($200 Value). Helps you to find the time, the energy and the motivation to organize your home by:
- Discovering your “true, internal why” -> what motivates you to want an organized home
- Helping you clearly identify what is holding you back from success
- Teaching you how to organize your schedule to create new pockets of time
- Helping you discover what is most important for you to accomplish with your time, as opposed to just urgent or habit
- Helping you cut out the things that aren't important and identify gaps in your schedule you can dedicate to working on your home
Your Ideal Home
The best processes to set and achieve your vision by breaking it down into actionable steps ($300 Value). Teaches you how to break down an overwhelming project into small, manageable steps, by:
- Clearly defining your goal and vision for your home
- Learning how to evaluate specific rooms and identify what you want to be improved
- Identifying specific, easy to complete tasks in each room that will contribute to your overall goal without overwhelming you
- Getting your family or others involved in the process
Cleaning and Maintaining
The best processes to clean and maintain your home after it has been organized ($200 Value).Teaches you how to maintain your home once it is clean and keep it organized, by:
- Providing you with the basic cleaning routines you need to naturally stay in control of your home
- Teaching you my amazing “Ten-Minute Clean-up” process, which allows you to clean an entire floor / room in ten minutes or less!
- Showing you how to establish routines with your kids and other members of the family
- Sharing important resources such as chore cards, favorite cleaning products, and a deep-cleaning checklist, and more
- Explaining the laundry routine we use in our home to get our laundry done every week without even thinking about it
- Teaching you how to deep clean your home after it has been decluttered and organized
- Showing you how to help the other members of your household be on the same page and not “unclean” your home
During the course, we will:
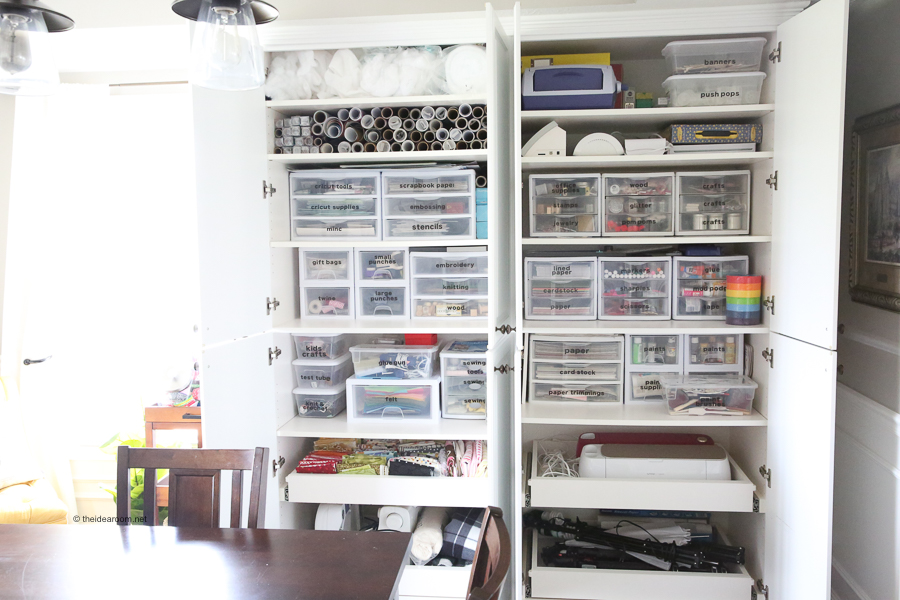
- Show you the process of how to go throughout your home decluttering, cleaning, and organizing. Then you can take this process and go throughout all the rooms in your home–including the bathrooms, kitchen, craft room, home office, basement, entryway, playroom, garage, attic, and all other rooms in your home–cleaning and organizing.
- Clean out and organize not just the rooms themselves, but organization spaces such as closets, shelves, drawers, and bookshelves.
- Learn how to properly use organization equipment, such as bins, drawer organizers, storage bins, food storage containers, lids, and baskets.
The Private Balanced Home Community
(BONUS – Priceless). Provides a community that you can go to whenever you need a place where you…
- Seek inspiration and ideas from others
- Receive support and motivation from others
- Share your successes and see the successes of others as we all work towards finding balance and clarity in our homes.
- Can ask questions and let me know what you may still need help with so that I can continue to cater the course to your needs


What Do People Have To Say About My Organization Course?
“This course was instrumental in helping me organize my space as well as my time. As a busy mom, I have a better grasp on what my days need to include so that I can enjoy my family rather than spend my time spinning my wheels cleaning up after everyone.”
“The Balanced Home Course helped me to be the “professional organizer” for my family! Simple steps to follow, check lists, printable labels, suggestions and worksheets will keep you on track to successfully maintain your own balanced home.”
“I am pretty sure I have solved more issues with the seven layers and clarity tool than I have in 6 months of therapy!! I think this course is going to help much more than my home. Thanks Amy!!!!”
When I realized I had been overcomplicating the idea of organization, that simplifying was a key component, then things really started to fall into place!”
When I realized I had been overcomplicating the idea of organization, that simplifying was a key component, then things really started to fall into place!””
HOW TO GET MOTIVATED TO ORGANIZE YOUR HOME
HOW TO OVERCOME FEARS AND MENTAL BARRIERS
I asked and these are the things that are holding you back from getting started! I made sure my course helped you overcome your specific fears and developed processes to address each of the concerns below. Have you ever had any of the same concerns?
- “I don't have the time.”
- “I don't know how to break it down into manageable chunks.”
- “How do I balance other activities?”
- “I don’t have enough energy / motivation.”
- “I'm overwhelmed and don't know where to start.”
- “I'm scared / unable to commit.”
- “I don't trust myself.”
- “I don't have the confidence I will finish.”
- “How do I maintain / keep on top of it?”
- “I have a hard time with inconsistency / finding balance.”
- “I'm afraid of quitting too soon and having it be a mess.”
- “How do I build the habits and routines?”
- “Keeping it clean and organized”“Staying focused and not getting distracted.”
- “What if I have physical limitations.”
- “I don't have the supplies / resources / money (i.e. containers etc.) / storage space.”
- “I don't want to part with things.”
- “What Do I do with all the stuff? Donate? Kids?”
- “What if I need it later?”
- “My family has stuff they want to keep.”
- “Family is not being helpful or even counterproductive… How do I get my family on board?”
- “No sense of design / vision for what I want.”
- “Lack of knowledge.”
- “Afraid of not doing it right.”
- “Being okay with not having it perfect.”
STILL NOT READY TO BUY?
Because I know that sometimes it can be difficult to take that initial leap of faith, I wanted to give you something that would allow you to get your feet wet a little, something that you could access RIGHT NOW. I think you'll like it. I've opened up a “sneak peek” section of my course, where you can access one or two of the lessons that are a part of The Balanced Home Course. If you click the button below you will be able to create your own personal account / log in for the course and access the “sneak peek” videos.

OTHER ORGANIZATION PROJECTS
If you are interested in taking a deeper look into some of the spaces in my home, check out the following posts!






I've been meaning to do precisely the same type of project to jazz up my kids' bathroom! Now, with your help, I'll give it a try!!
We did this, too! Such an inexpensive, great way to make a huge upgrade.
I've been wanting to frame our mirrors for quite a while. Thanks for the instructions on how to do it!
Thanks for sharing this, it looks great! I was just thinking about doing this to our bathroom mirror, so I'm glad you shared how you did it. Can't wait to see the other things you did in that bathroom. :)
Can you get a close up of the clips you had holding the mirror in place (if you have them in another bathroom, of course). My MIL wants to do this and I am concerned that the clips are really going to be in the way.
This looks great!
Hey Nikkol,
I know it’s been a while, but if you’re still looking for a solution…
I replaced my clips with washers and did this same project, it cuts down on the bulkiness!
WHAT DID YOU DO “WITH” THE WASHERS?
What a wonderful makeover! I too would love to upgrade an existing and similar mirror but wonder what you did with the clips holding your mirror up. Did you adhere the mirror to the wall? If you left the clips in place I wouldn't think the molding would sit flush & glue correctly.
I was just about to ask the same question two others have already asked. :) About the clips that hold the mirror in place! We just moved into a new house with that same huge mirror. Fortunately there is extra baseboard in the basement as well as tons of white trim paint! All I need to buy is the glue! :) Yippee!
I totally love this!! It really makes the room look amazing. Now I just need to move out of my apt and into a house or something so my place can look cute too!
I would love to do this…all the mirrors in my bathrooms are like this. Can you still remove the mirror from the clips or is is all glued together. I just think of needing to take it down in the future. Thank you for the tutorial…great step by step and pictures!
looks so good! And I love the pictures of you kids wrapped in towels on the wall, what a cute idea for bathroom decor!
Looks AWESOME!! Love the white frame!
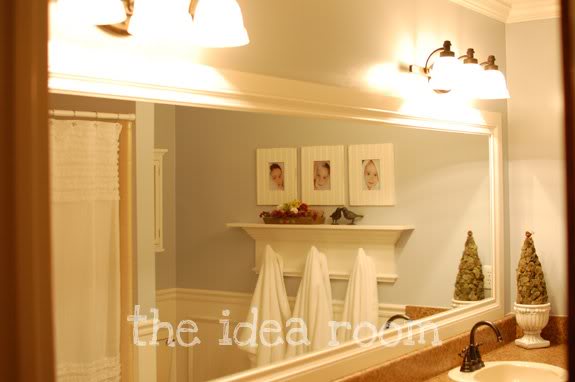
Great job with the mirror! But, I really want to know more about the shelf with the hooks in the background. I have been looking for something like this…was this a DIY project, or where did you buy it?
Fabulous Job Amy!! I love it. My house is brand new and I still want to do this in my girl's bathroom. I'll be using your info. for help. It gives a drab bathroom such character.
Amazing what a little molding can do!
i really want to do this…love it!
I always love seeing your remodeling projects. I can't wait to see how you did the rest of it.
looks awesome! I have a mirror I have been wanting to do this to and I wasn't sure what to do about the clips, so thanks for mentioning that!
Love the chunky weight of the frame. It looks great! (and I love the color on the walls in the room, too)
What about those pesky little plastic tabs that hold the mirror on the wall? Or do you have those? I do on both of mine mirrors and it's the ONLY THING holding me back from tackling this project.
Did you ever get a reply? I just posted asking the same question!
I have answered this in some of the comments below! Great question!
this is FABULOUS! We have a mirror very similar in our bathroom that I just can't stand and this looks so incredibly easy!! Thank you so much! I'll finally get my master bath feeling spa-like!
Great Job! It adds so much to the room.
Looks fabulous! Now I am almost wishing I didn't paint my bathroom such a bright color. I'm wondering the same question as everyone else…the tabs. Also, do you know where the lights are from? So cute and I like the color. They don't look builder grade to me. If you could point me in the right direction, that would rock. Thanks!
Did you glue this right on the mirror? Doesn't it stick out from the wall when you look at it from the side?
It does stick out from the side a bit. But if you put it a little over the edge of the mirror it is not as noticeable. You can also slide in a thin layer of painters caulk to fill in the small overlap and seam. It then can be painted over and you won’t even notice it.
You put the frame right on top of the clips??! How did you do that without there being a gap? I keep trying to devise a way to miter out a notch for the clips and it sounds so difficult. If you have some tips, I'm all ears! Looks great!
YOu can also lay your molding agains the mirror and get a general idea of where the clips will fall and mark it with a pencil on your molding. Then you can easily notch out the back of the molding with a chisel or file and a hammer or use your dremmel.
Hey there! Where did you get the shelf in the center and how did you mount it to the counter?
I made that one. You can find it here:https://www.theidearoom.net/diy-new-bathroom-shelf-with-towel-hooks/
We now have the same light fixtures :) Luckily they were on sale at homedepot.com around Black Friday and the shipping was free. I was surprised by the "rainbow accents" on the glass but overall like the light fixtures. I do have some questions about the mirror frame–the tabs and also what did you do about the sides of the mirror? Does it look funny that nothing is covering the part where the side of the mirror is exposed right by the wall? I am wondering b/c our mirror is not fully enclosed between two walls. Hope my question makes sense, thanks again!
Hey there… I’ve saved this and bookmarked it and frankly, I’m ready to conquer the beast in our masterbath! However, I’m curious…. do you have any of those little holder things (the plastic ones) that hold your mirror to the wall? If so, how do you go about covering those?
We did have some small plastic clips but they were small enough that the frame sat nice and flush against the mirror with the moulding we bought. You may need to take a dremmel or a chisel and carefully remove some of the wood from the inside of the moulding right where the clip will sit. Does that make sense? This should make it so that it lies flat against the mirror. Good Luck! :)
I finally did mine. However, my diary attempt was thwarted by warped wood. Didn’t realize that was the issue when the wood wouldn’t stick to the mirror. Cut up another piece and worked like a charm. Thanks for the how-to.
Yay! So glad you were able to frame your mirror in. And thanks for stopping by to share it with me. I love to hear from my readers. We had the same problem with warped wood. Now I check them very carefully at the hardware store!
Glad to hear you were able to frame your mirror too. Yes! Great point. We closely inspect our trim and moldings for warping and such before buying them. This can really affect the outcome of your overall finish! Thanks for sharing that tip!
What is the name of the wall paint color you used. I love the blue – not too baby but still soft.
Upwards by Sherwin Williams.
beautiful! did you do anything with the vanity?
I’m in the midst of attempting this project right now. I have the plastic clips, the big pesky ones that scare and pose the problem for all of us. first let me say I’m not using baseboard trim I’m using door trim, you can get it for around 10$ for a pack at HD. I cut notches out for the plastic clips so that the trim would lay over top of the clips and glue to the mirror just like described above. the first thing I did was lay my first piece over the clips and marked where they fell on the trim. next I cut the notches two different ways (I also cut the notches a little wider so that I could wiggle my trim back and forth to seat it better) the first way I notched my trim was to use my miter saw, cutting slowly I put two cuts into the trim then used a flat-head screwdriver and hammer to chisel to the notch. The second method I found easier was to use an oscillating multi-tool to make the cuts, I could make the cuts for the width and for the depth and then just clean it out with my screw driver. Next I just checked it would lay flat on the mirror and I was ready to mount. I hope that helps everyone asking the question about the clips because I had the same question and could never get an answer from any of the forums.
thanks. that helped me!
I’ve got the clips workaround down, so thanks for all the suggestions. My next question is the long metal channel that holds the bottom of the mirror. Not all of these builder grade mirrors have these, but mine does and it makes a nice, more finished appearance. But am I going to need to cut out a 6 foot channel in my bottom framing piece? The metal channel cannot be removed; it seems to be caulked into place and sits right on top of the vanity counter. Casn’t find the workaround for this anywhere. Thanks.
You may just have to cut out a groove to accommodate the metal frame piece.
Yay! Thx SO much for answering HOW to fit over the awful plastic clips!!
Can someone please answer me what kind of silicone to use? There are so many different ones out there and I thought they were mainly to be used as sealants not adhesives. If you can provide the brand and the label – that would help me! I tried looking at the label on the one pictured above but I just couldn’t make it out.
Thanks!
We did paint and repair damage on the vanity. Here is a post where we shared how we paint our cabinets http://www.theidearoom.net/2012/01/paint-your-cabinets.html
We used this particular Silicone…http://www.lowes.com/pd_48316-72643-LW5070_4294729414_4294937087_?productId=3084969&Ns=p_product_qty_sales_dollar%7C1&pl=1¤tURL=%3FNs%3Dp_product_qty_sales_dollar%7C1&facetInfo=
Hi…Love the bathroom! Can’t wait to have my hubby tackle the mirror frame. Did you leave the vanity the same color or did you paint it white also? What is your opinion on wood color on a vanity versus trim and door color in the same room? My husband thinks if our door is light oak everything else has to be too, and I’m not sure. What color frame on the mirror would you reccommend with a light oak vanity? Love your style! I’m pinning your ideas for others too. Thanks.
We painted our oak vanity white. Our cabinets were very old and beat up. We patched, repaired and then painted them white the same color as our trim but in a semi-gloss finish (because it is a kid bathroom and they tend to be messier and harder on things). Our trim is high gloss. Our interior doors are all a mahogany color though. I wish they were white but they actually don’t look too bad with the white trim. I kind of like the contrast in color though!
Hi Amy, I love this idea and can’t wait to do it in my master bath. Can you tell me what paint color you have on the walls? I adore it and want to try it out on another one of my bathrooms that needs re-doing. Thanks!
The paint color is called Upwards by Sherwin Williams!
Is there any way for me to Pin this framed mirror tutorial? I’m not seeing the Pin button.
I have slowly been making my way through old posts and adding the pin button. I just added it to this one for you! Thanks for the push! And thank you so much for pinning this! :)
simple yet so effective. definitely doing this in my bathroom. Grazie!
Beautiful ! I am hoping do do this. Did u replace the counter top or is it a different DYI?
We did replace the counter tops and had a company build us one to replace the old yellow formica countertop.
found this and LOVED it! Thanks for the easy to follow step by step instructions! Looks pretty easy. You had said you put the frame up over the mirror/mirror clips. How does this look from the edge or side… does the frame stick off the wall a lot?….
The mirror frame does stick out a bit from the wall, but our mirror extends fully so you don’t even notice it at all!
Thanks for a wonderful idea. We are trying to frame our bathroom mirror (which is quite large about 9 ft). After we assembled the pieces we noticed that the flat board that sits at the bottom is warped. Any tips on how to deal with this issue without starting all over again?
It’s amazing designed for me to have a site, which is
beneficial in support of my knowledge. thanks admin
THIS MIRROR IS BEAUTIFUL! WHAT CAN I DO IF I DON’T HAVE A COMPOUND SAW?
These are such beautiful pictures of mirrors. I am really into interior decorating, and I have been astonished lately at the impact mirrors can have on a room. I have been researching different types of mirrors, and methods to use while installing, and I really appreciate your site! Have a great day!
Thank you for posting this. This is going to be really useful for me as I try and help my mom remodel here master bathroom. However, I noticed that the mirror you framed has two sides that are flush against the walls. How would you suggest to frame mirrors that don’t totally cover the walls. Would you approach it in the same way?
Yes…Approach it the same way. Then you can always add a strip of molding to cover the sides where the mirror does not lie flush. You can have it so that it meets the top of the frame so that it is all flush…or you can just use a quarter round piece to cover the hole or gap. Does that make sense?
Valuable info. Fortunate me I discovered your website by chance,
and I am shocked why this coincidence didn’t happened in advance!
I bookmarked it.
Hello!
Were all four molding pieces glued directly Onto the mirror?
Yes they were. Great question.
What about the shelf unit in the middle? Do you buy or make it?
I’m interested in the shelving you put in the middle on the counter top. Did you buy it or make it
Janice- Here is the link to make one: https://www.theidearoom.net/diy-new-bathroom-shelf-with-towel-hooks/
Thank you!
It is beautiful and such a clever, original idea. Bravo!
Andrea-Thank You.