
Today I am excited to share with you how to remove brick fireplace from your home. Removing your brick fireplace takes a lot of hard work but can be done. Here is how we removed our wood burning stove and brick fireplace after lots of consultation with a professional.
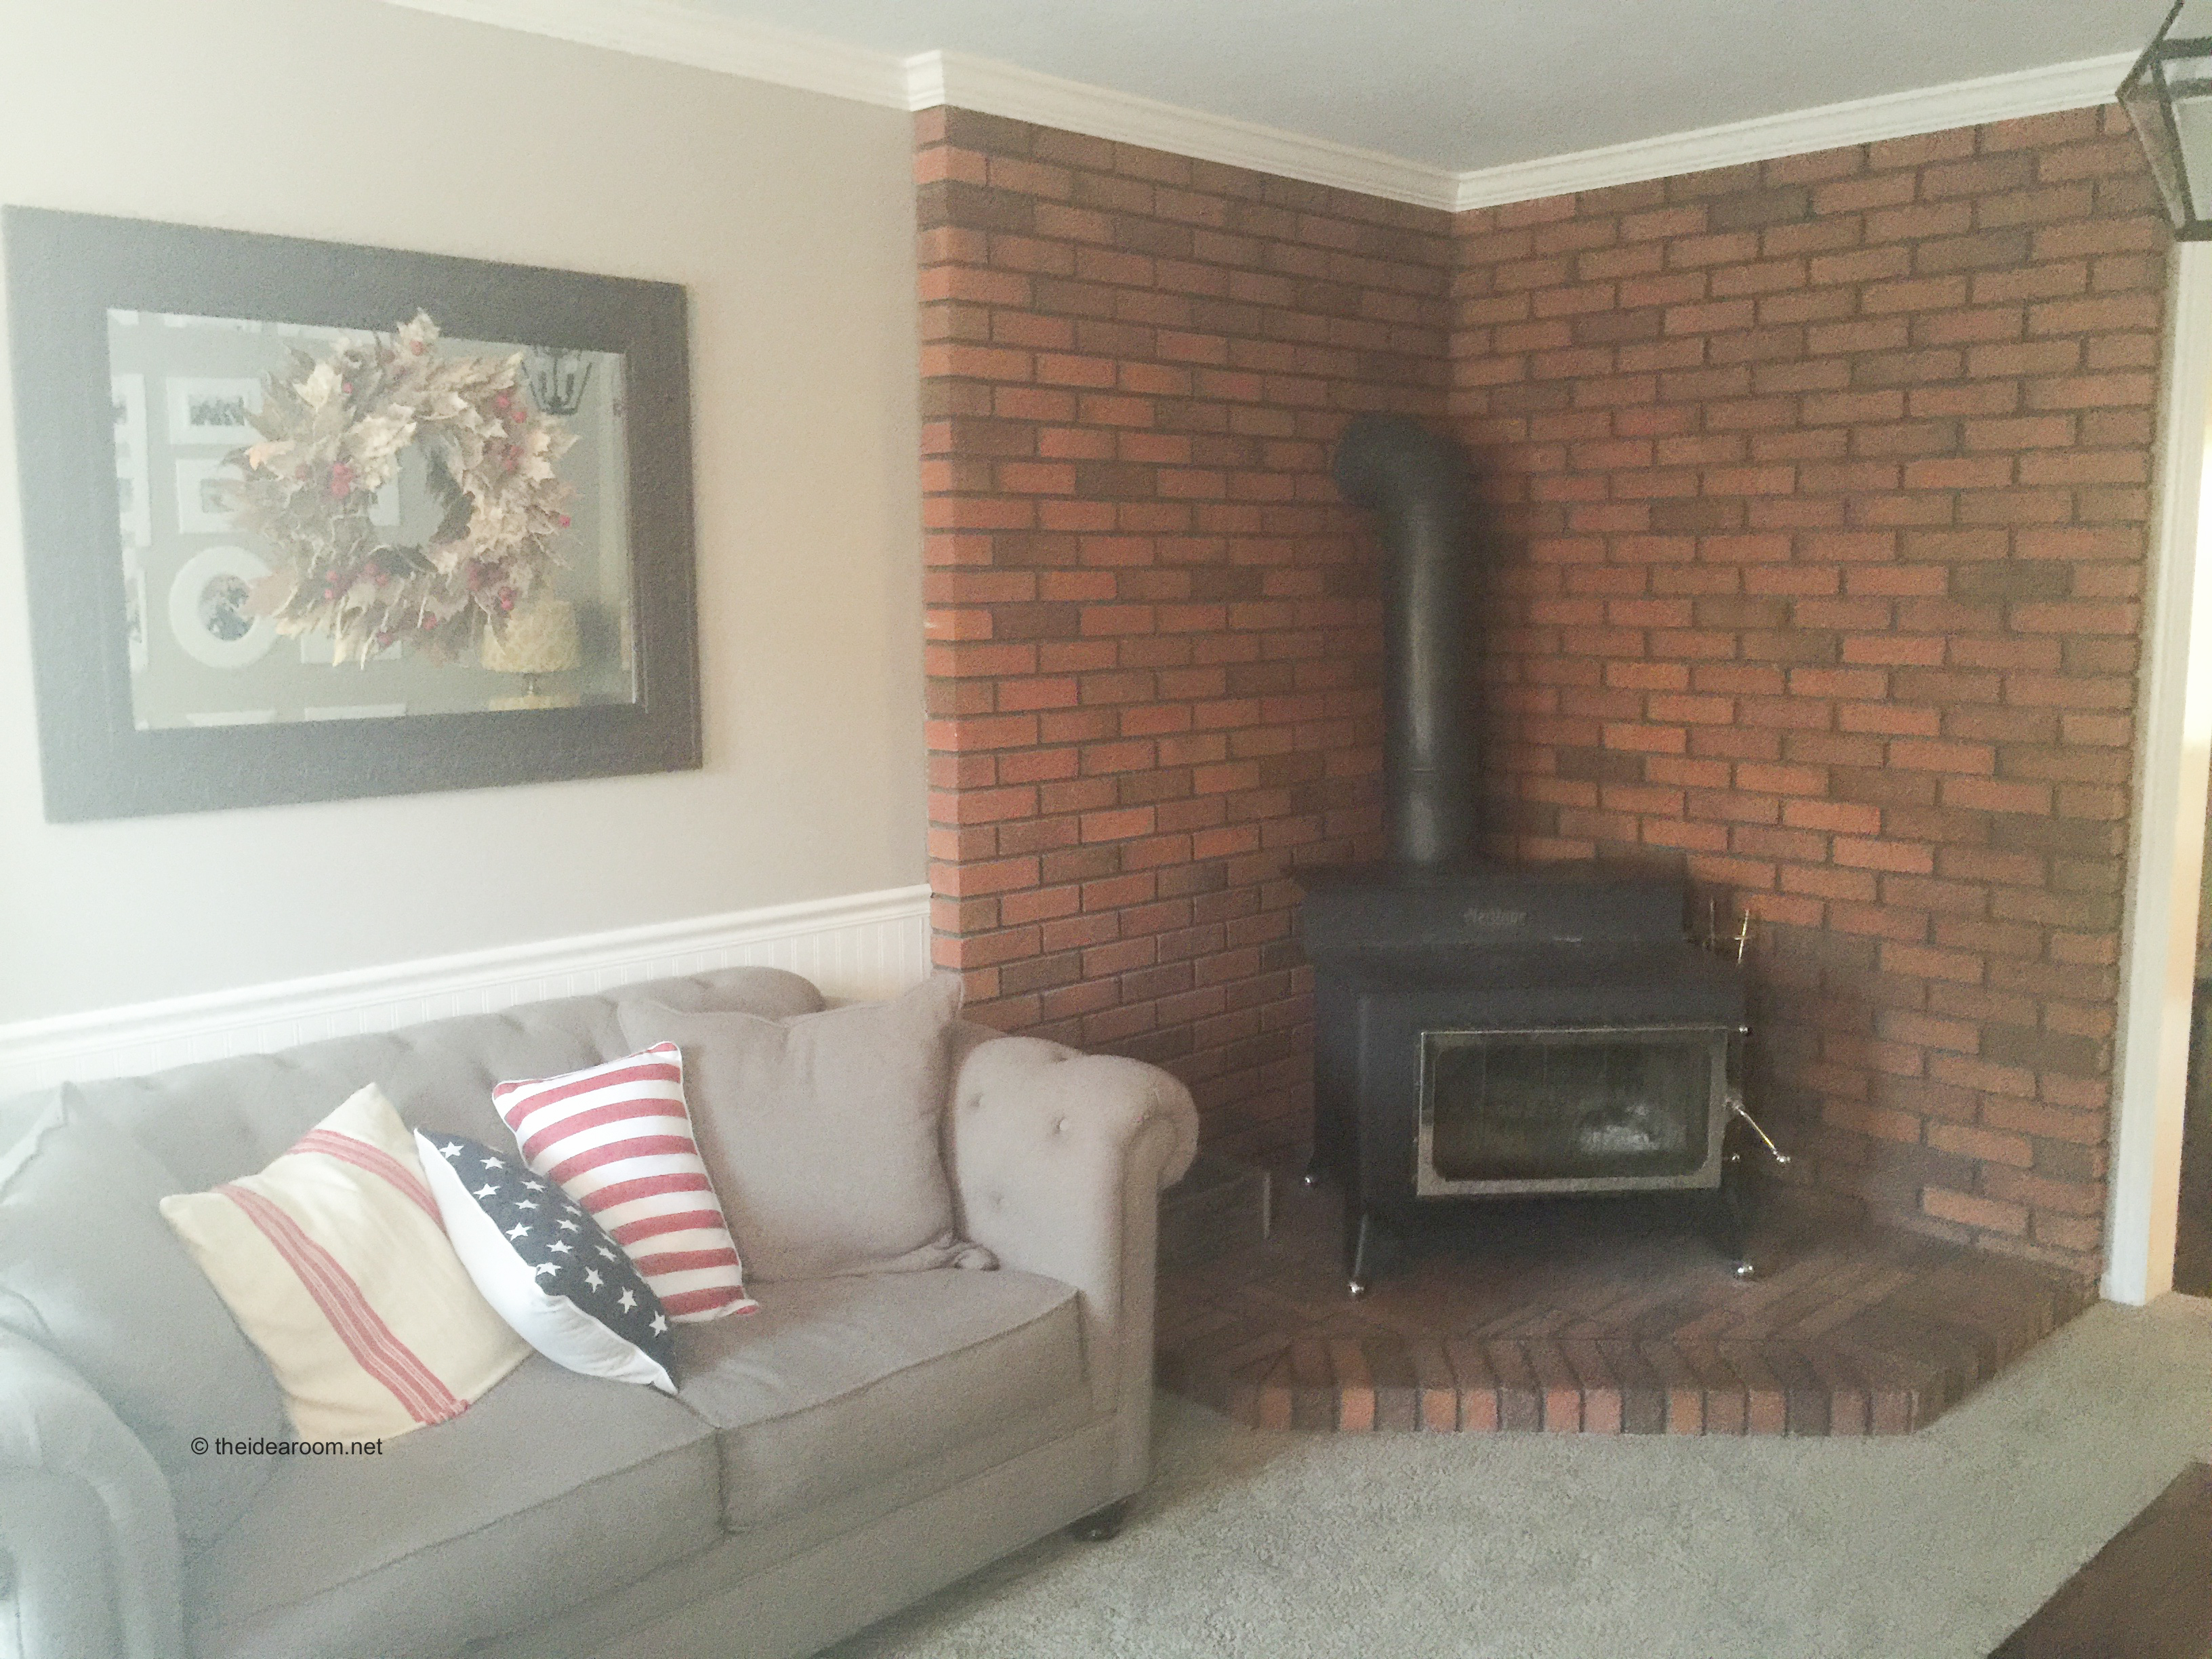
Our home was built in 1979 and we have lived here since 2002. When we first moved into our home, we didn’t have any extra money to fix it up at the time how we wanted it. We did a few easy renovation projects here and there to make it ours by removing old, out-dated wall paper and painting over outdated paint colors, but we had a large brick and wood burning stove in our main family room that I just didn’t love.
Don’t get me wrong, I love fireplaces, but the size and placement of this fireplace made for an awkward furniture arrangement in the room. We also rarely used it except for at Christmas time…and because it was a wood burning stove we could only use it if the air conditions outside allowed for it. With three other fireplaces in the home (2 gas fireplaces and I wood fireplace) we frankly didn’t even need it.
I wanted to rip it out…but my husband wasn’t on board with the idea because it was one of those bigger renovation projects that we didn’t ever seem to have time for with 5 kids and a busy life. So, the fireplace stayed for many years because we didn’t have the time or want to spend the money to pay someone else for the fireplace removal costs.
But, last Memorial Day weekend, we had plans that were suddenly canceled and left us an entire weekend open…this rarely happens. As we discussed what to do with our newly freed up time, my husband said, “We could take out that fireplace that you don’t like!”
What?! Heck yes! I was not going to let anything stop this from happening. Haha! We had talked about it long enough. We had already done our research and talked to our friend who is a contractor and knew what we needed to do to safely remove it. So, we went for it right then and there.
Here are some guidelines you need to know before embarking on a project of this size.
CONSULT A PROFESSIONAL
Whether you are looking to do a partial removal or a full fireplace removal, before beginning the removal of your fireplace, you are going to want to make sure to do your research. Not all brick fireplaces can be removed safely by yourself. Some chimney’s and brick fireplaces may be structural or are placed in a load-bearing wall and may need to be removed safely by a professional and insured contractor with the proper developer credentials. You don’t want to mess with the structural integrity of the room or your home. You may also need to consult a structural engineer if your brick fireplace is more complicated to remove.
We had our brick fireplace checked over by our contractor friend who gave us very specific instructions for how to remove our brick fireplace safely. Our hearth was a pretty easy removal process and one that simply required some heavy lifting and hard work…which we aren’t afraid of, so we made the decision to go ahead and DIY this home improvement job by ourselves. After we removed the wood-burning fireplace and the flue, the contractor came back and helped us to properly seal off the chimney.

SUPPLIES NEEDED FOR BRICK FIREPLACE REMOVAL
- sledge hammer
- demolition hammer (optional can be rented)
- work gloves
- eye protecion
- dust mask
- brick chisel
- cold chisel set
- crow bar
- heavy duty hammer
- shovel
- wheel barrow or buckets
- work tarp or painters tarp to cover flooring
- plastic sheeting
- broom
- dust pan
- step ladder
- wet dry vacuum
HOW TO REMOVE BRICK FIREPLACE
PREP THE AREA
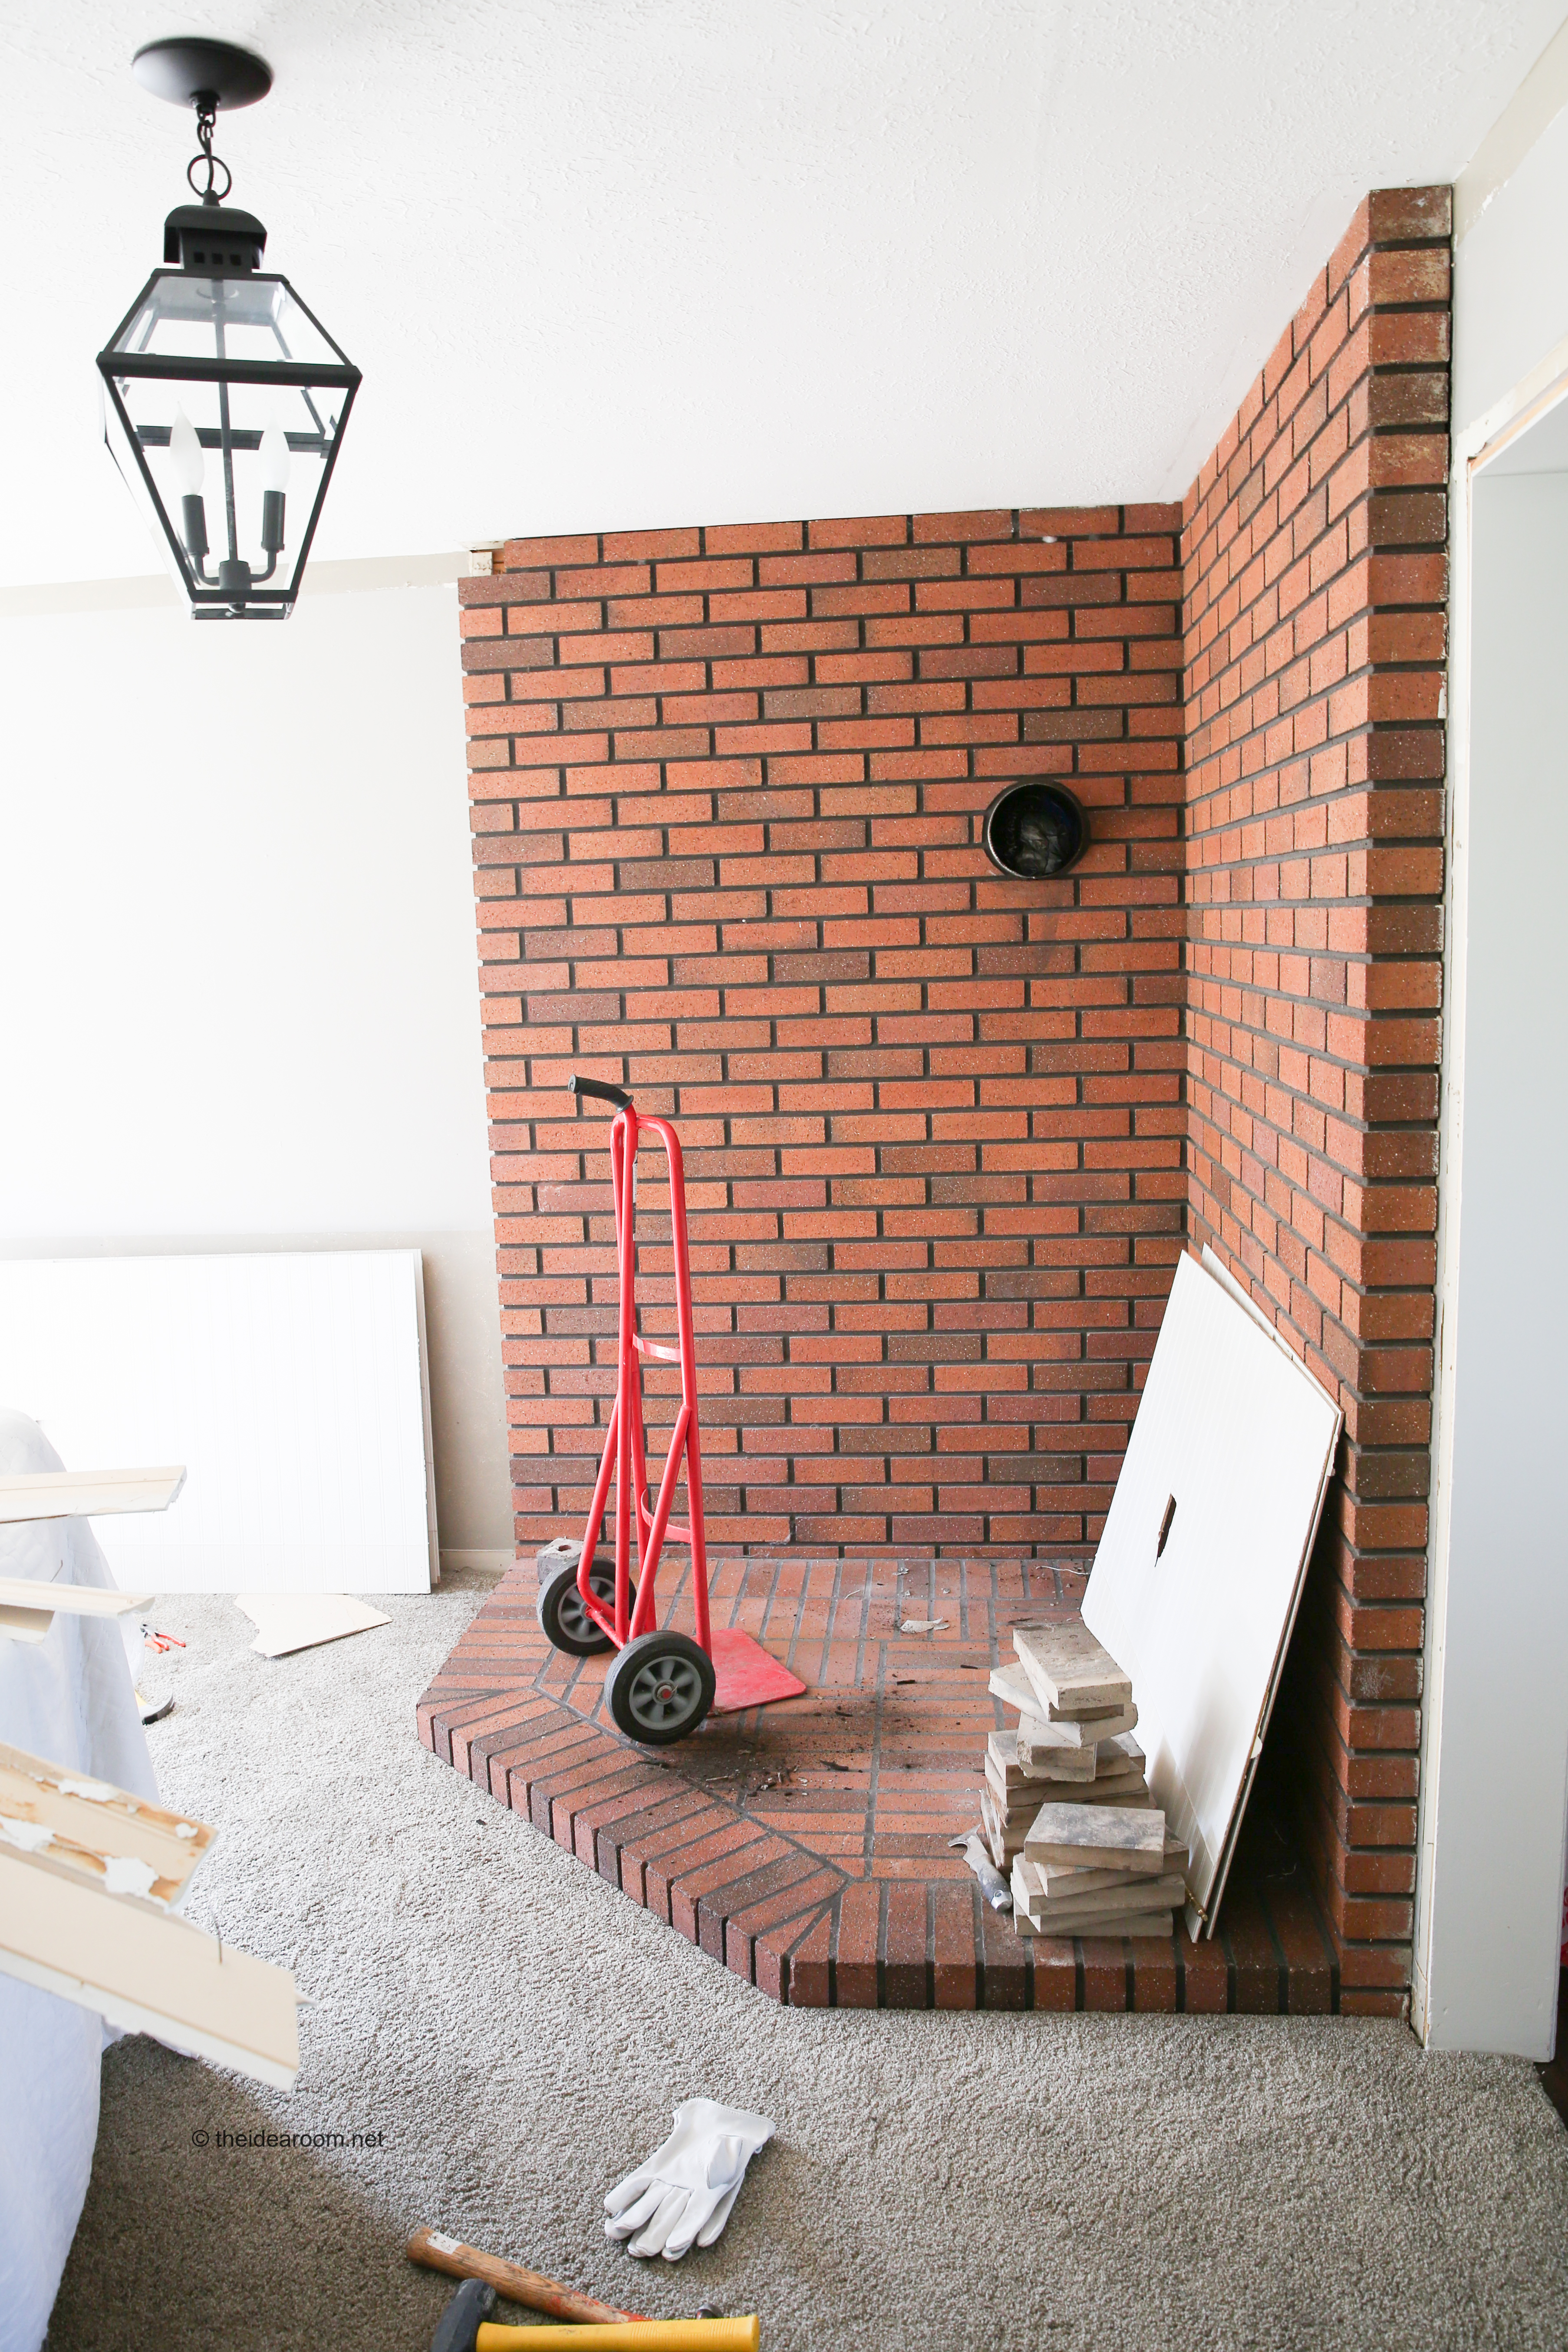
- Set up a tarp underneath the entire area where you will be removing the brick fireplace from. Place any plastic sheeting on the floor or over any doorways to prevent dust from entering the rest of the home. These two extra steps will help you maintain some cleanliness and keep the carpet area cleaner from the brick and debris.
- Remove any and all ashes from the fireplace before beginning. Doing this first will save a big, dirty mess.
REMOVE THE FIREPLACE
- Un-attach and remove fireplace if it is a separate piece that can be removed. We sold our wood burning stove in a classified ad a few days later.
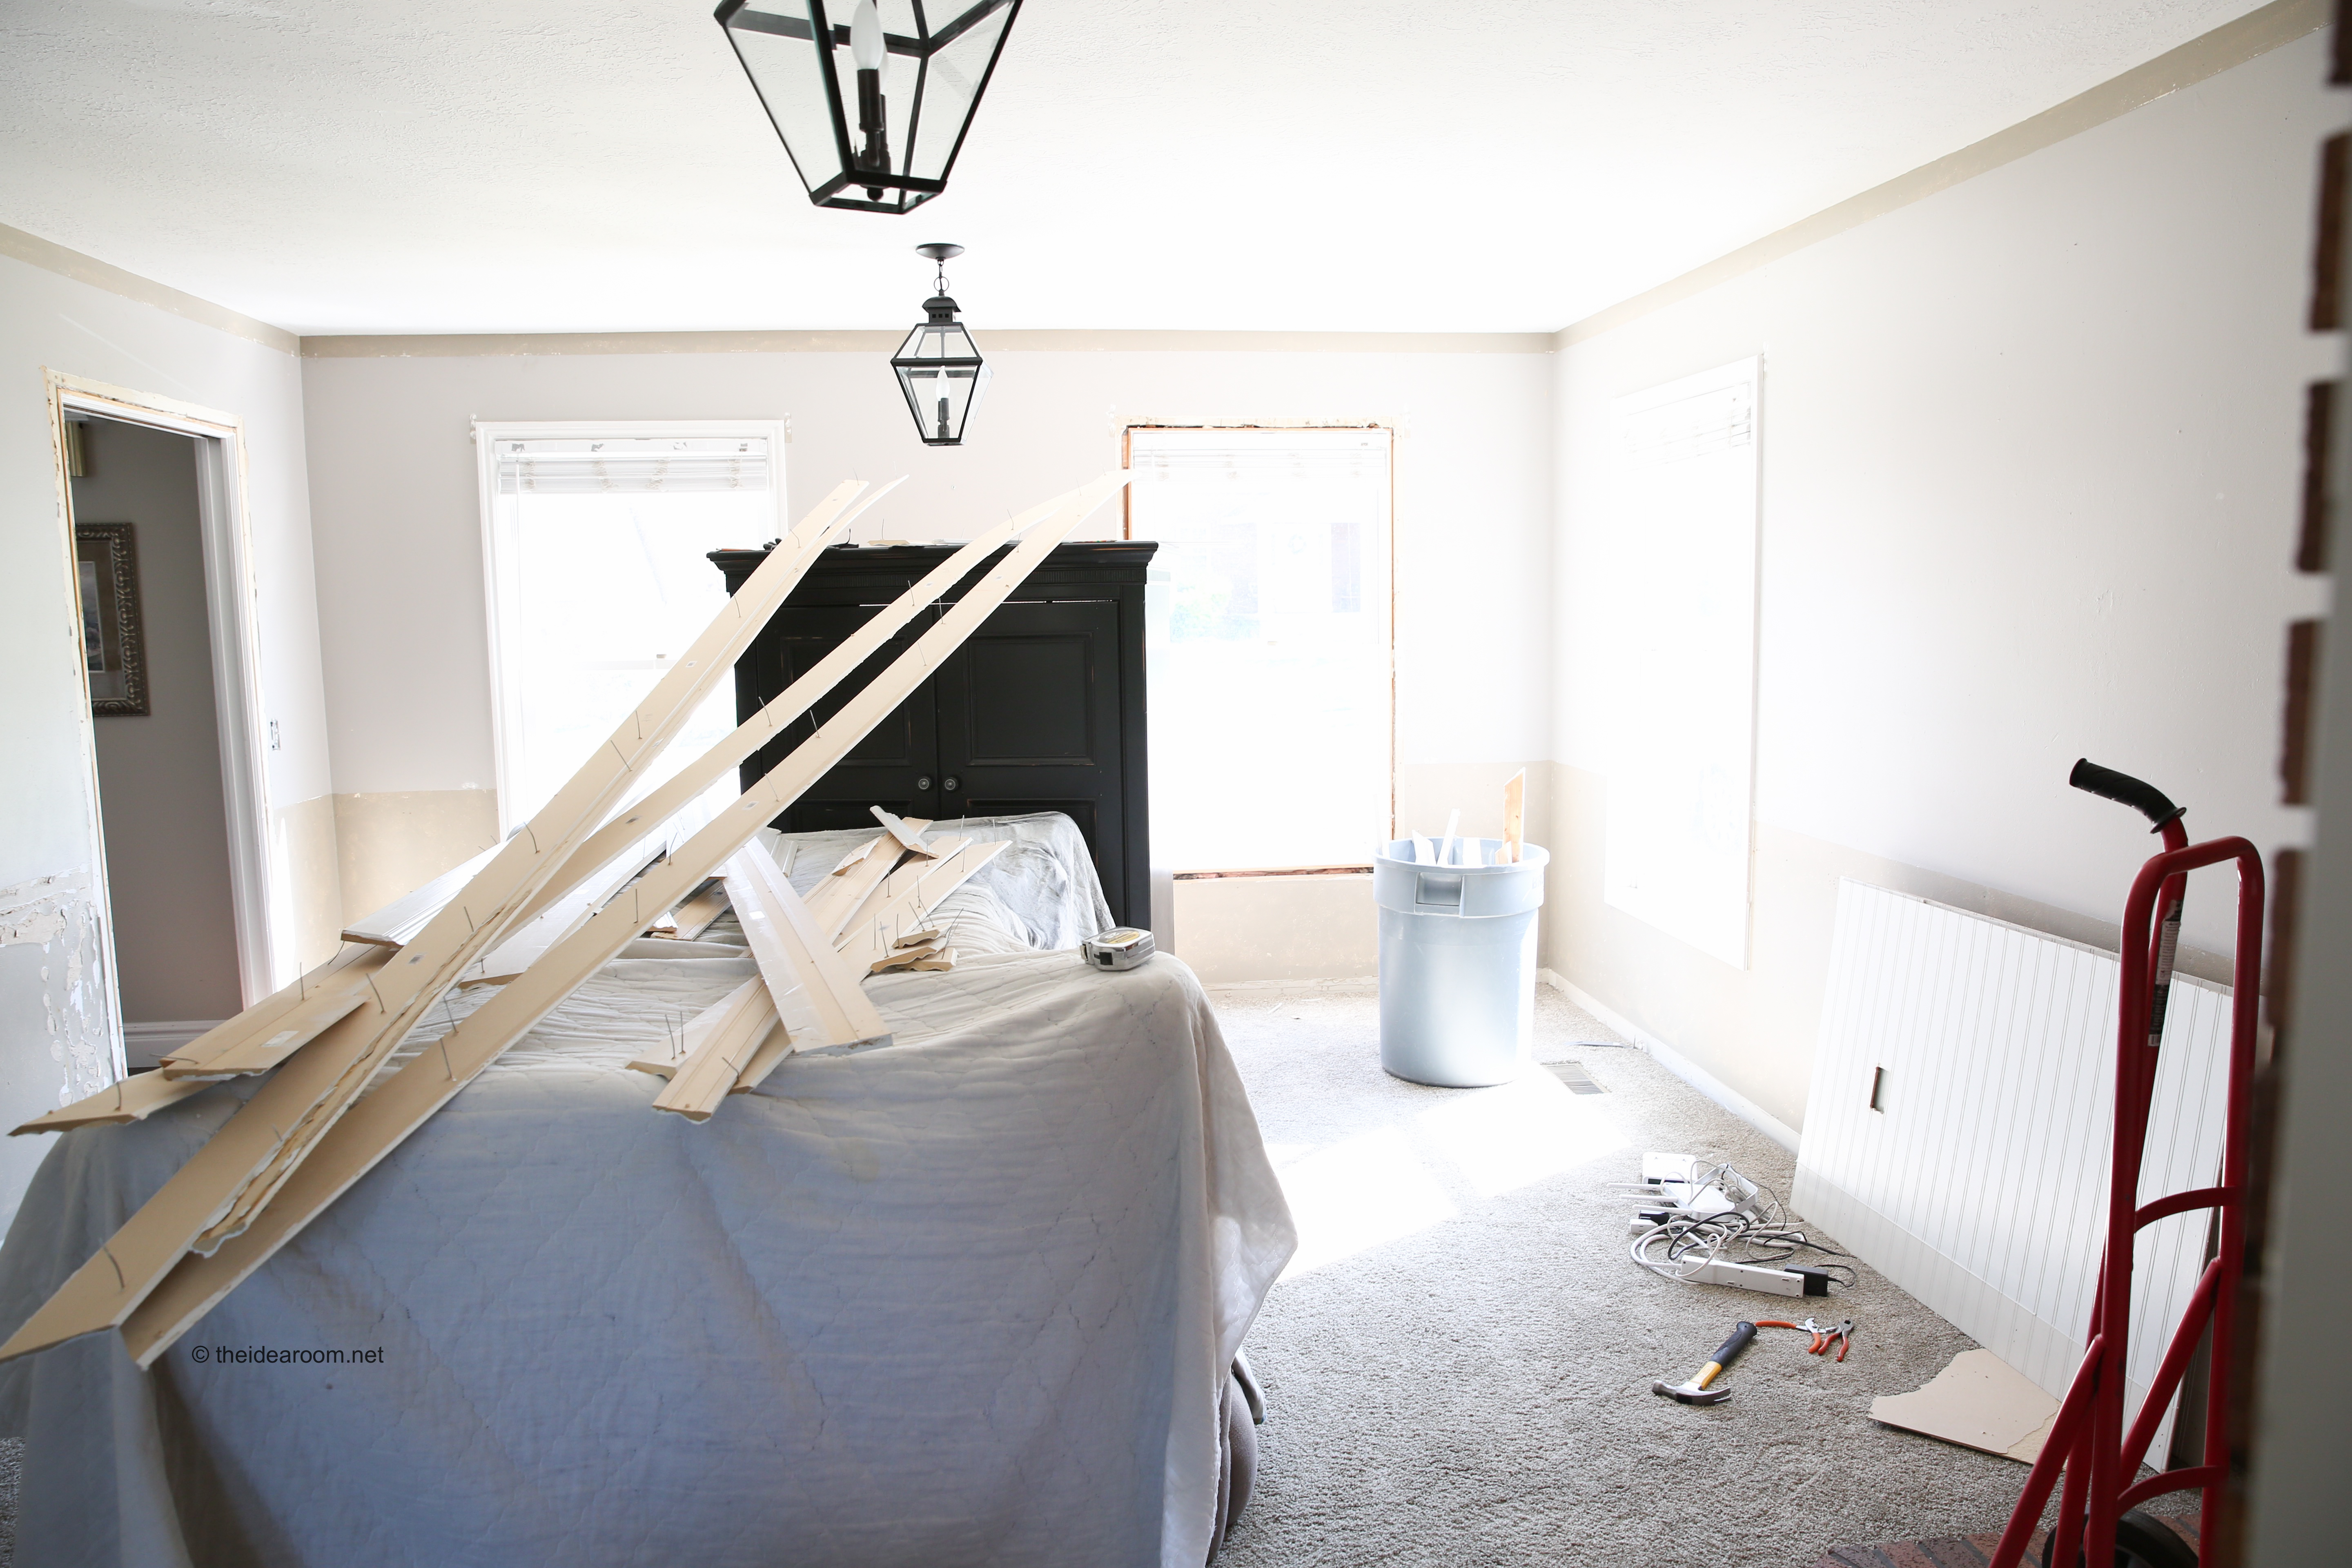
- Start by taking down all the crown moldings, chair rail moldings, baseboards and the paneling on the bottom of the wall. We pulled them off carefully so we could reuse the crown and baseboard moldings again.
REMOVE THE BRICKS
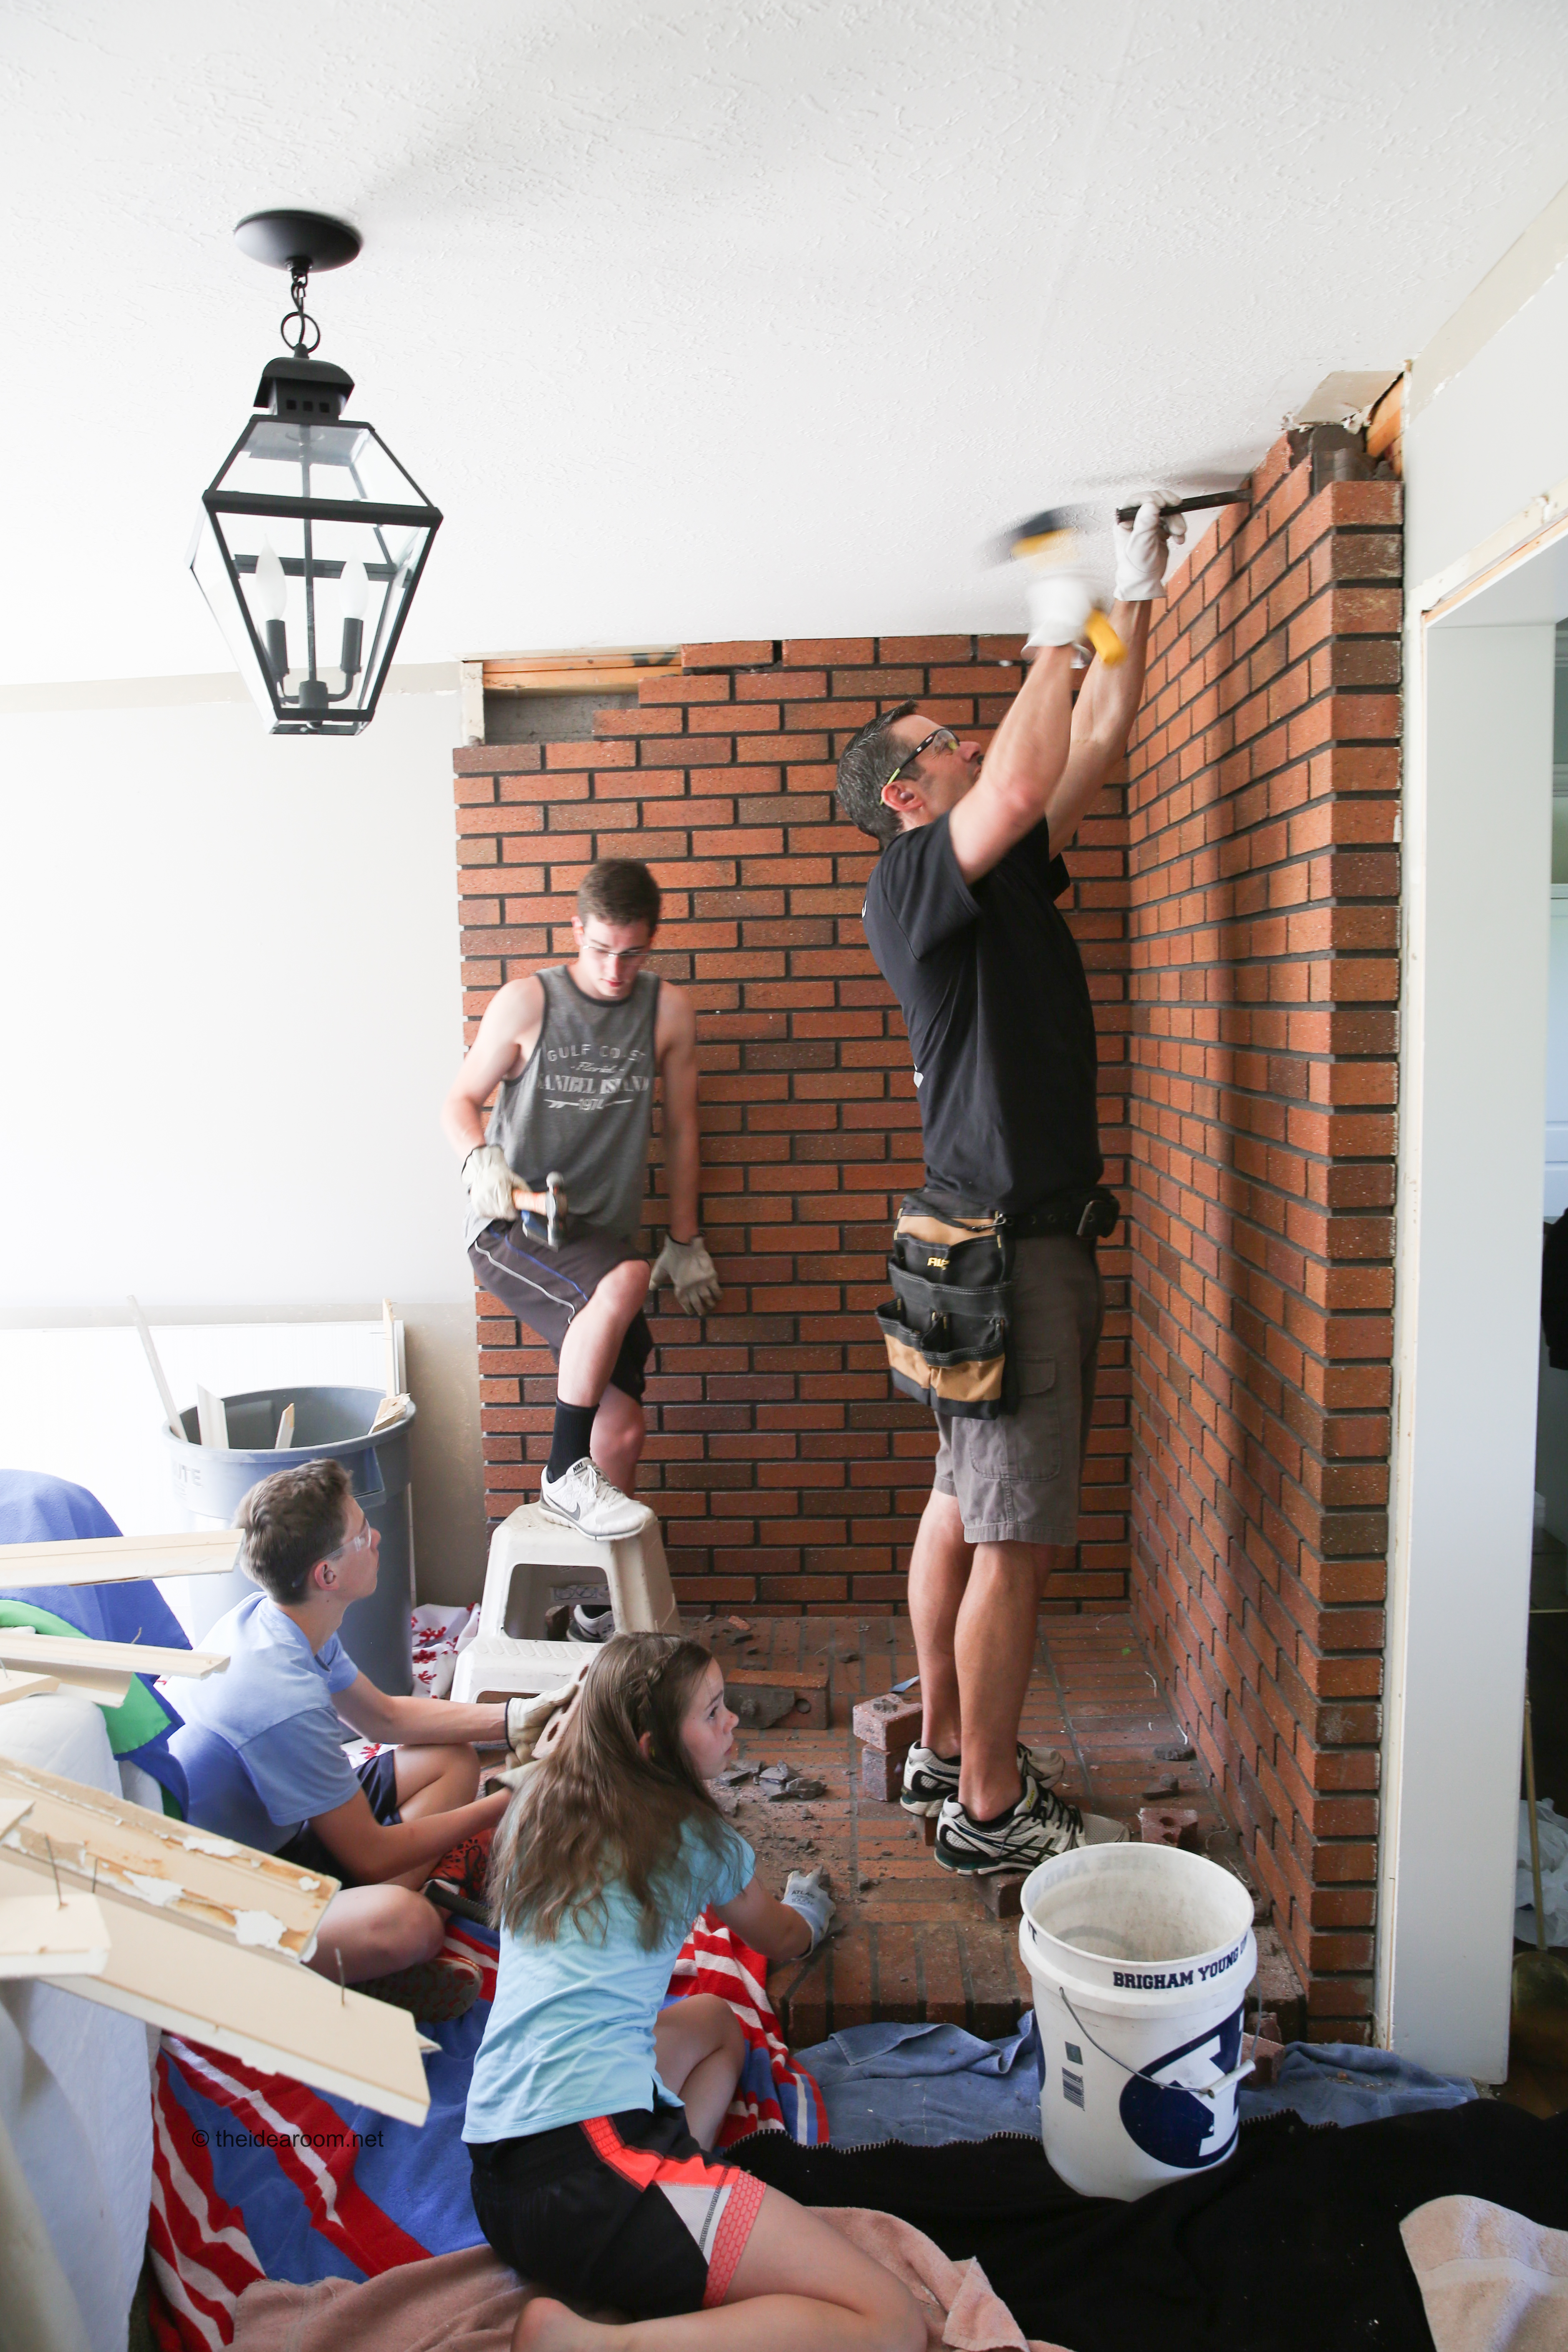
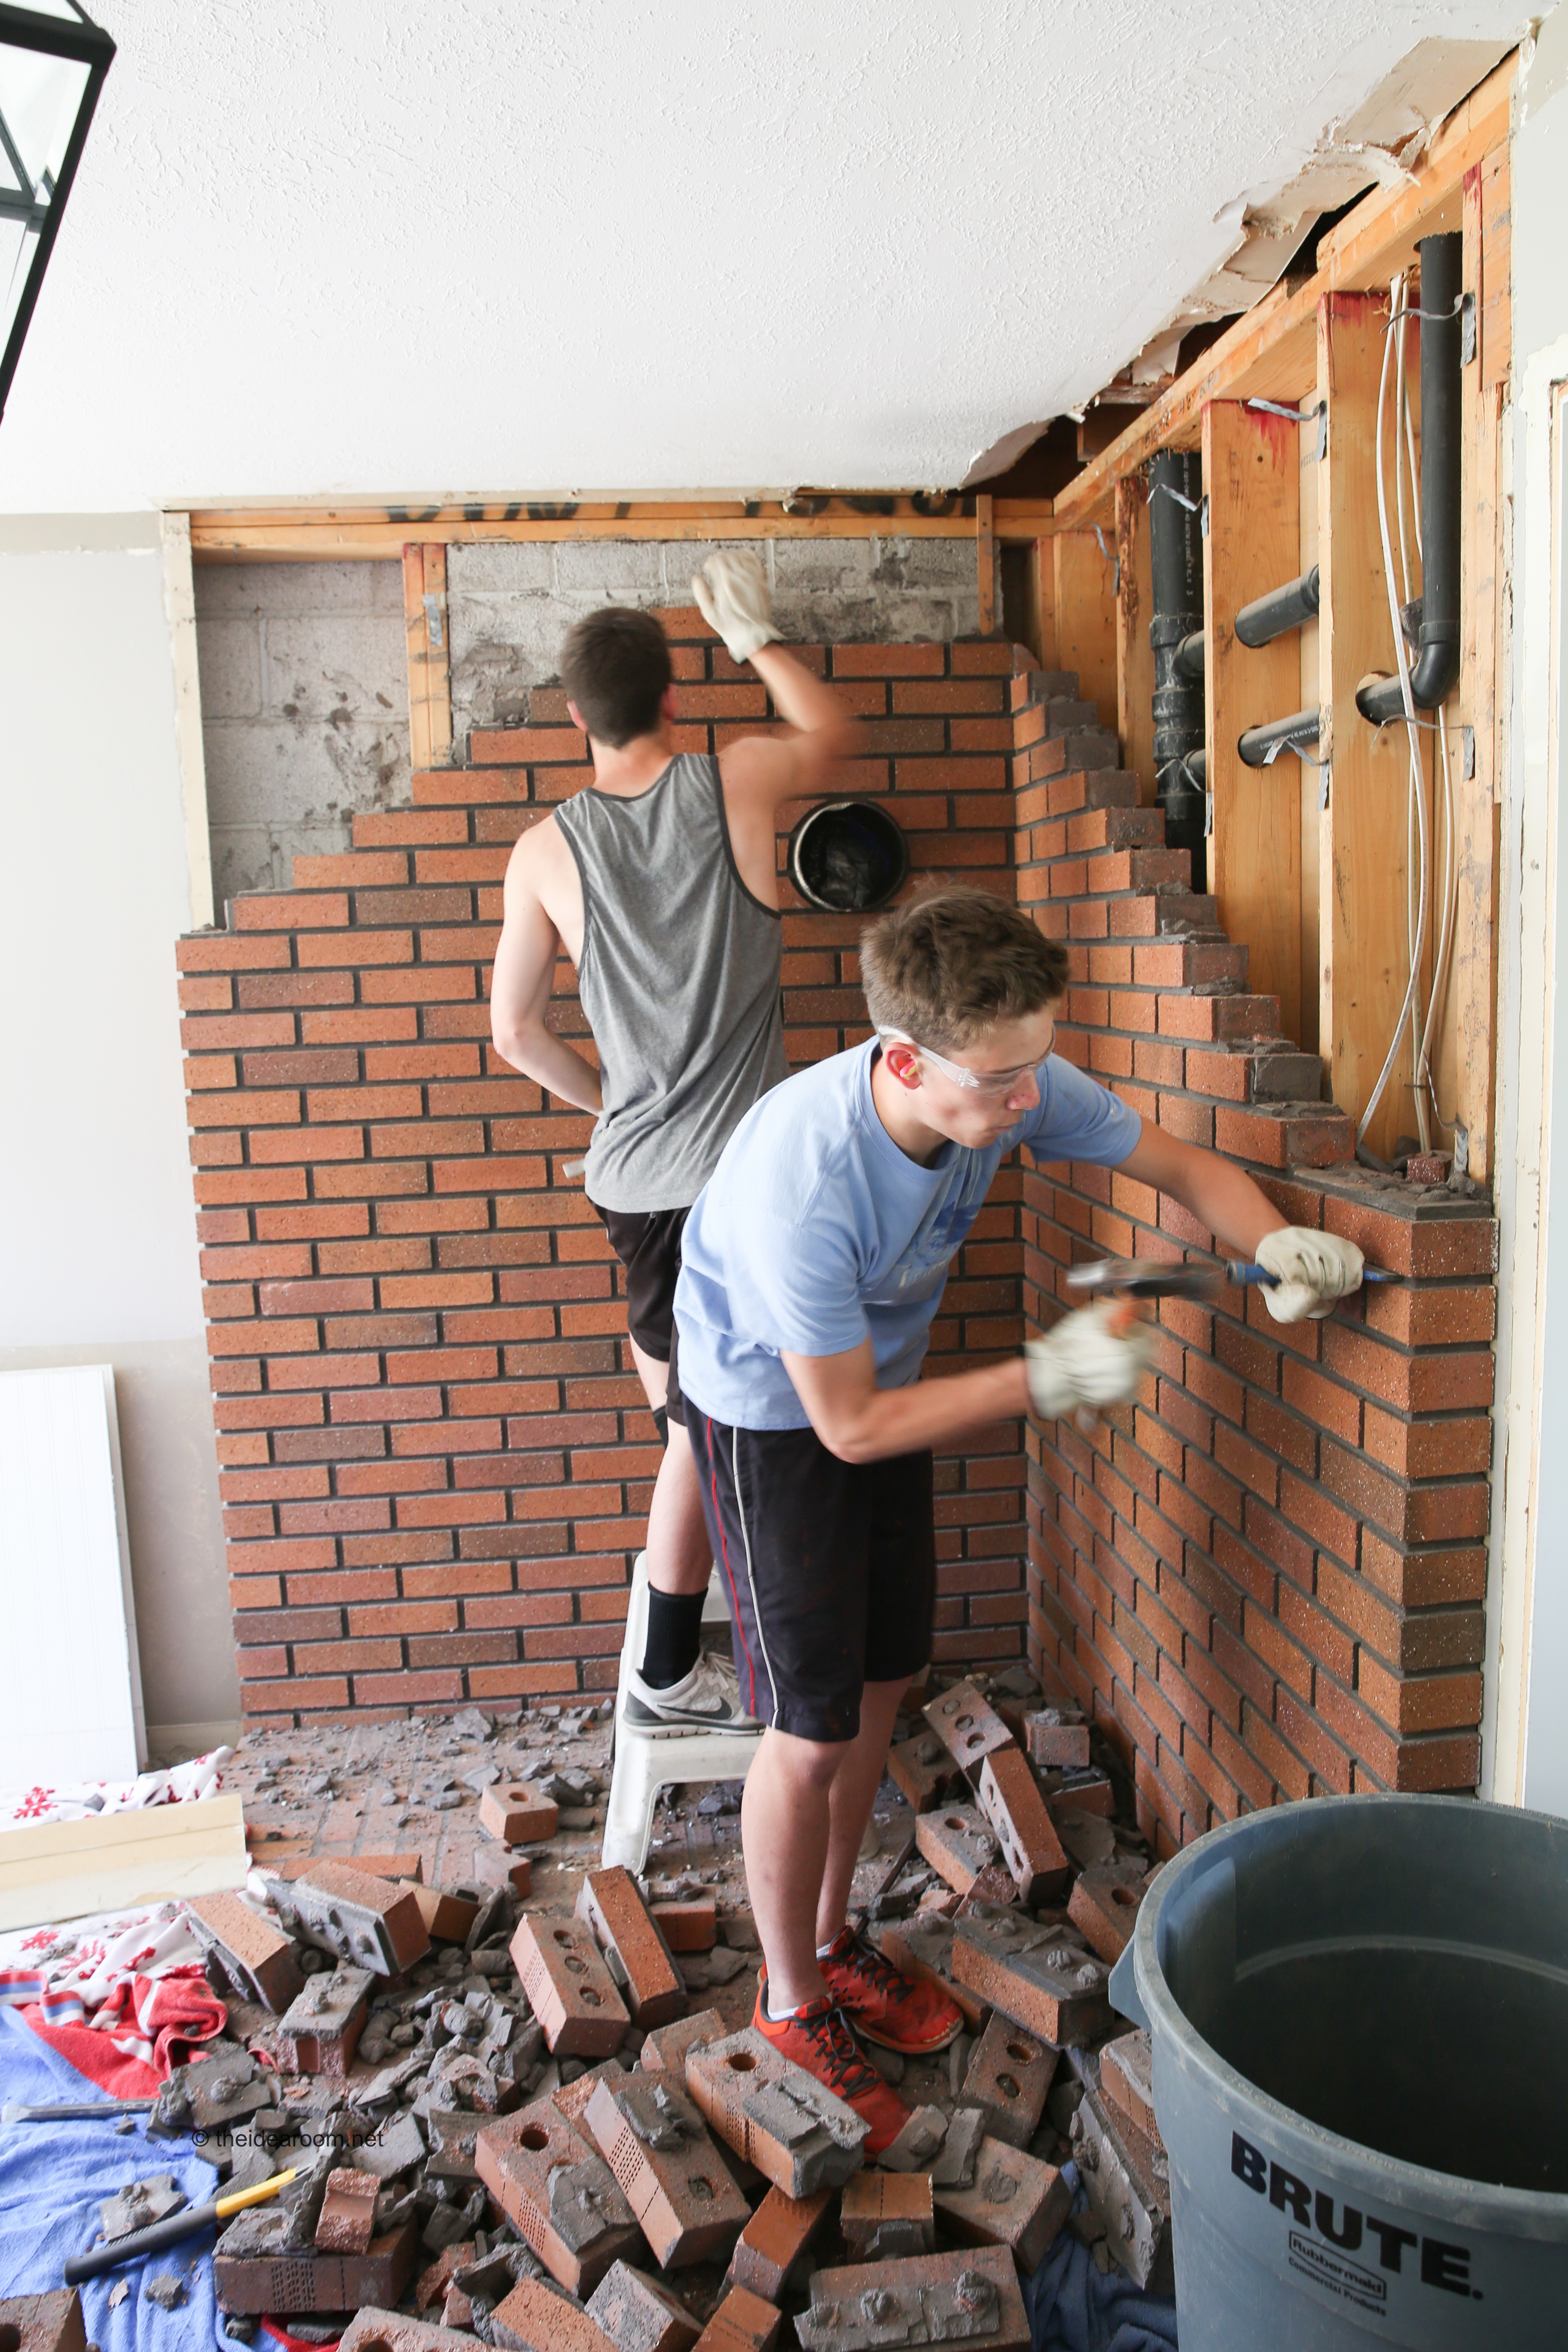
- Take a sledge hammer and a chisel and use them to break through the mortar of the bricks. If you can find a weaker area to begin this can help with the removal of the first few bricks allowing you to get behind the bricks for better angle of removal.
- Haul away the bricks to the dumpster as you go. This will help to keep your work area free and allow you to work without tripping on small pieces of brick and mortar. The younger kids loved this chore and helped to carry away the brickdebris.
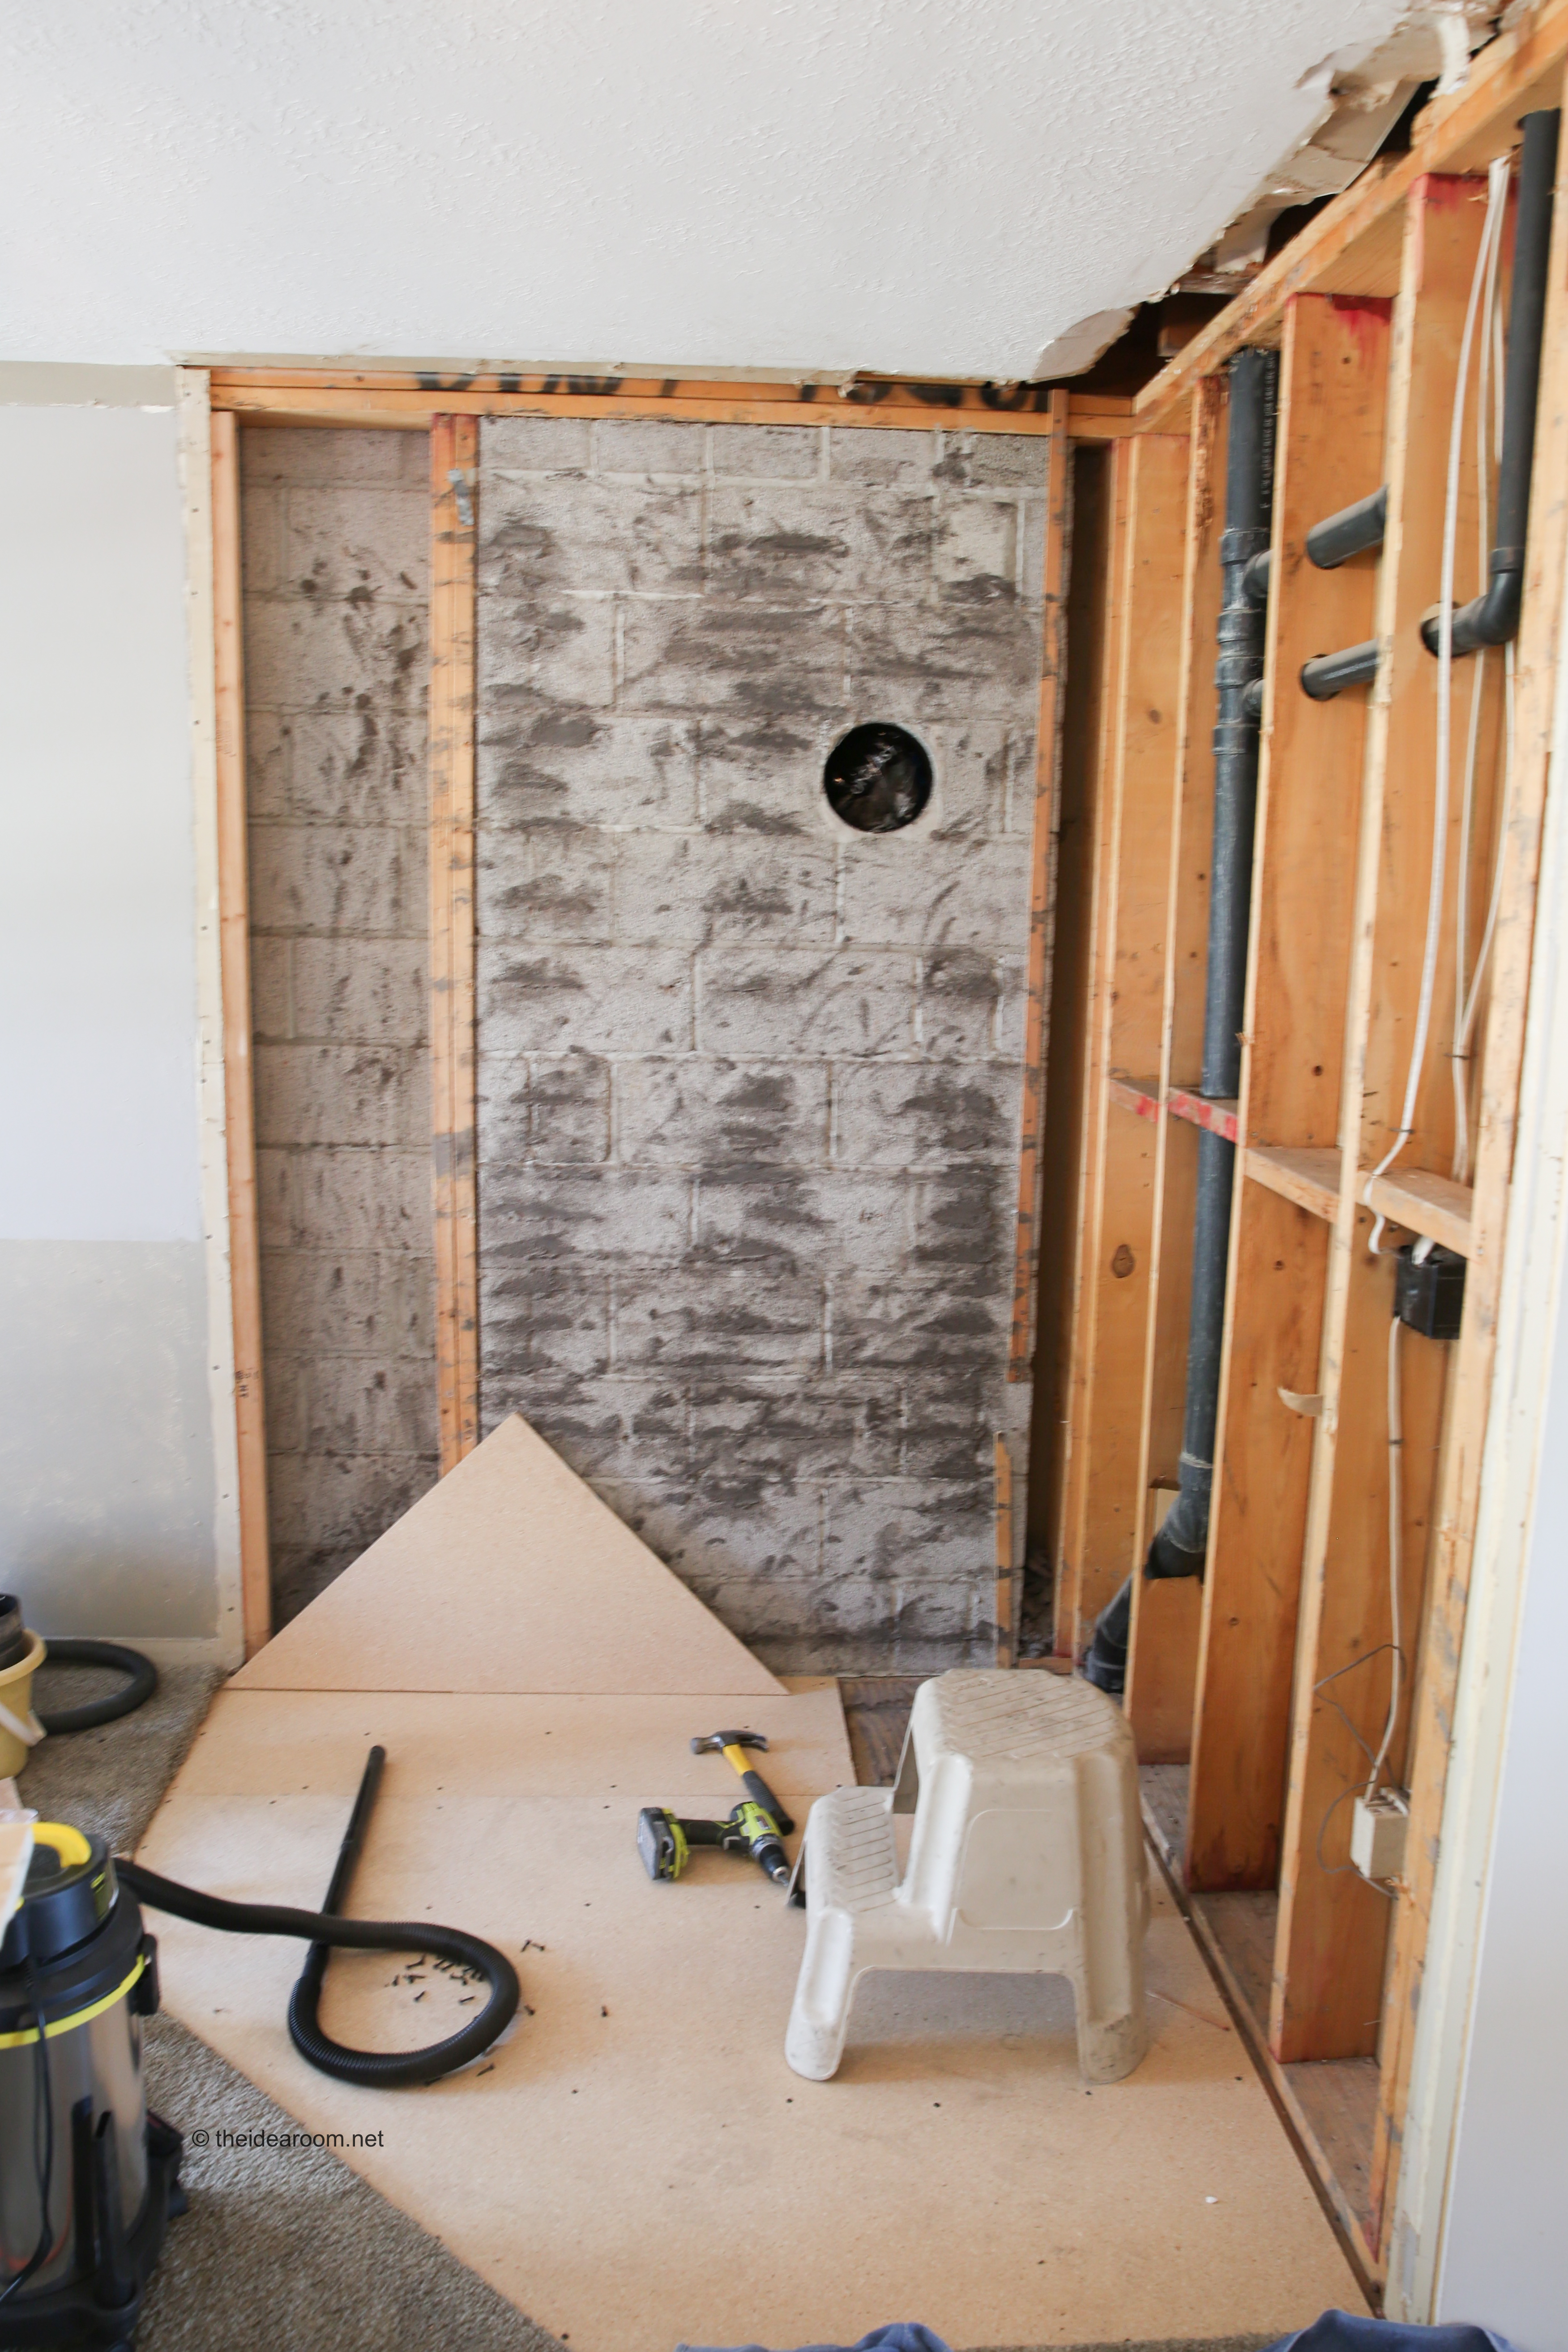
- Remove all the bricks from the area you are demolishing.
- You will need to remove the flooring along the bottom of the wall to reach the same level as your sub-flooring if your bricks extend below that. This way your new flooring if needed will be level.
- Sweep up the entire area and use a shovel or a dust pan to clean alway all of the debris.
- In most cases you will need to repair the walls and add new insulation and dry wall to the wall where the bricks were.
- Clean and prepare the wall for the installation of new insulation between the frame wall studs and to add plywood and drywall where needed.
FINISHING OFF
- You will need to take care of the chimney and the flue removal. This will vary depending on the type and style of fireplace you are removing. Be sure to consult a professional on the best way to do this for your specific situation. Be sure to do your research before adding any type of flue plug or chimney balloon etc.
- If your chimney vented through the ceiling you will need to repair that and research or hire a professional and find the proper way to remove it and seal it off safely and securely.
We took out the wood burning stove and ended up selling it in the classifieds a couple days later.
HOW TO REMOVE BRICKS
My house is so well built and these bricks took some serious effort to take down. It’s great to have a home that is well built…but demo-ing it is another story :). All the kids wanted to get in on the brick removal process. They had a good time taking a sledgehammer to the wall!
Be sure to wear protective equipment to cover your eyes as small pieces of brick and mortar fly around and can be very sharp. You don’t want to get any in your eyes.
Use a chisel that is specifically designed to break into the mortar and remove the bricks properly. You will need a sledgehammer for most brick due to its durability and toughness. They are designed to last!
It took a couple days to take the entire wall down. But we got it done. Then we had to haul all the bricks away and clean up the space so that we could add some dry wall to finish it and match it up with the existing walls.
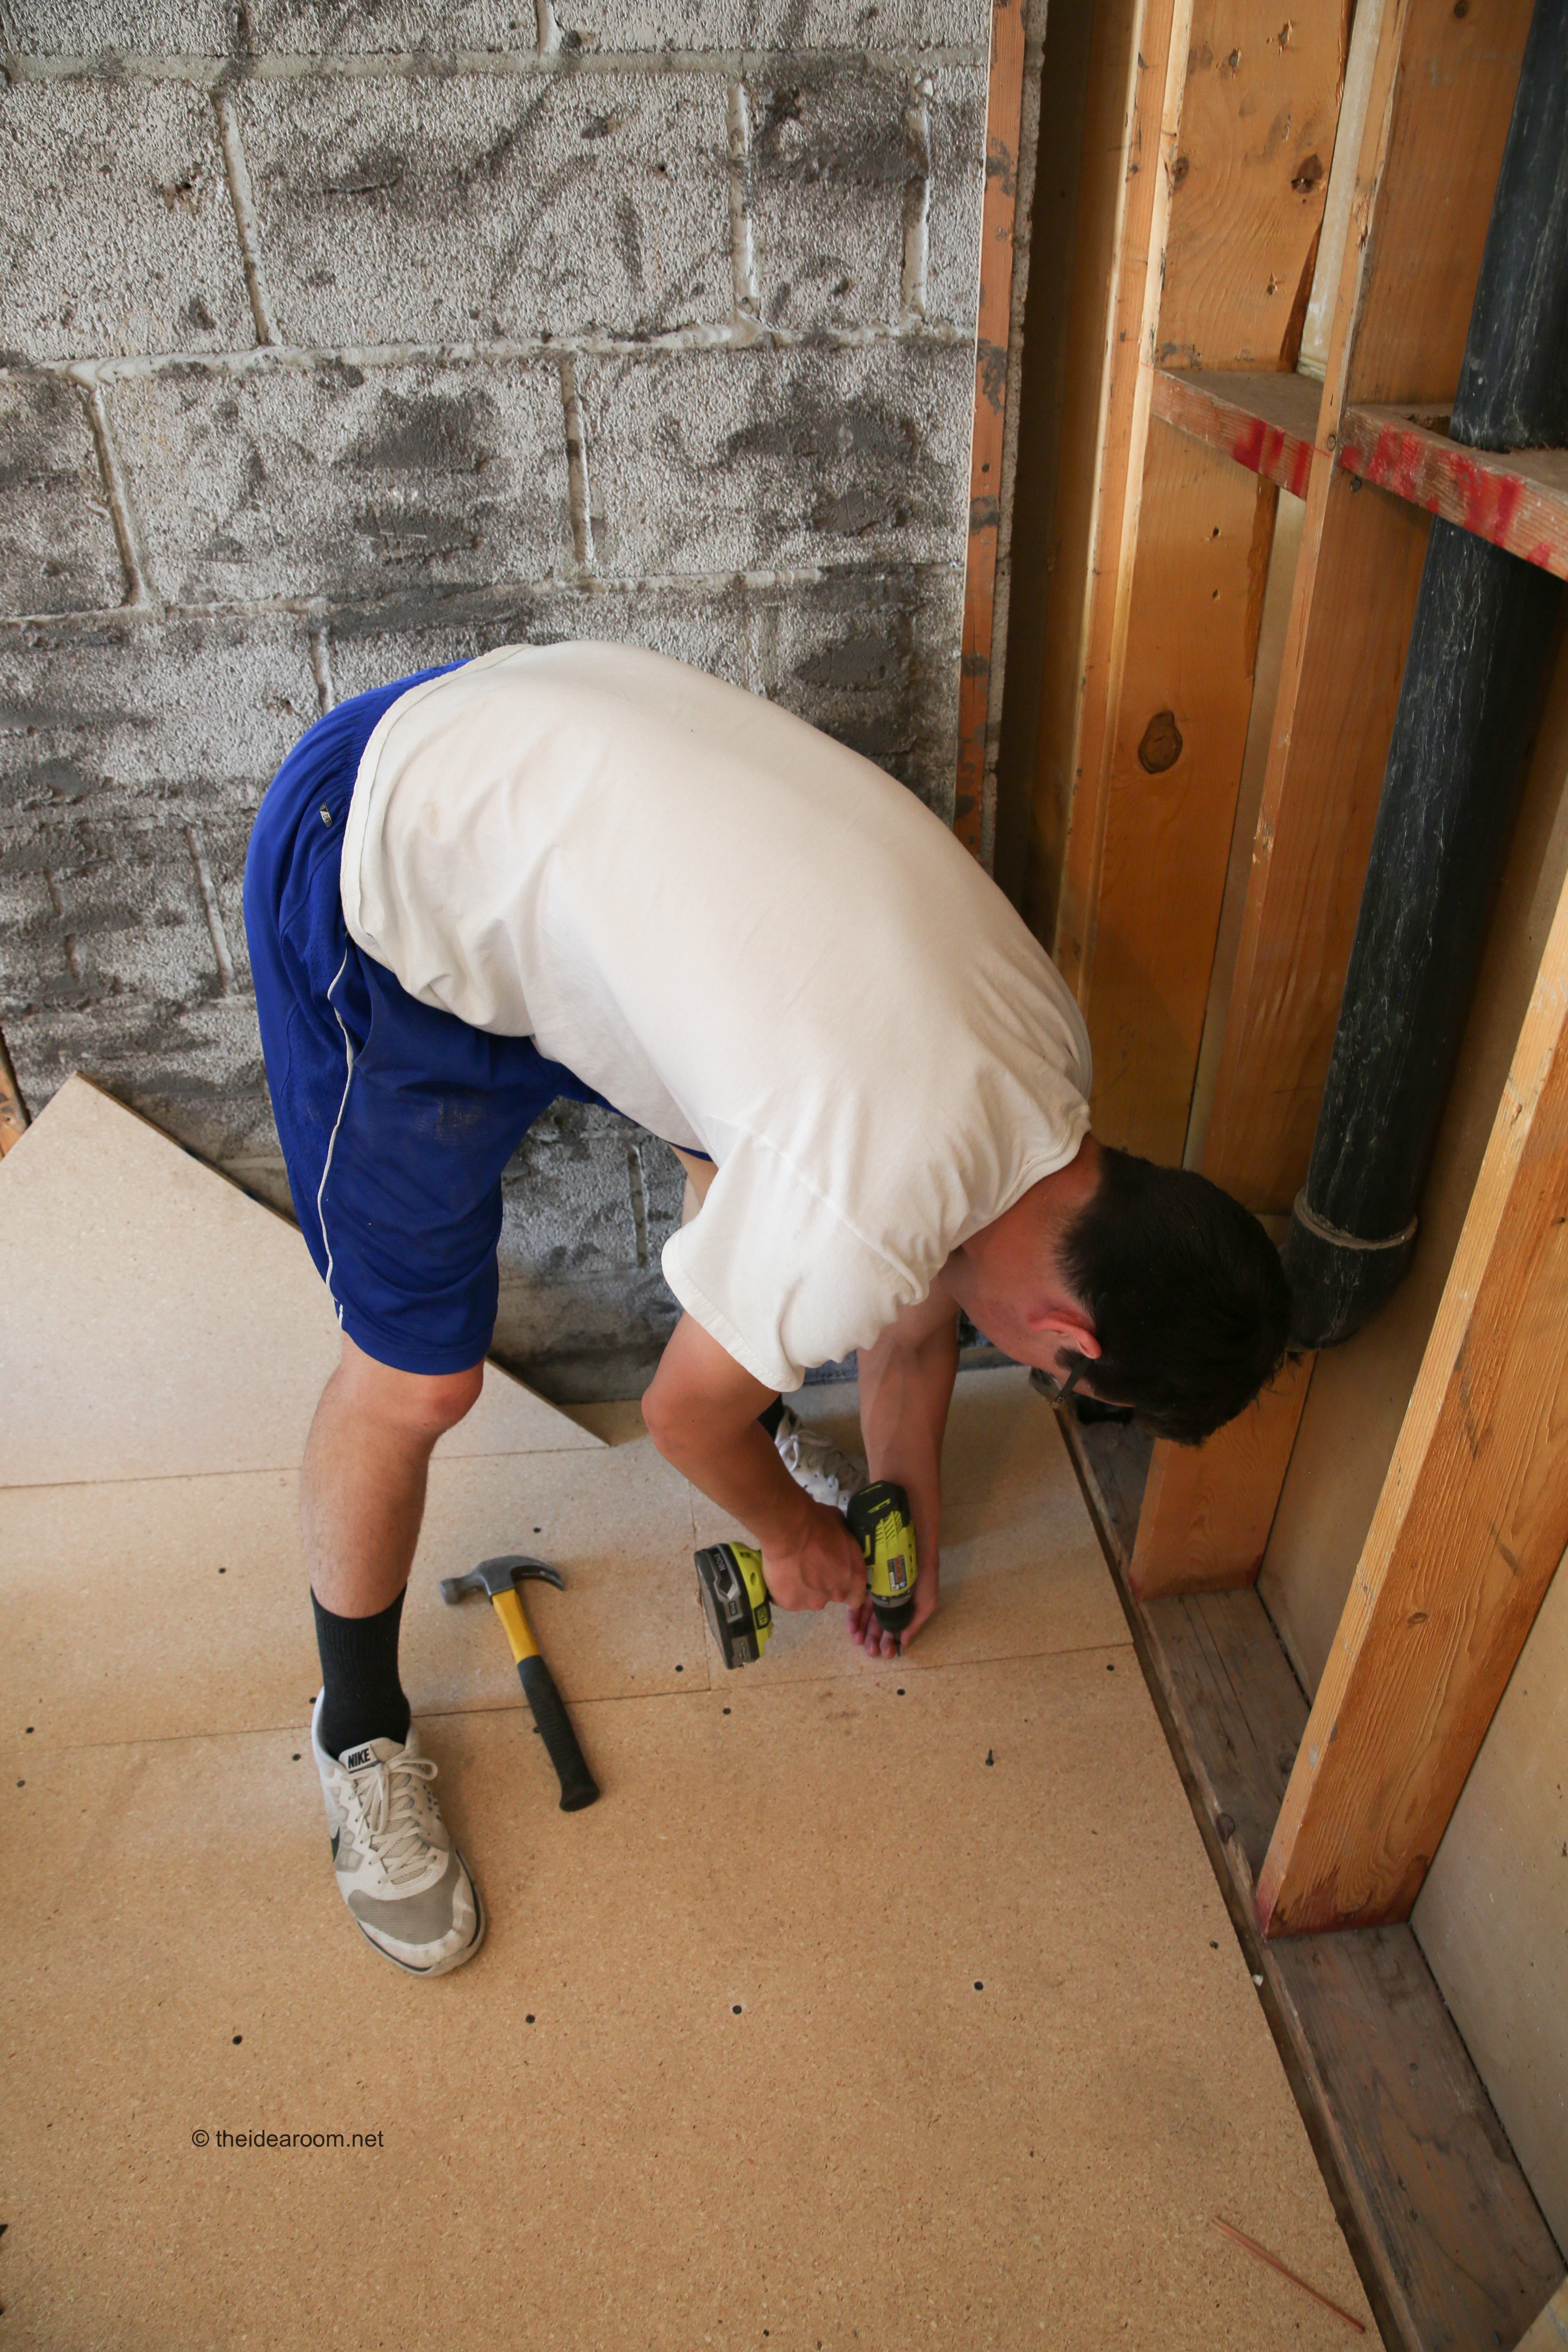
INSTALL SUB FLOORING
We also had to put in the sub floor where the brick was. This room is separated on each end with wood flooring. We debated about putting the same flooring in this room to match everything, but the hubs really wanted a carpeted family room for comfort, so we went with the carpet and had the carpet replaced.
Use plywood to fill in any areas that need sub flooring.

SEAL OFF CHIMNEY
We sealed off the fireplace after having our contractor friend help us seal it properly and then added some insulation in the walls before covering them with the dry wall. Be sure to properly research and have a professional help you with this part before installing any chimney balloons or flue plugs, etc. Each chimney will need a specific solution.
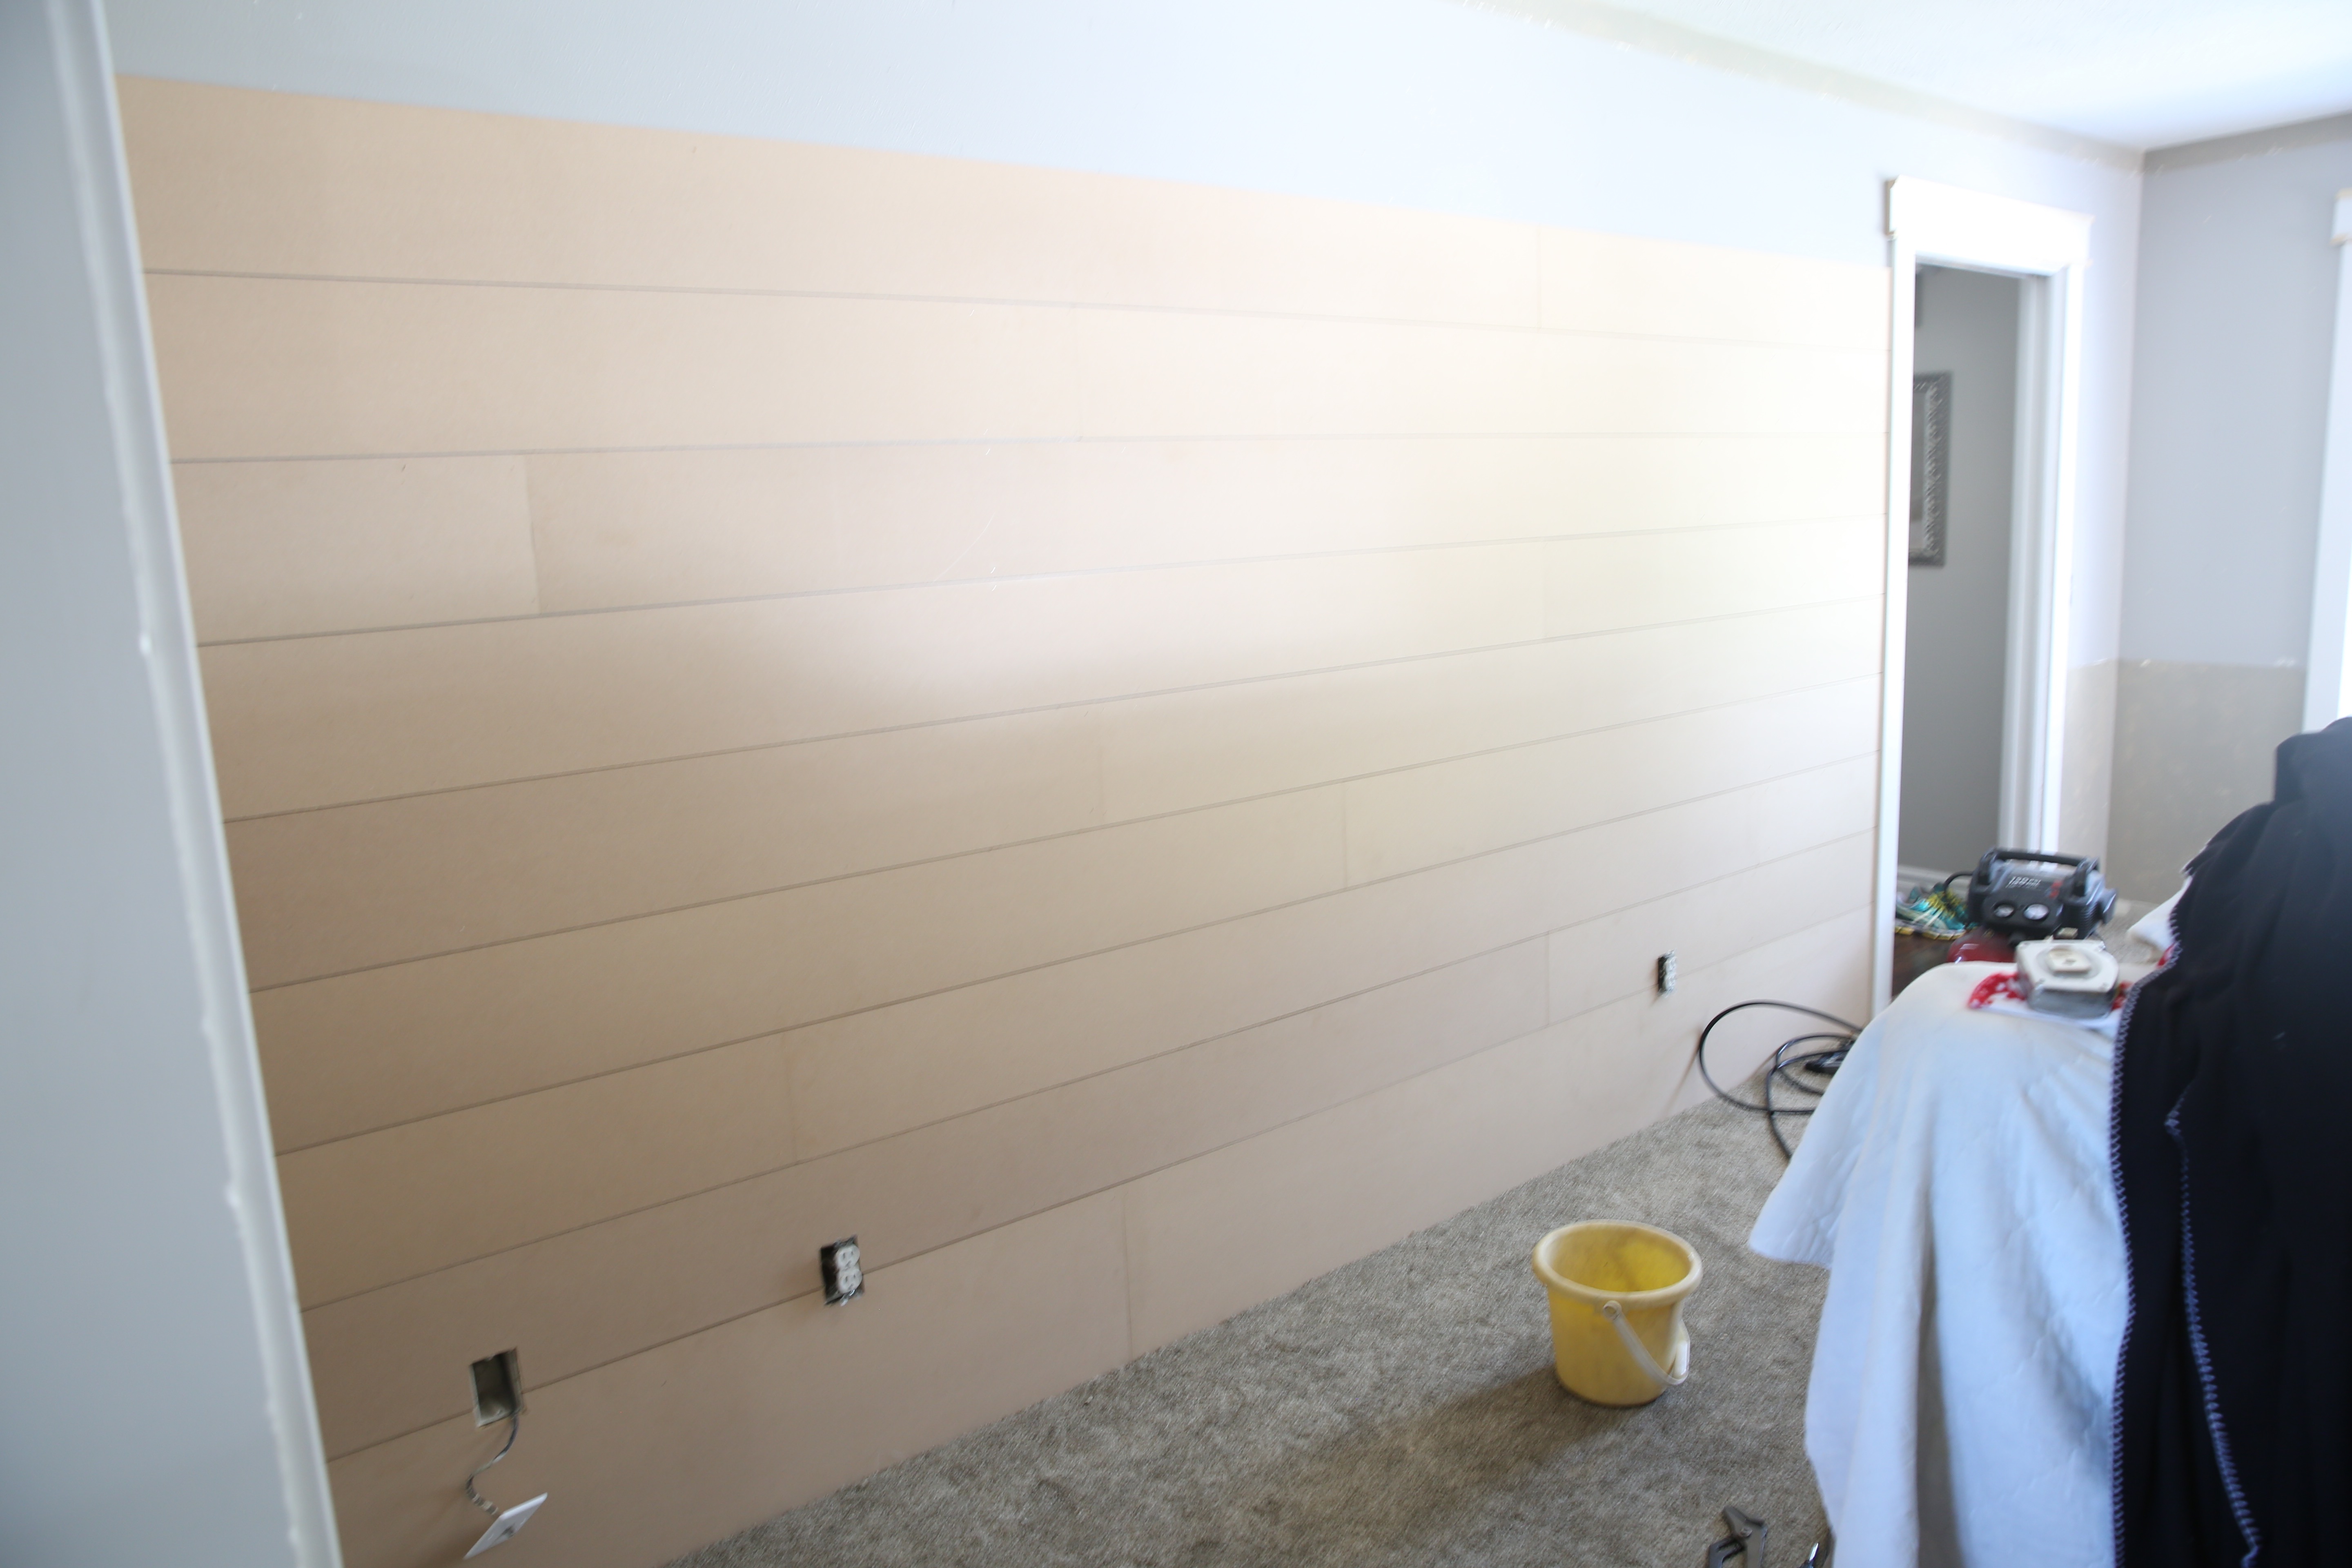
ADD NEW DRYWALL
We added new drywall to match up with the rest of the drywall in the room. Be sure before adding the drywall you add in some insulation into the walls between your studs if needed. Add the drywall by drilling it onto the wall with a drill and drywall screws. Make sure that it lines up properly. Use drywall tape and putty to fill in the seams and to create a seamless wall after the final paint job.

PUTTY AND SAND THE DRYWALL
Putty any holes and along the seams of the new drywall or sheet rock with drywall putty and a putty knife. Sand with a hand sander the drywall putty after it has dried so that you have a clean smooth surface.
We also decided to add some shiplap boards to cover ALL the walls in this room so we could have a fresh, clean wall surface. The walls in this room were previously covered with wall paper. We had removed it when we first moved in. But, the wall paper was installed directly onto the dry wall…without a layer of paint first…gah! So the walls were a little beat up and it has always bothered me. The shiplap will give us a fresh new surface to paint!
PAINT THE WALL
We painted the wall with our favorite interior paint in a satin sheen. It took two coats and it turned out better than I could have imagined it. We love these paint brushes and paint rollers for a nice smooth painted surface. I do not miss the brick fireplace at all! There is so much more room and I am able to arrange the furniture in the room the way I want too. And we were able to fit a much longer couch for our big family!
I am so in love with it! I will share how we did the shiplap in a coming post!
To see the final Family Room Reveal, go here. Thanks so much for stopping by and sharing a part of your day with us! xo
JOIN OUR NEWSLETTER
Would you like more Recipes, DIY, Printables and Organization Ideas?
Subscribing to the newsletter will enable us to periodically send you creative content exclusively for Idea Room subscribers.
*View our Privacy Policy here.


Ah! I can’t believe we don’t get to see how it looks yet! The suspense! ? Can’t wait!!
Ha! Sorry about that! :)
you could reuse those bricks in the garden they make great accents for edging planters and other things. Build a fire pit.
We did save most of them! We haven’t figured out how to use them…those are great ideas!
Great job guys!!! We have the same set up in the upstairs bedroom of our 1911 home (so much weight!!!!!) and bit the bullet to take it out but ….. wow ….. what tricks did you use to remove the bricks & mortar??? Our walls are very, very well built also lol. We chiseled, drilled & smashed and got three bricks off in the space of an hour!!!!! Any help and an after pic would be great. Thanks
Karen- A sledge hammer works the best. Start at the top of the bricks and work your way down. That worked best for us.
The room looks amazing, your new family room wall looks so great! I’m sure that the final result will be looks cozy.
Thank you so much!